The Magic Milk Experiment: A Colorful Journey into Science and Creativity
Hello there, fellow DIY enthusiasts! Today, I am thrilled to share one of my favorite fun and colorful projects: the Magic Milk Experiment. If you’ve never encountered it before, prepare to be astonished by this whimsical science activity that combines art and learning seamlessly. It's not only a visual delight but also a fantastic opportunity to engage young minds with fundamental science concepts!
What Is the Magic Milk Experiment?
At its core, the Magic Milk Experiment is an eye-catching demonstration of how milk reacts with food coloring and dish soap. This project is particularly popular in classrooms for science demonstrations and at home as an entertaining yet educational activity for kids. Whether you're looking to spice up a rainy afternoon or wanting to explore creativity in science, this experiment fits the bill perfectly. Plus, it's a great way to teach kids about the properties of liquid and the concept of surface tension—all while having a splash-tacular time!
When Should You Do the Magic Milk Experiment?
This project is versatile enough to be conducted anytime you want to spark curiosity! It’s perfect for:
- Experiential Learning: Use it as an introduction to chemical reactions in science classes.
- Birthday Parties: Add a splash of color to your themed parties.
- Family Fun Days: Enjoy quality time by inviting your little ones to create vibrant masterpieces.
- Home Schooling: Combine art with science to enhance learning.
Now that you're aware of the magic behind this experiment, let’s dive into the step-by-step tutorial.
Step-by-Step Tutorial: How to Conduct the Magic Milk Experiment
Materials Needed
- Whole Milk or any milk with a higher fat content: 1 cup
- Food Coloring: Different colors for a more vibrant display (red, blue, yellow, green).
- Dish Soap: 1 teaspoon of liquid dish soap will do.
- Shallow Dish or Baking Tray: To hold the milk (a pie plate works beautifully!).
- Cotton Swabs or Droppers: To add soap to the milk.
- Optional: Toothpick for swirling.
Step 1: Prepare Your Space
Before diving in, set up your work area. A clear, flat surface is ideal. Since this experiment can get a bit messy, I recommend laying down an old tablecloth or newspaper to protect your work surface.
Step 2: Pour the Milk
Carefully pour 1 cup of milk into your shallow dish. You can also experiment with different amounts in other containers, but I find that using a shallow dish allows for a better display of colors.
Why It Matters:
The type of milk you use can affect the results. Higher fat content in whole milk produces more vivid reactions. If you're using skim milk, you might not see the same vibrant swirling as whole milk provides.
Step 3: Add Food Coloring
Now comes the fun part! Drop a few drops of food coloring into different areas of the dish. Feel free to use multiple colors. The more the merrier!
Tip:
Don't overdo it; a total of 5-7 drops in various spots is just about right. Too much coloring can lead to a muddied result instead of the beautiful swirls we are aiming for.
Step 4: Prepare the Dish Soap
Take your cotton swab or dropper, and dip it into the dish soap. You can also use a small squeeze bottle if you have one handy.
Why This Step Matters:
Dish soap is essential because it breaks the surface tension of the milk, allowing the colors to spread and create those captivating swirls and formations.
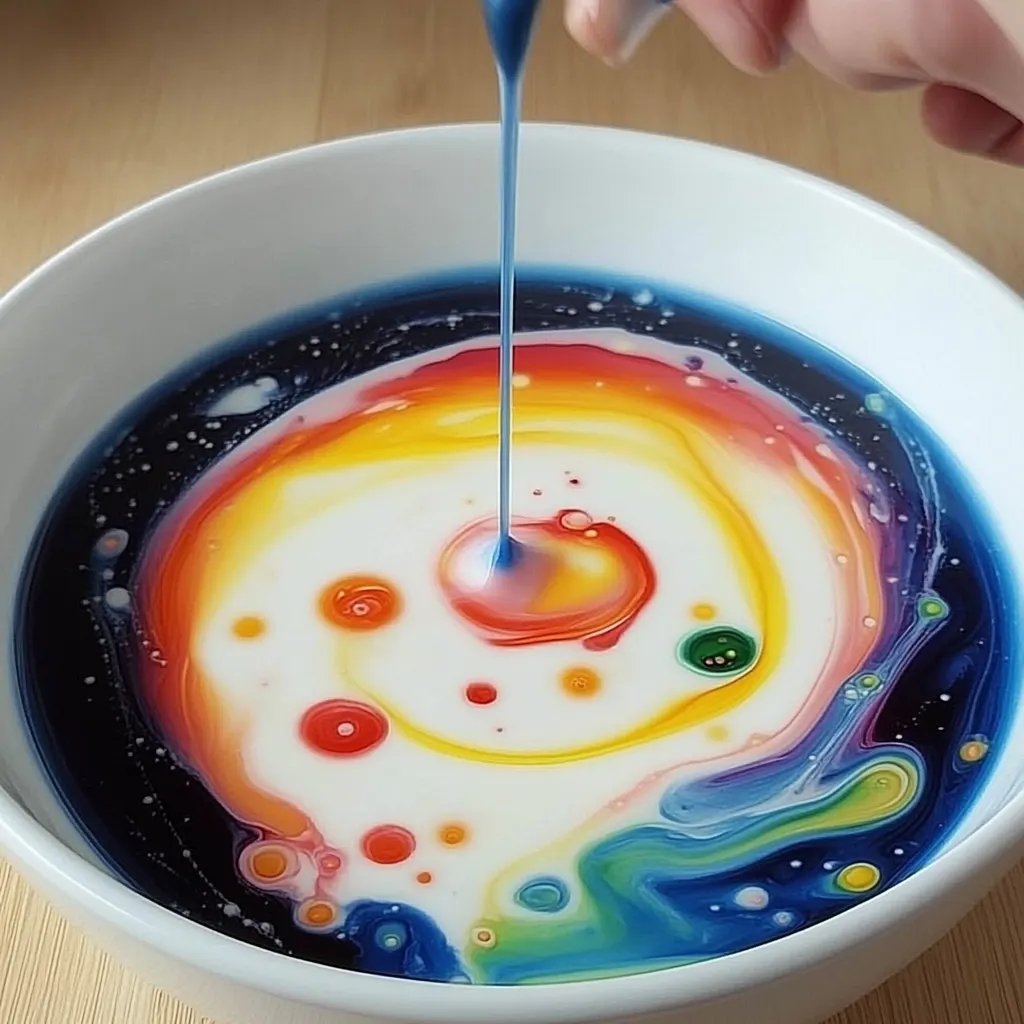
Step 5: Make the Magic Happen!
Now, gently touch the tip of the cotton swab (with dish soap) to the center of the area where you added the food coloring. Hold on tight because magic is about to unfold!
What Could Go Wrong:
If you don’t see much action, it could mean your soap is not reaching the milk properly, or you need to add more food coloring. Try experiencing with your placement!
Step 6: Observe and Create
As you touch the soap to the milk, watch closely as the colors react, swirl, and dance around. This process can take just a few seconds, and I guarantee it will leave you in awe.
Safety Warnings:
Make sure not to ingest any of the materials. While dish soap is not toxic, it’s not meant for consumption. Supervise young children during this experiment to ensure safety.
Step 7: Explore and Experiment
After you’ve seen the initial reaction, you can start experimenting! Try different amounts of soap, various milk types, or even alternate containers to see how the results differ.
Personal Anecdotes and Insights
I remember the first time I did this experiment with my little niece. Her eyes were wide with wonder as the colors burst and intertwined. We spent the afternoon making different combinations and even captured photos to document the vibrant explosions of color. It became a cherished memory, and every time I recreate this experiment, I can’t help but smile at how much joy it brought to our day.
Creative Variations to Try
- Rainbow Magic: Instead of a few separate colors, you can layer colors in the shape of a rainbow.
- Glitter Touch: Add a sprinkle of biodegradable glitter for added sparkle!
- Flavor Experiment: Use various flavored milk instead of plain milk for a unique twist on color and scent.
Final Thoughts
The Magic Milk Experiment is an exciting, hands-on way to explore science while letting your creativity shine. It requires minimal supplies, is easy to set up, and can be enjoyed by people of all ages. I encourage you to try this delightful science activity, and don't forget to share your results and experiences. If you capture any amazing pictures—share them with your fellow DIY enthusiasts!
Get the colors flowing, and let the magic begin! Happy experimenting!