The Joy of Bubble Painting: A Fun and Creative Activity for All Ages
As an experienced crafter, I can confidently say that bubble painting is one of the most delightful art activities you can explore. It’s a fantastic way to unleash creativity, especially for children, but adults can have just as much fun! The ethereal, colorful patterns that emerge from the bubble foam are mesmerizing and can spark an enthusiasm for art in anyone. Whether you're looking to spend a rainy afternoon indoors with your kids or planning an outdoor artsy party, bubble painting fits the bill perfectly.
In this article, I’ll walk you through each step of creating your own bubble painting, providing tips, personal insights, and plenty of variations that can take your creation to the next level. By the end of this tutorial, you'll have a new favorite craft up your sleeve!
Why Bubble Painting?
Bubble painting is popular for several reasons:
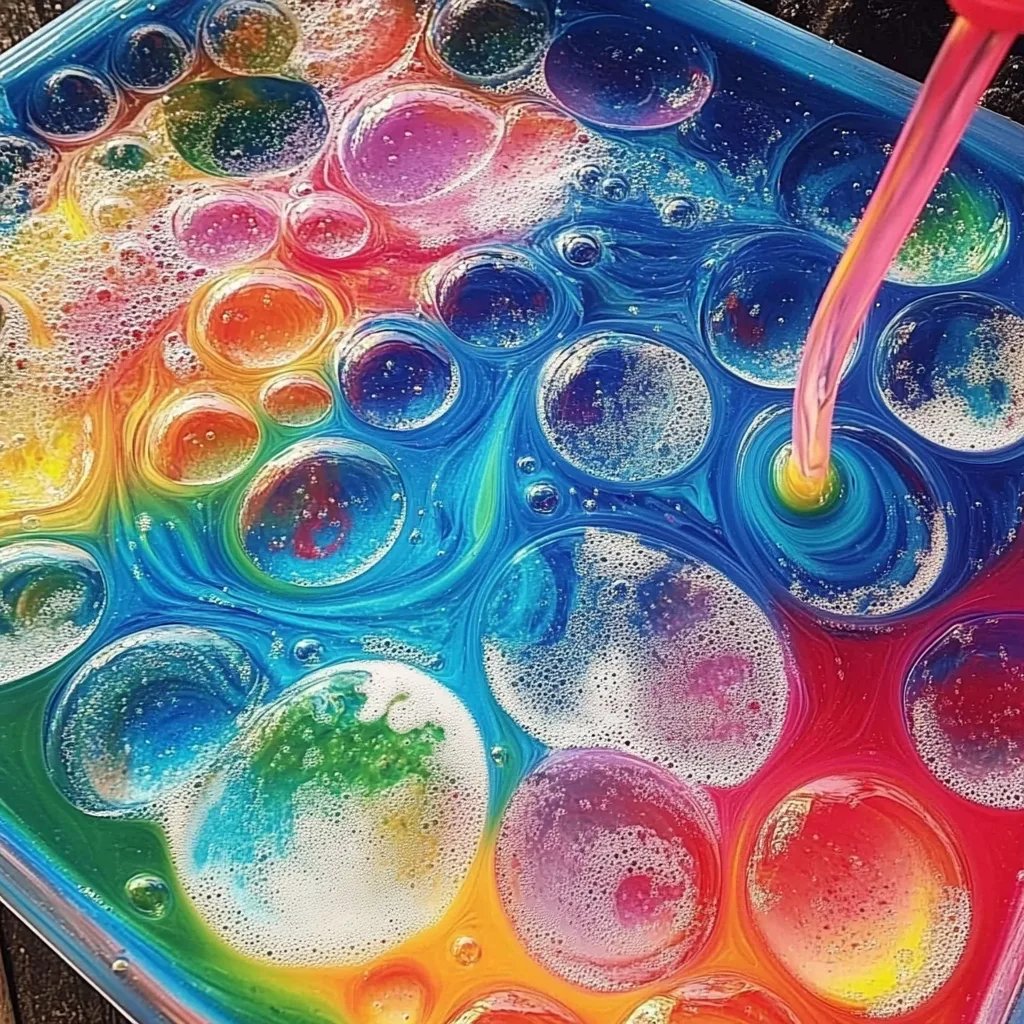
- Visual Appeal: The vibrant swirls and shapes you create are visually striking. Each piece is unique, making every painting a one-of-a-kind work of art.
- Ease of Access: The materials required are simple and often already in your home, making it easy to whip up a session without extensive preparation.
- Sensory Experience: The act of blowing bubbles is fun and tactile, engaging multiple senses.
- Educational Value: It can be an excellent opportunity to familiarize kids with colors, patterns, and basic scientific principles related to bubbles and mixing.
Now that you know why bubble painting is such an appealing activity, let’s dive into how to create your masterpiece!
Materials You’ll Need
- Dish soap: This will help create the bubbles. Avoid using concentrated formulas; go for something mild.
- Water: A basic ingredient that balances the soap solution.
- Food coloring or washable liquid watercolors: These are essential for adding color; food coloring is a great choice since it’s vibrant.
- Bowl or tray: A shallow dish will work best for creating bubbles.
- Straws: To blow into the mixture and create bubbles. Just be sure to use disposable ones or clean them after use.
- Paper: Standard paper works, but heavier cardstock or watercolor paper can create better results.
- Old t-shirt or apron: Crafting can get messy!
- Protective covering for your workspace: An oil cloth or plastic sheet to prevent any spills on your table.
Step-by-Step Tutorial
Step 1: Mix Your Bubble Solution
In a bowl, combine 2 tablespoons of dish soap and 1 cup of water. The mixture should have a good balance—too much soap might not bubble effectively, and too little won't hold the bubbles.
Why It Matters: The ratio is crucial. If the mix is incorrect, you may get small bubbles that pop too quickly or fail to create a bubbly foam.
What Could Go Wrong: If your solution is not bubbly, consider adding a little more soap (but be careful not to overdo it). You can also try letting it sit for a few minutes to enhance bubble creation.
Step 2: Add Color
Next, add about 4-6 drops of food coloring or your chosen liquid watercolors to the solution. You can experiment with colors—mixing them will yield more beautiful results!
Why It Matters: The coloring will disperse through the bubbles once we start blowing into them. The more vivid your colors, the more vibrant your artwork will be.
Tip: If you want layered colors, use a different bowl for contrasting colors and combine them on your paper later!
Step 3: Begin Blowing Bubbles
Using a straw, dip it into your colorful mixture, and gently blow until bubbles form above the liquid. Focus on creating a mound of bubbles rather than blowing them all over your workspace.
Why It Matters: The aim is to create a thick foam pile. The wider the mound, the better the coverage on your paper.
Safety Warning: Ensure children are supervised while using straws—emphasize that they should only blow, not suck.
Step 4: Add Paper and Create Art
Now comes the fun part! Gently place your paper on top of the bubble pile. When you lift the paper, you’ll see the beautiful bubble prints left behind.
What Could Go Wrong: If too many bubbles burst before you get to the paper, try blowing more gently next time or using a different straw length. Adjust your timing and find the perfect method that works for you.
Step 5: Let it Dry
Place your masterpiece somewhere flat and allow it to dry completely. This could take a few hours, depending on the thickness of your color application.
Why It Matters: Proper drying ensures that the colors adhere well to the paper without smudging.
Step 6: Clean-Up
Bubble painting can be messy, so be sure to have wet wipes or a damp cloth on hand for quick clean-ups. If you’re using disposable straws, dispose of them properly.
Creative Variations
Once you’ve mastered the basic bubble painting technique, consider trying these fun variations:
- Sponge Painting: Use a sponge to apply the bubble solution to the paper, creating a textured effect.
- Bubble Wrap: Dip bubble wrap into the solution and press it onto the paper for an exciting texture.
- Stencils: Place stencils under your paper before blowing bubbles to create unique patterns.
- Outdoor Fun: Take this project outside! Place a tarp or large sheet on the grass and let your creations flow freely.
- Themed Colors: Create seasonal art—pastels for Easter, reds and greens for Christmas, or even colors representing your favorite sports team!
Final Thoughts
Bubble painting is more than just a craft; it’s an experience full of laughter and creativity. It allows artists of all ages to express themselves while enjoying a sensory adventure. Whether you decide to make a few simple pieces or create an entire collection, every painting will bring joy and inspiration.
As you embark on this artistic journey, remember that the process is just as important as the result. Embrace any “flaws” or unexpected surprises—you might find that they lead to the most cherished pieces. Happy crafting, and may your adventures in bubble painting be as colorful and joyful as the art you create!