Rainbow Pour-Paint Pumpkins: An Incredible Ultimate Recipe
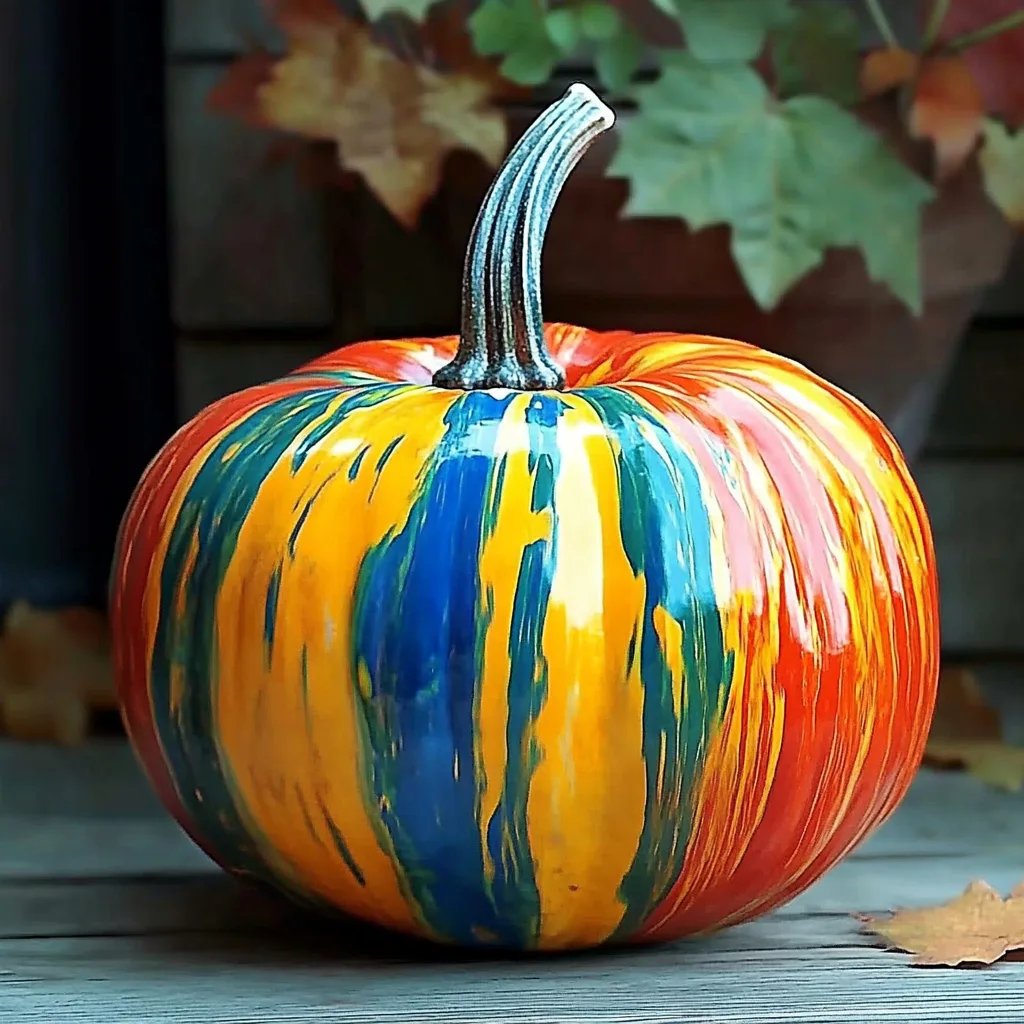
Rainbow Pour-Paint Pumpkins are an amazing and imaginative way to celebrate the fall season. This fun and creative project transforms ordinary pumpkins into vibrant art pieces that can be displayed both indoors and outdoors. With captivating colors and unique patterns, these painted pumpkins will enhance your home decor and bring joy to your autumn festivities. Not only are they visually stunning, but they are also easy and enjoyable to create, making them perfect for families, friends, or craft enthusiasts.
Imagine gathering with your loved ones to unleash your creativity, experimenting with colors, and watching as your pumpkins come to life with every pour. This activity isn’t just about decorating; it’s about making memories, sharing laughter, and experiencing the excitement of autumn together. Rainbow Pour-Paint Pumpkins provide a wonderful opportunity to express your artistic side while adding a splash of color to your seasonal decorations.
In this guide, you will discover the essence of making Rainbow Pour-Paint Pumpkins, from the preparation process to thrilling tips to enhance your experience. Whether you are an experienced crafter or a beginner, this incredible project is designed for everyone. Get ready to dive into the colorful world of pour painting, and let's see how you can create masterpieces that will impress everyone who sees them.
Why You’ll Love This Recipe
Creating Rainbow Pour-Paint Pumpkins offers an array of benefits that every crafter will appreciate. Here are just a few reasons why you’ll fall in love with this incredible project:
- Endless Creativity: There are no limits to what you can create. You can mix colors, experiment with designs, and use various pouring techniques.
- Easy to Follow: The steps involved are straightforward, making it accessible to crafters of all ages, including kids.
- Unique Decor: Each pumpkin you create will be uniquely yours. No two pumpkins will look the same, providing a stunning variety for your display.
- Great for Groups: This activity is perfect for group gatherings, craft parties, or family bonding time, allowing for shared creativity and fun.
- Seasonal Delight: Your painted pumpkins will serve as eye-catching decorations for your home, bringing the spirit of fall into your living space.
- Flexible Timing: Whether you want to make a quick afternoon project or an all-day crafting event, this recipe allows for flexibility in your schedule.
With these amazing benefits in mind, it’s easy to see why Rainbow Pour-Paint Pumpkins have become a popular choice for fall crafting. Dive into this colorful adventure and unleash your inner artist!
Preparation and Cooking Time
Creating Rainbow Pour-Paint Pumpkins is a fun and engaging activity that doesn't require extensive time commitments. Here’s a breakdown of the time involved:
- Preparation Time: 30 minutes
- Painting Time: 1 to 2 hours (depending on drying time)
- Total Time: Approximately 2 to 3 hours (including drying phase)
Factors such as the size of your pumpkins and your painting technique may affect the time slightly. However, this estimate provides a solid guideline for planning your crafting session.
Ingredients
- 1-3 small to medium pumpkins (real or faux)
- Acrylic paints (various colors)
- Pouring medium (optional, for smoother paint flow)
- Plastic cups or containers (for mixing paint)
- Paintbrush or foam applicator (for touch-ups)
- Plastic sheets or newspapers (to protect your workspace)
- Water (for thinning paint, if necessary)
- Sealer (optional, for preserving your pumpkins)
Step-by-Step Instructions
Creating your Rainbow Pour-Paint Pumpkins can be fun and simple! Follow these easy steps to make your vibrant creations:
- Prepare the Workspace: Lay down plastic sheets or newspapers to protect your surfaces from paint splatters.
- Choose Pumpkins: Select your desired pumpkins. You can use real pumpkins for a natural look or faux pumpkins for longevity.
- Mix Paint: In separate cups, mix your chosen acrylic paint colors. If desired, add a pouring medium to create a smoother consistency.
- Set Up for Pouring: Elevate your pumpkins on plastic cups or small containers so that paint can drip off easily and dry evenly.
- Start Pouring: Begin with one color, pouring it slowly over the pumpkin. Rotate the pumpkin to spread the paint evenly.
- Layer Colors: Continue pouring additional colors, allowing them to blend together for beautiful effects. Don't be afraid to experiment with different techniques.
- Let Dry: Allow the pumpkins to dry completely. Depending on the thickness of the paint, this can take about 1 to 2 hours.
- Add Details: Use a paintbrush to touch up areas or add details if desired. Consider adding metallics or glitter for a shimmering effect.
- Seal (Optional): Once fully dried, apply a sealer to protect the paint and increase its longevity, especially for real pumpkins.
- Display: Find a fabulous spot in your home or outside to showcase your finished Rainbow Pour-Paint Pumpkins.
Following these steps, you will create mesmerizing painted pumpkins that are sure to bring smiles and compliments!
How to Serve
Decorating with your Rainbow Pour-Paint Pumpkins can be just as enjoyable as crafting them. Here are some wonderful ideas on how to display your vibrant creations:
- Entryway Greetings: Place your pumpkins on your front porch or entry table to welcome guests with a burst of color.
- Table Centerpieces: Arrange the pumpkins as a centerpiece on your dining or coffee table, combined with seasonal decor elements like leaves or candles.
- Outdoor Displays: Use your painted pumpkins in your garden or yard, creating unique outdoor displays that enhance your fall scenery.
- Themed Arrangements: Group them with other autumn-themed decorations, such as hay bales, scarecrows, and cornstalks for a festive vibe.
- Creative Lighting: Add fairy lights or LED candles inside your pumpkins for an enchanting display that glows after sunset.
By considering these serving suggestions, you can transform your home into a radiant autumn haven filled with creativity and warmth. Enjoy the seasonal spirit and display your Rainbow Pour-Paint Pumpkins proudly!
Additional Tips
- Use a Variety of Paints: Experiment with different acrylic paint brands to find ones that pour and blend well.
- Practice Your Pouring Technique: Before pouring on an actual pumpkin, practice on paper or an old pumpkin to refine your technique.
- Add Water Sparingly: If thinning your paint, add water gradually to avoid making it too runny.
- Clean Up Promptly: Rinse your brushes and tools immediately after use to prevent the paint from drying on them.
- Embrace Imperfections: The beauty of pour painting lies in its unpredictability, so embrace the unique patterns that emerge.
Recipe Variation
Here are some fun variations you can try to make your Rainbow Pour-Paint Pumpkins even more unique:
- Metallic Touch: Incorporate metallic acrylic paints for an eye-catching shimmer that reflects light beautifully.
- Glow-in-the-Dark: Use glow-in-the-dark paint to create pumpkins that light up at night, perfect for Halloween.
- Textured Effects: Add sand or rice to your paint to create a textured finish that adds depth to your design.
- Themed Designs: Use a specific color palette to match your seasonal decor or to support a holiday theme.
- Layering Technique: Try pouring in layers, allowing each color to dry slightly before adding the next for a stacked effect.
Freezing and Storage
- Storage: If you used faux pumpkins, they can be stored indefinitely. Keep them in a cool, dry place to avoid damage.
- Real Pumpkins: If you made your colorful creations on real pumpkins, they can last 1-2 weeks depending on the conditions. Store them in a cool area away from direct sunlight.
- Preservation: Use a clear sealer to protect painted surfaces and extend the life of real pumpkins.
Special Equipment
While creating Rainbow Pour-Paint Pumpkins is mostly straightforward, having the right tools can enhance your experience:
- Plastic cups for mixing
- Crafting gloves to keep hands clean
- A drop cloth or newspaper to catch spills
- A heat gun or hairdryer to speed up drying time (optional)
- Paper towels for quick cleanups
Frequently Asked Questions
Can I use other types of paint besides acrylic?
While acrylic paint works best, you can experiment with other paints, but the consistency and drying time may vary.
What if I want to use larger pumpkins?
You can certainly use larger pumpkins! Just be mindful that pouring may take longer, and you may need additional paint.
Is this project kid-friendly?
Yes! With proper supervision, children can join in the fun. Just ensure they use non-toxic paints and monitor them during the pouring process.
How can I clean up any spills?
If paint spills occur, clean them with warm soapy water immediately. For dried paint, a scraper or paint thinner may be needed, depending on the surface.
Could I use these pumpkins for Halloween?
Absolutely! Rainbow Pour-Paint Pumpkins make a delightful, colorful alternative to traditional Halloween decor.
Conclusion
Rainbow Pour-Paint Pumpkins are a fantastic way to engage in creative expression while adding vibrant decor to your autumn festivities. This fun and engaging craft offers opportunities for all ages to connect through art. Whether you choose to display your creations indoors or outside, these painted pumpkins will undoubtedly bring joy and color to your celebrations. So gather your supplies, invite your friends and family, and dive into the joy of crafting colorful masterpieces together!