Mastering Dutch Pour Painting Coasters: A Comprehensive Guide to Crafting Unique Artworks
Hello, fellow crafters! Today, I’m excited to share with you one of my favorite creative projects—Dutch Pour Painting Coasters. If you’re looking for a fun, visually striking craft that combines fluid art techniques with functionality, you’ve come to the right place. Not only are these coasters the perfect blend of aesthetics and practicality, but they also make heartfelt gifts or charming accents for your dining or coffee table.
Why Dutch Pour Painting Coasters?
Dutch Pour Painting—a technique that utilizes acrylic paints diluted with pouring mediums—has surged in popularity across social media platforms like Instagram and Pinterest. It’s mesmerizing to watch vibrant colors flow and blend, creating organic forms reminiscent of natural landscapes or abstract art. Coasters, in particular, are an excellent surface for this technique as they allow you to experiment with colors without committing to a large canvas.
Whether you're hosting a casual get-together, participating in a creative workshop, or simply adding a splash of color to your home, creating and using Dutch Pour Painting Coasters is a joyous experience. Plus, they protect your surfaces from stains and moisture!
Materials You'll Need
Before diving into the process, let’s ensure you have all the materials at hand. Here’s a comprehensive list:
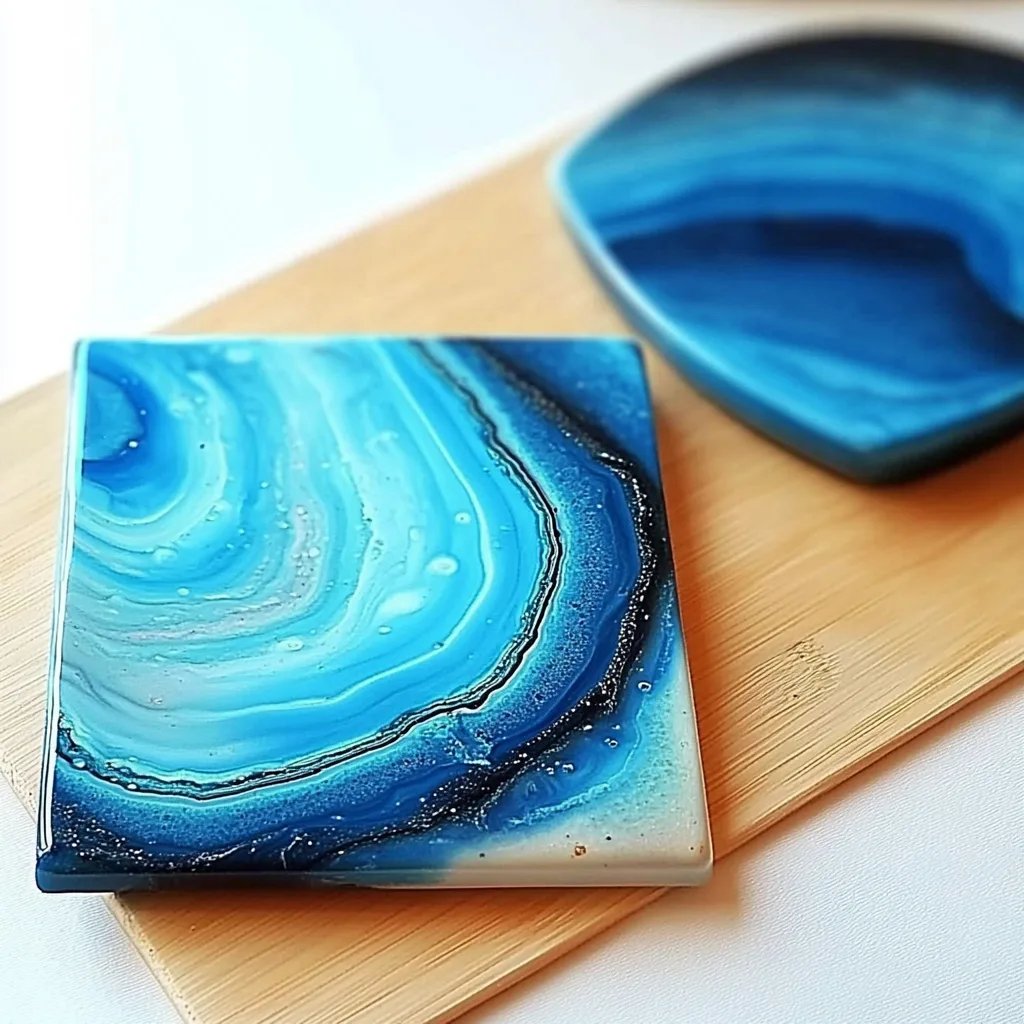
- Coaster Base: 4-inch cork or wooden coasters (you can also use ceramic tiles)
- Acrylic Paints: Choose your favorite colors. I often combine 3-4 shades for depth (make sure they’re suitable for pouring).
- Pouring Medium: This can be a premade medium like Floetrol or homemade glue and water mix.
- Plastic Cups: For mixing paints and mediums.
- Stirring Sticks: Wooden popsicle sticks or disposable spoons work great.
- Heat Gun or Torch: To pop air bubbles and create effects.
- Plastic Sheet or Canvas: To protect your workspace.
- Sealant: Epoxy resin or polyurethane spray (for finishing).
- Gloves: To keep your hands clean.
Step-by-Step Tutorial
Now that you’re armed with your materials, let’s dive into the exciting process of making these stunning coasters!
Step 1: Prepare Your Workspace
Creating art can get messy, especially with pouring techniques. Lay down a plastic sheet on your work surface to catch any drips. Wear your disposable gloves to protect your hands from paint while also avoiding the paint's mess later. Tidiness is crucial here, especially if you want to create a space you enjoy working in!
Step 2: Mix Your Paints
In a plastic cup, pour equal parts of acrylic paint and the pouring medium. A common ratio is 1:1, but feel free to adjust for your desired consistency. Remember: if the mixture is too thick, it won’t flow properly, ruining that beautiful Dutch Pour effect. Mix each color separately and thoroughly; I often choose a combination of one light shade, one dark shade, and one or two vibrant accents.
Tip: Conduct a “drip test.” Dip your stirring stick into the paint and let it drip back into the cup. If it flows off easily, it's ready! If it clumps, add a bit more pouring medium.
Step 3: Layer the Paints
To create that stunning color blend that Dutch Pour is known for, you’ll layer your paints in a clean cup. Start by pouring your lightest color in first, followed by the mid-tones and finally the darkest. Don’t worry about getting it perfectly even; the beauty is in the organic flow.
Step 4: Pouring Technique
This is where the magic happens! Place your cork or wooden coaster on the workspace.
- Initial Pour: Start pouring your paint mixture onto the center of the coaster. Let it flow outward naturally; don't rush it.
- Dutch Pour Motion: Using a heat gun or your breath (very lightly!), gently blow at the edges of the paint. The idea is to coax the paint to move over the coaster edges.
What Could Go Wrong: If the paint is too thick, it may not flow as desired. If that happens, carefully scrape the thick part back into your cup, add a touch of water or pouring medium, remix, and try pouring again.
Step 5: Add Texture with Heat
After pouring, use a heat gun to pop any air bubbles created during mixing. This not only helps achieve a smooth finish but is also crucial for creating interesting effects. Move the heat gun back and forth gently—prolonged exposure can alter the colors.
Step 6: Let It Dry
Once you’re happy with the outcome, let your coasters dry completely. This may take between 24-48 hours, depending on the thickness of the paint and your climate. Keep them somewhere dust-free.
Sealing and Finishing Touches
Now that your coasters are dry, it’s time to add a protective layer. I like to apply a clear epoxy resin to give a glossy finish and a durable seal. Follow the instructions for mixing and applying it correctly.
Alternatively, you can use a polyurethane spray sealant. Just ensure it’s labeled waterproof and suitable for your material.
Safety Precautions
Always work in a well-ventilated area, especially when using resin or spray sealants. Wear a mask to avoid inhaling fumes, and keep your workspace free of food and drink to prevent accidents.
Troubleshooting Common Issues
- Paint Doesn’t Flow: Add more pouring medium and remix. Thinning it can often solve this issue.
- Bubbles in Finished Product: Use a heat gun post-coating to pop those pesky bubbles before it fully dries.
- Sealing Peeling Off: Ensure your paint is thoroughly dry before applying any top coat, or you may risk the seal lifting.
Creative Variations
Once you’ve mastered the basics, consider trying different techniques:
- Layering Colors: Experiment with pouring multiple layers to create different depths.
- Adding Glitter or Metallics: Mixing in a hint of shimmer can elevate your artwork!
- Custom Stencils: Incorporate stencils to create fun patterns over your coasters.
Conclusion: Crafting from the Heart
Crafting Dutch Pour Painting Coasters is not just a project; it’s an exploration of creativity. Each piece reflects a unique blend of your chosen colors, your pouring style, and your personal touch.
I hope this guide inspires you to try your hand at creating these lovely coasters. Embrace the imperfections and flows of the paint; after all, art is all about self-expression! Share your creations and experiences, and let’s continue to inspire each other in this beautiful crafting journey. Happy pouring!