How to Make Vibrant Coffee Filter Butterflies: An Expert Crafter’s Guide
Hello fellow crafters! Today, I am thrilled to share one of my favorite crafts with you: making vibrant coffee filter butterflies! This delightful and colorful project is not only fun to create but also serves as a charming decoration for your home, a whimsical classroom activity, or an engaging project to keep the kids entertained on a rainy day. Whether you use them to brighten up a party, as a colorful classroom decor, or simply as a beautiful way to bring the outdoors inside, these butterflies are sure to flutter their way into the hearts of everyone who sees them.
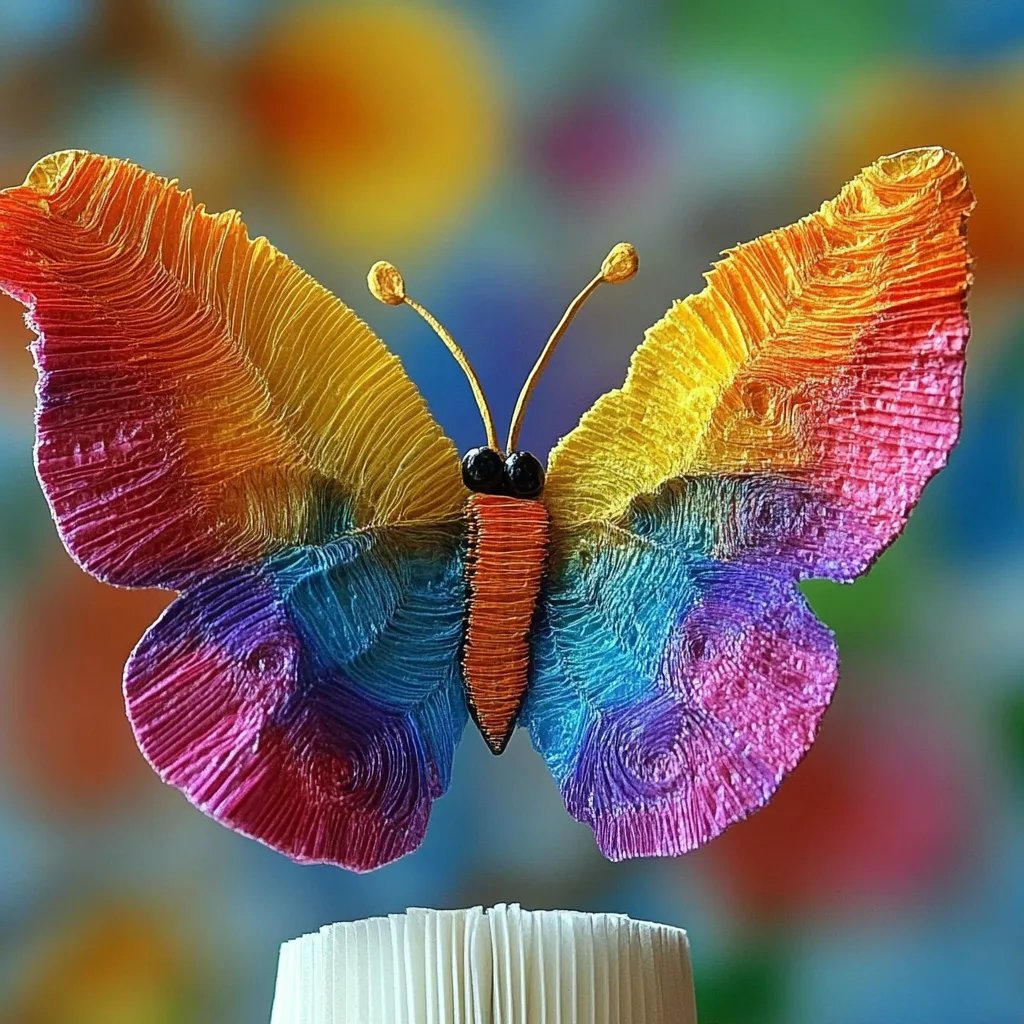
What Are Coffee Filter Butterflies?
Coffee filter butterflies are vibrant creations made from simple coffee filters, which can be easily transformed into stunning works of art with just a few supplies. They capitalize on the absorbent nature of coffee filters, allowing you to blend colors effortlessly with markers, dyes, or inks. The result? Beautifully colorful paper butterflies that can be used in myriad ways—from hanging decorations to embellishments in scrapbooking or even in flower arrangements.
Why Are They Popular?
So why are these little beauties so popular? The answer lies in their versatility and ease of crafting. This project is not only beginner-friendly; it also invites creativity by allowing crafters to explore color combinations and designs. Plus, since it requires minimal materials, it can be done any time, making it a fantastic family activity or a solo crafting meditation.
When and How To Use Coffee Filter Butterflies
You can use these vibrant butterflies in various ways:
- Decorations: Hang them from the ceiling, attach them to walls, or use them as table centerpieces.
- Parties: Perfect as party favors or colorful elements for themed events.
- Classroom Activities: Engage students with a hands-on activity that inspires creativity.
- Gift Wrapping: Use them as colorful accents on gift wrap or as homemade greeting cards.
Now that you’re excited about these charming creations, let’s dive into the detailed step-by-step tutorial!
Materials You'll Need
Before you embark on this journey, gather the following materials:
- Coffee filters (white or natural brown, I recommend the circular ones)
- Markers or watercolors (to add vibrant colors)
- Spray bottle filled with water
- Pipe cleaners (for butterfly antennas)
- Scissors
- Pencil (optional for sketching designs)
- Paper towel or plastic sheet (to protect your workspace)
- Clear drying glue or a hot glue gun (for assembly)
Step-by-Step Instructions
Step 1: Prepare Your Workspace
Start by laying down some paper towels or a plastic sheet to protect your workspace from stains. I can't stress enough how important it is to keep your crafting area clean, especially when working with markers and watercolors.
Step 2: Color the Coffee Filters
Take a coffee filter and use markers or watercolors to create a beautiful design. Feel free to let your creativity flow! I often like to start with a lighter color and blend in darker shades. Here’s why this step matters: as the colors saturate the filter, they will blend beautifully when dampened.
Tip: Don’t be afraid to experiment! Create stripes, dots, or even swirls—this is your time to shine!
What Could Go Wrong: If you use too much water or too many colors that don’t blend well, you may end up with muddy colors. If this happens, consider letting the filter dry fully and starting anew.
Step 3: Moisten the Filter
Using your spray bottle, lightly mist the colored coffee filter with water. What this does is activate the inks and allow them to spread and create stunning blends. You only want it damp—not soaking wet—so adjust your spray as necessary.
Tip: If you mist too much and the filter becomes too flimsy, simply lay it flat to dry.
Step 4: Let Them Dry
After misting, place your filters on a flat surface and let them air dry completely. This may take some time—perhaps 30 minutes to an hour—depending on humidity and how wet the filters were.
Tip: To speed up the drying process, you can use a hairdryer on the cool setting, gently moving it around to avoid scorching the paper.
Step 5: Shape Your Butterflies
Once dry, fold the colored coffee filter several times in a concertina fashion. (Think of how an accordion works!) This creates the body and wings of your butterfly. You can fold them either in half to create a symmetrical butterfly or into more intricate shapes for different butterfly variations.
Step 6: Secure the Body
Take a pipe cleaner, fold it in half, and wrap it around the center of the folded filter. Twist to secure, leaving two ends free for the antennae. This step is crucial as it gives the butterfly its shape and hold.
What Could Go Wrong: If the pipe cleaner is too loose, the wings will droop. Make sure to twist tight enough to secure the shape, but not so tight that the paper tears.
Step 7: Form the Antennae
Bend the two ends of the pipe cleaner upward to create the antennae. You can spiral the ends for a cute finishing touch.
Step 8: Display Your Butterflies
Now the fun part! Arrange your butterflies wherever your heart desires. You can also attach them to strings to hang them from the ceiling or use glue to attach them to cardstock for additional stability.
Creative Variations:
- For a twist, use glitter or metallic markers to shine up your butterflies.
- Mix different sizes of coffee filters to create a family of butterflies.
- Try using different shapes—imagine a dragonfly or a moth!
Final Thoughts
Creating vibrant coffee filter butterflies is an exciting way to unearth your creative spirit, and it can be a therapeutic activity as well. I hope my detailed guide helps you craft lovely butterflies that will charm and captivate anyone who sees them.
As with any art project, remember that imperfections can add character. Don’t worry about making them perfect; the joy is in the process and the love you put into your crafting.
Safety Precautions
While this project is safe for most ages, it's good to supervise younger children, especially when using scissors or hot glue guns. Always encourage safe crafting practices!
Now, go gather your materials and let your creativity soar as you craft these delightful butterflies. Happy crafting, and may your butterflies be as vibrant as your imagination!