How to Make Underwater Magic Sand: A Comprehensive Guide from an Experienced Crafter
Hello there, fellow crafters! Today, I am extremely excited to share with you one of my all-time favorite DIY projects: Underwater Magic Sand. This fascinating craft not only delights the senses but also teaches the wonders of science in a playful way. Whether you're looking to entertain children, create mesmerizing displays, or simply tap into your inner child, this activity is sure to inspire joy and creativity.
What is Underwater Magic Sand?
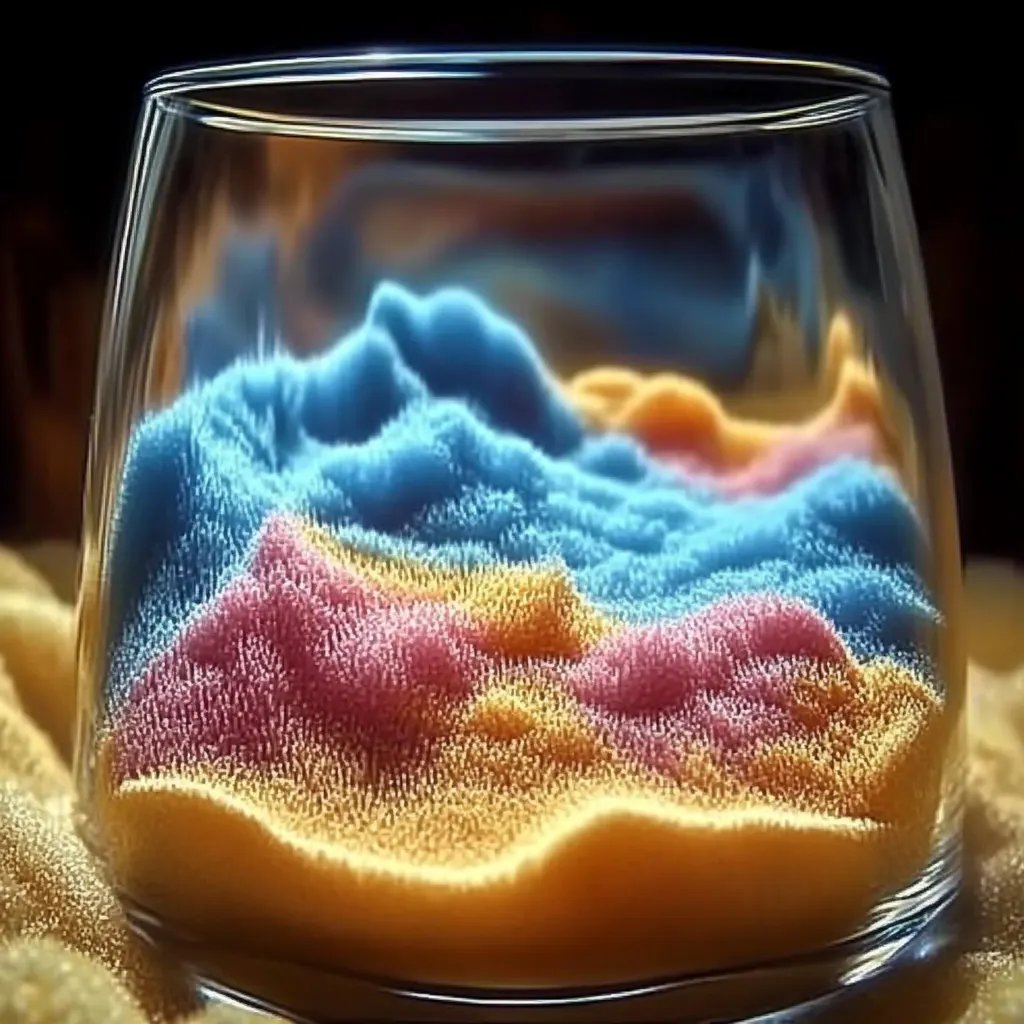
Underwater Magic Sand, often referred to as hydrophobic sand, is a unique substance that repels water, creating an enchanting experience when used in wet and dry environments. Imagine building sandcastles that don't wash away in the ocean or seeing colored grains floating around in a pool like mini islands. It’s not only a visual delight but also a fantastic way to explore ideas of density, buoyancy, and the properties of materials.
This playful substance has gained immense popularity in recent years, especially as a sensory play material for kids or as a decorative element for events and parties. It's endlessly fun at beach-themed parties, summer gatherings, or even science-based activities in classrooms.
Materials You'll Need
Before we dive into the magic of this crafting journey, here's what you'll need to gather. I promise you that these materials are easy to find, and you might already have some at home!
- Fine Sand: Look for sand from your local craft store or a sandbox. Avoid coarse sand, as it won't have the same magical properties.
- Hydrophobic Coating: The secret ingredient! You can use silicone spray that’s often available in hardware stores or online. Alternatively, if you'd like a more natural method, there are recipes using wax.
- A Large Mixing Bowl: I prefer a plastic bowl for easy clean-up.
- A Spoon or Stirring Stick: Use this to mix your ingredients.
- Gloves: Safety first! These will protect your hands when working with silicone spray or wax.
- Sifter (Optional): If you want an ultra-smooth finish that resembles the unique properties of fine underwater sand.
- Water: For testing your magic sand.
Step-by-Step Tutorial
Step 1: Preparing Your Sand
Begin by measuring out your fine sand. I usually opt for about 2 cups to start with, but feel free to adjust depending on how much magic sand you want to create.
Tip: If possible, sift the sand to eliminate any larger particles or debris, ensuring a smooth, even texture.
Step 2: Coating the Sand
Now comes the fun part—applying the hydrophobic coating! If you’re using silicone spray, follow these steps carefully:
- Put on Your Gloves: Protect your hands from the spray.
- Spray the Sand: In your mixing bowl, spray about 10-15 pumps of silicone spray over your sand.
- Mix Thoroughly: Use your spoon or stick to mix the sand and silicone thoroughly. Ensure every grain is coated; it’s crucial for creating that magical water-repelling effect.
What Could Go Wrong?
- Uneven coating can lead to areas of sand that absorb water. If you notice dry patches, just add more silicone spray and mix until all the sand shines slightly from the coating.
Step 3: Drying the Sand
Once mixed, spread the sand out on a baking sheet lined with parchment paper. Allow it to dry for at least 24 hours.
Why This Matters: This step ensures that the coating fully adheres to the sand, enhancing its hydrophobic properties.
Personal Anecdote: I remember one time I was impatient and tried to use the sand right away. It worked to an extent, but it didn’t have the same captivating effect as when I let it dry properly. Patience really is a virtue in crafting!
Step 4: Testing Your Magic Sand
After 24 hours, it’s time to test out your creation! Fill a shallow dish or tray with water and sprinkle some of your magic sand on top.
What You Should See:
- The sand should float on the surface without sinking, forming little islands of dry sand.
Fixing Issues:
If your sand sinks or absorbs water, it might require more coating. Dust the sand with additional silicone spray and mix thoroughly again.
Creative Variations
Now that you’ve created your Underwater Magic Sand, where can you go from here? Get creative!
- Color It: Before applying the silicone spray, mix in some food coloring or powdered pigments to create a vibrant array of colors.
- Shapes and Molds: Use molds to form fun shapes and let your sand get even more creative. Just remember to remove them gently to keep the shape intact.
- Sensory Play: Pair your magic sand with water tables or sensory bins for interactive play, enhancing motor skills in children.
- Themed Parties: Use this sand for your beach party decorations or as part of an ocean-themed craft project.
Safety Tips & Warnings
While making Underwater Magic Sand is generally safe, always exercise caution, especially when dealing with sprays and chemicals.
- Wear gloves during application to avoid skin contact with chemicals.
- Work in a well-ventilated area to reduce inhalation risks of spray particles.
- Always supervise children during the crafting process to ensure safe handling.
Final Thoughts: Enjoy the Magic!
Creating Underwater Magic Sand is not only a fantastic project but also a wondrous way to engage with art, science, and play. I hope this guide has inspired you to try your hand at making your own magical sand. There's something incredibly satisfying about crafting something so ordinary into something extraordinary!
Remember, crafting is all about exploration and creativity. Don’t be afraid to deviate from the steps or add your own unique touch. Each batch of magic sand can be a personal reflection of your creativity. Happy crafting, and may your sand remain magically dry beneath the waves!