How to Make Tea Bombs: Your Ultimate Guide to Crafting a Delightful Beverage Experience
Hello fellow crafters! Today, I’m excited to share with you a fun and creative project that has taken the crafting world by storm—Tea Bombs! As someone who loves both tea and crafting, I can’t tell you how thrilled I am to combine these two passions. If you’re not familiar with tea bombs, think of them as delightful little spheres filled with an assortment of tea, herbs, and spices, designed to explode with flavor when submerged in hot water. They are perfect for anyone looking to add a little flair to their cup of tea, whether it's for a cozy night at home, a celebratory gathering, or even as thoughtful gifts.
Why Are Tea Bombs So Popular?
Tea bombs have skyrocketed in popularity for a number of reasons. Firstly, they make tea brewing fun and interactive. Imagine dropping a beautifully crafted bomb into your cup and watching it dissolve to reveal a fragrant infusion! Secondly, they’re customizable; you can tailor the ingredients to suit your preferences or dietary needs. Finally, they are a feast for the eyes as well, making them great for social media sharing. And let's be honest—they are simply satisfying to make!
When Should I Use Tea Bombs?
You can use tea bombs anytime you crave a warm and soothing drink. They are perfect for:
- A cozy evening with a good book.
- Health boosts during chilly weather.
- Afternoon teas.
- Exciting party favors or gifts.
- An opportunity to explore new flavors.
Now that you’re eager to dive into this crafting adventure, let me take you through the step-by-step process.
Materials You’ll Need
Before we start, make sure you’ve gathered the following materials. Most of these should be easily accessible, and I’ll provide alternatives along the way!
Ingredients:
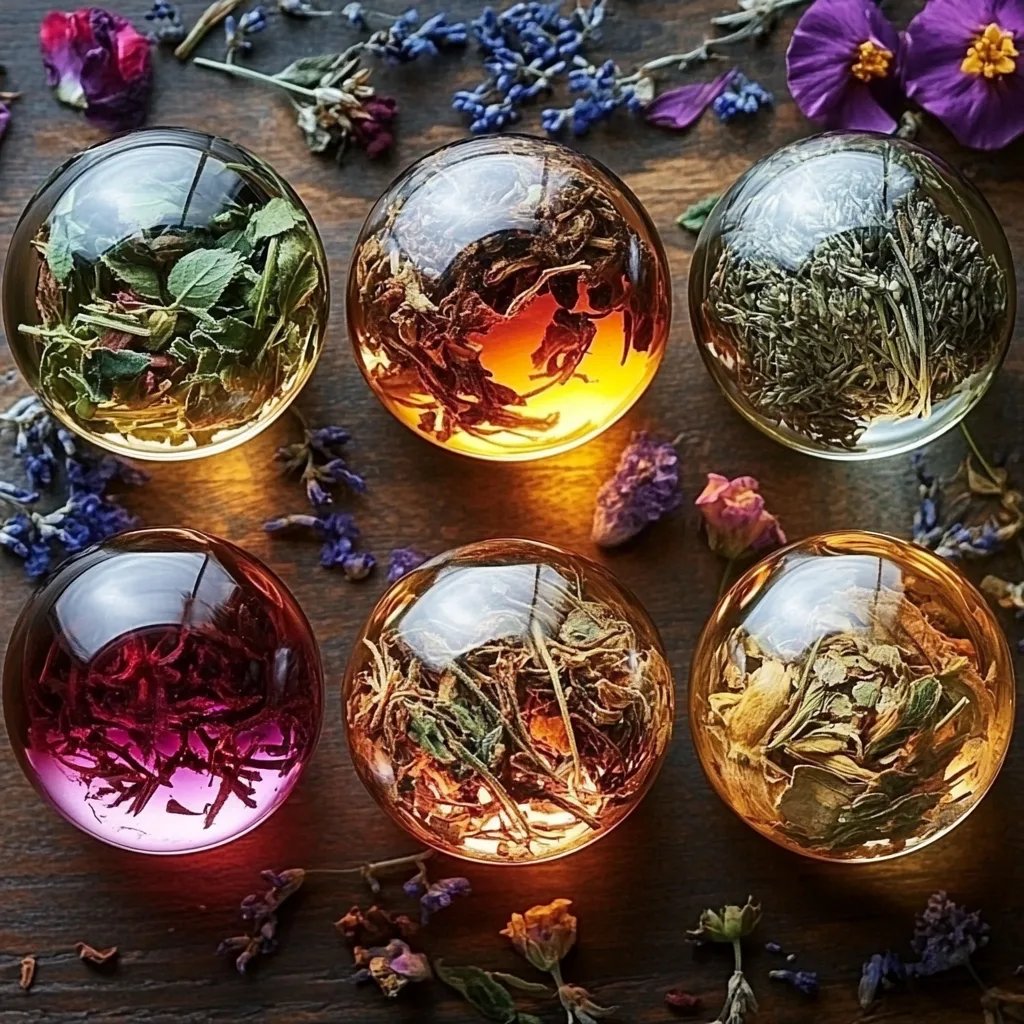
- Loose-leaf tea (2-3 teaspoons of your favorite kind)
- Dried herbs/spices (like lavender, mint, or cinnamon)
- Sweeteners (dried honey, sugar, or stevia)
- Edible flowers (optional, for decoration)
- Flavor extracts (like vanilla or almond, optional)
For Molding:
- Silicone mold (silicone sphere molds work best)
- A microwave-safe bowl
- A small spoon for mixing
For Assembly:
- A warm baking tray or plate (to help with sealing)
- Airtight containers for storage
Step-by-Step Tutorial for Making Tea Bombs
Step 1: Prepare Your Ingredients
Gather your ingredients and get your workspace organized. I like to lay everything out so I can see my options at a glance. This is essential for creativity and efficiency.
Why It Matters: Preparing everything ahead of time helps prevent any mishaps during mixing and molding. Trust me, it’s so much easier than scrambling for ingredients halfway through!
Tip: If you have allergies or specific tastes, feel free to substitute or omit any ingredients!
Step 2: Melt Your Base
- Using your silicone molds, decide how many tea bombs you want to make. For this guide, we’ll aim for six bombs.
- Melt your base. Traditionally, this is done with cocoa butter or white chocolate. If you're using cocoa butter, chop it into small pieces for an even melt. Heat it in the microwave in 15-second intervals until fully melted but not scorched. Stir finely between sessions.
Warning: Be cautious not to overheat the cocoa butter or chocolate as it can seize up. If this happens, you can fix it by adding a teaspoon of vegetable oil to loosen it back up.
Step 3: Mix in Your Flavors
Once your cocoa butter or chocolate is melted, it's time to mix in the tea and herbs.
- Add 2-3 teaspoons of loose-leaf tea to the melted base.
- Sprinkle in your dried herbs and spices. Use a combination that you think will complement each other! For example, chamomile with lavender offers relaxation, while ginger and turmeric are great for boosting immunity.
- Add any desired sweeteners, extracts, or edibles. Remember, you can omit sweeteners if you're watching your sugar intake.
Why This Step Matters: This is where the magic happens. The mixture needs to be flavorful, but not overly watery or thick, which could affect how it melts later.
Step 4: Molding the Bombs
- Use a spoon to fill your silicone molds with the chocolate mixture. Tap the molds lightly on the counter to eliminate any air bubbles.
- Allow the mixture to cool slightly. After about 5-10 minutes, use a spoon to add a tiny bit more mixture, smoothing it out. This helps create a solid surface for the bombs to hold together.
Tip: Molding can be messy! If you find yourself with excess on the sides, a clean-up with a warm cloth before hardening will leave your bombs looking professional.
Step 5: Demolding
Once the chocolate has solidified, it’s time to demold.
- Carefully peel the silicone away from the bombs. If a piece breaks off, don’t worry—simply remelt a small amount of the leftover mixture and use it to patch any cracks.
- Store your completed bombs. Place them in an airtight container.
What Could Go Wrong: If the bombs feel soft and don’t hold their shape, it could be due to incorrect ratios of ingredients. Just remelt and add a bit more base to fix it.
Step 6: Enjoying and Sharing Your Tea Bombs
You can enjoy your tea bomb right away! Simply:
- Place a tea bomb in your cup.
- Pour over hot water.
- Watch it burst and dissolve as it releases delightful flavors!
Creative Variations: Experiment with ingredients! Try matcha tea bombs, chai-spiced bombs, or even herbal blends using hibiscus, rose petals, or other botanicals. The sky's the limit!
Wrap Up: Tips and Personal Anecdotes
As you embark on your tea-bomb-making journey, remember to be patient and have fun! The first time I tried this, I felt thrilled but also challenged, and I destroyed a few bombs in the process. But I learned from every mishap! If you find that the bombs don't turn out perfectly the first time, don’t be discouraged. Each attempt brings you closer to mastering the process.
Feel free to experiment with flavors, try adding natural colors from superfoods, or create themed bombs for holidays and events! You can even customize the packaging for a perfect gift that's as thoughtful as it is delicious.
Final Thoughts
Making tea bombs is such a rewarding process that stretches your creativity while satisfying your taste buds. I hope this guide serves as a useful resource for you as you start crafting your own delightful tea bombs. Go ahead, gather your materials, and dive into the world of tea-infused delights. I can’t wait to see what you create! Cheers to your crafting success!