How to Make Summer Puffy Paint Art: An Expert's Guide to Creative Fun
As an experienced crafter, I’m thrilled to share one of my all-time favorite summer activities: creating beautiful puffy paint art. It’s a fantastic way to unleash your creativity while also engaging in a tactile and visually stimulating experience. Whether you're hosting a kids' craft session, organizing a summer camp activity, or simply looking for a fun solo project, puffy paint art offers endless possibilities for expression.
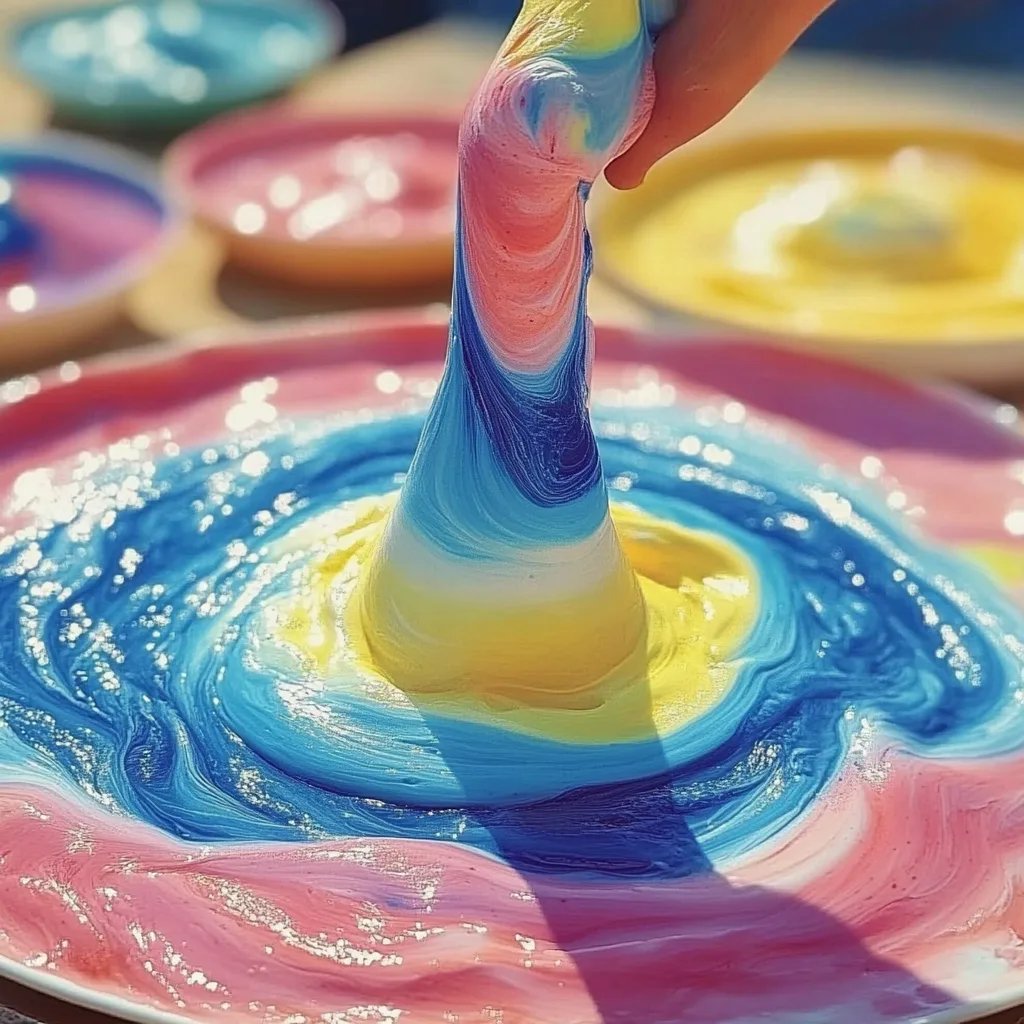
What is Puffy Paint?
Puffy paint is a thick, textured medium that, when dry, gives a lovely tactile dimension to your artwork. It's reminiscent of the paint you might remember from childhood—soft, squishy, and dangerously fun! People love it for its playful nature and the way it can transform ordinary paper or canvas into a vibrant, three-dimensional masterpiece. You can use puffy paint on various surfaces—from thick cardstock to fabric—making it an incredibly versatile medium.
Why It's Popular
Puffy paint is beloved not just for its aesthetic appeal but also for its accessibility. Anyone, regardless of age or skill level, can create something beautiful and unique. Whether you're making gifts, personalized cards, or decor, puffy paints are an engaging way to spend a summer day.
When to Use Puffy Paint
Puffy paint can shine in multiple contexts:
- Summer Parties: Add a fun craft table to your event for guests to create keepsakes.
- Children's Activities: A great way to keep kids entertained indoors or outdoors.
- Personal Projects: Use puffy paint to embellish greeting cards or canvas art.
Materials You'll Need
Before we dive into the step-by-step tutorial, let's gather our supplies. You’ll need:
- Puffy Paint Ingredients:
- 1 cup of white school glue (make sure it’s washable)
- 1 cup of shaving cream (preferably unscented)
- 1 tablespoon of cornstarch
- Food coloring (any colors you like)
- A mixing bowl
- A whisk or stirring stick
- Tools and Supplies:
- Craft paper or canvas
- Plastic squeeze bottles or disposable piping bags (for application)
- Plastic wrap (for storage)
- Newspaper or a drop cloth (to protect your work area)
- Optional Extras:
- Glitter for added sparkle
- Stencils or rubber stamps to use with your puffy paint
- A heat gun or hairdryer (not required, but helpful)
Step-by-Step Tutorial: Making Summer Puffy Paint
Now that we have everything ready, let’s jump into the creation process!
Step 1: Mix the Base
Begin by pouring your cup of white school glue into a mixing bowl. This glue will act as the adhesive in our puffy paint, allowing it to stick to your surfaces.
Why It Matters: Using the right kind of glue is crucial. School glue is preferred because it dries clear and remains flexible, giving your art a clean finish.
Step 2: Incorporate Shaving Cream
Next, add 1 cup of shaving cream to the glue. Use your whisk (or stirring stick) to blend the two until they create a light, fluffy texture.
Tip: Stir gently to maintain air bubbles, which will help give your paint the puffy effect when it dries.
What Could Go Wrong: If your mixture becomes too runny, it won't retain its puffy form. The solution? Add a little more glue to thicken the paint.
Step 3: Add Cornstarch
Now, sprinkle in the tablespoon of cornstarch. This gives your puffy paint a bit more body.
Why It Matters: Cornstarch also helps enhance the texture, ensuring it dries nicely.
Step 4: Color it Up
This is where the fun really begins! Divide your paint mixture into separate bowls if you want multiple colors, adding food coloring to each bowl until you achieve your desired hue.
Personal Anecdote: I often find joy in mixing unexpected color combinations, like teal and lavender or golden yellow and magenta. Don’t be afraid to experiment!
Step 5: Transfer to Squeeze Bottles or Bags
For easy application, transfer your paint into squeeze bottles or piping bags. This will allow you to create precise lines and shapes in your artwork.
What Could Go Wrong: If there aren’t any holes in the tips of your squeeze bottles or bags, the paint might not flow properly. Make sure to cut a small tip for a smooth application.
Step 6: Let’s Create!
Now, it’s time to unleash your inner artist! Squeeze your puffy paint onto craft paper or canvas in your favorite designs, patterns, or messages.
Creative Variations: Try using stencils to create more intricate designs or layer colors to produce beautiful gradients.
Step 7: Drying Time
Allow your artwork to dry for several hours or overnight, depending on the thickness of the paint.
Tip: Use a heat gun or hairdryer on a low setting if you want to expedite this process—but be careful not to scorch the paint!
Safety Warning: Always ensure you’re in a well-ventilated area if using a heat tool.
Troubleshooting Common Issues
As a friendly reminder, creating art is all about trial and error! If things don’t go according to plan, here are some fixes:
- Paint Too Runny: Add more cornstarch to thicken.
- Colors Mixing Unintentionally: Make sure to allow layers to dry before adding new ones.
- Application Issues: Ensure your bags or bottles are tightly sealed before starting.
Storing Your Puffy Paint
Leftover puffy paint can be stored in airtight containers or sealed plastic bags. Just ensure to keep any air out to prevent it from drying out. On those rainy days when outdoor crafting isn’t an option, pull your paint back out and make more puffy art!
Conclusion: Celebrate Your Creation
Puffy paint art is not just about the destination; it’s also about the journey. It offers a wonderful opportunity to express your creativity and share the joy of crafting with others. I hope my guide has inspired you to roll up your sleeves, get messy, and dive into the exciting world of puffy paint. Don’t forget to take pictures of your creations and share them with your friends and family—it’s always fun to show off a bit of summer art!
Happy crafting, and may your summer be filled with color, creativity, and endless fun!