#How to Make Sparkling Rainbow Bubble Slime with a Twist: A Fun and Creative Crafting Experience
Hello, fellow crafters! Today, I’m excited to share my delightful journey into the world of DIY slime-making—specifically, how to create Sparkling Rainbow Bubble Slime with a twist! This glimmering, colorful masterpiece is not just a treat for the senses; it’s a hit among kids and adults alike. Whether you're hosting a party, engaging in some playful self-care, or simply wanting to bond with your children, this slime is perfect for any occasion.
In recent years, slime has exploded into a global phenomenon, capturing the imagination of crafters far and wide. Its tactile appeal is undeniable—stretchy, squishy, and mesmerizingly fun! Plus, who can resist the excitement of crafting something spectacular right from their kitchen?
Why Sparkling Rainbow Bubble Slime?
What makes Sparkling Rainbow Bubble Slime so irresistible lies in its vibrant hues contrasted with a beautiful sparkle, not to mention the bubbly texture that’s incredibly satisfying to squish. Kids love the sensory experience, while adults can appreciate the crafty DIY aspect. Also, the possibilities for variations are endless. So, let's roll up our sleeves and dive into crafting this delightful concoction!
Materials You'll Need
Before we begin, let’s gather all the materials. This is a very accessible recipe, so you might already have most of these items:
- White School Glue: 1 cup (Make sure it’s non-toxic.)
- Baking Soda: 1 teaspoon
- Contact Lens Solution: 1-2 tablespoons (This will act as the activator.)
- Water: 1/2 cup
- Food Coloring: Different colors for your rainbow effect (gel colors work best!)
- Glitter: Fine glitter or confetti for sparkle (Choose biodegradable glitter for an eco-friendly twist!)
- Mixing Bowls: A few of them for different colors.
- Whisk or Spoon: To mix your ingredients.
- Airtight Container: For storage.
Step-By-Step Tutorial
Let’s unleash our inner slime artists! Gather everything in a well-lit and clean crafting space, and I promise we’ll create something beautiful together.
Step 1: Prepare the Slime Base
- Create the Glue Mixture: In a mixing bowl, combine 1 cup of white school glue with 1/2 cup of water. This will give you a nice, soupy base.
- *Why this matters*: The water thins out the glue, making it easier to mix with other components.
- Add Baking Soda: Stir in 1 teaspoon of baking soda until fully dissolved.
- *Potential Pitfall*: Make sure the baking soda is completely dissolved; otherwise, it might lead to an uneven texture.
- Color It Up: If you want a solid base color, add a few drops of food coloring here. For the rainbow effect, you can skip this initial stage.
Step 2: Activate the Slime
- Contact Lens Solution: Gradually add 1 tablespoon of contact lens solution to your mixture. As you do this, you’ll notice it starting to form.
- *Importance*: The boric acid in contact lens solution is what activates the slime. For gooey slime, add less; for firmer slime, add more gradually.
- Knead It: Once the slime starts pulling away from the bowl’s sides, use your hands to knead it for a minute.
- *Troubleshoot*: If it’s too sticky, add a little more contact lens solution. If it’s too firm, mix in a tiny bit of water.
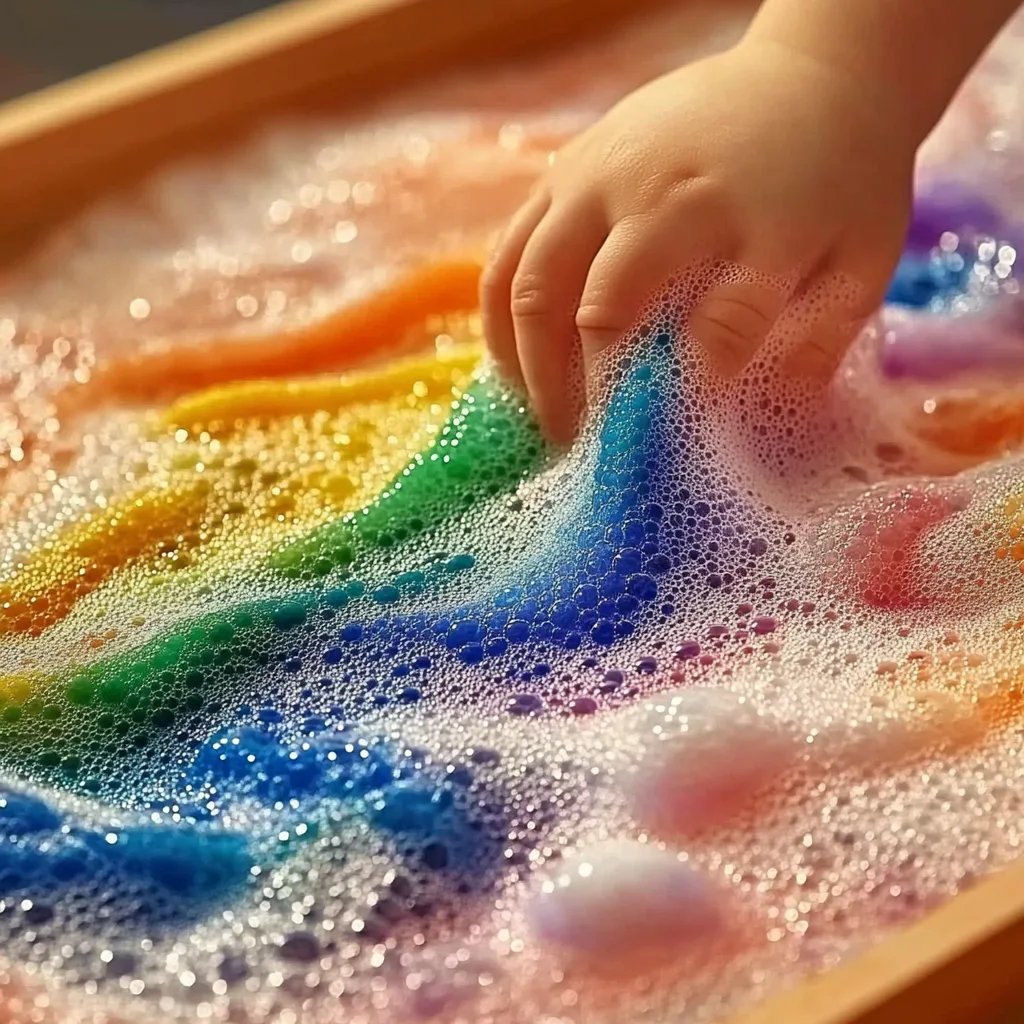
Step 3: Create the Rainbow
- Divide the Slime: Split your base slime into smaller portions—about six if you want a full rainbow.
- Color Each Portion: Now, here comes the fun part! Add different food coloring to each portion. Mix until you achieve your desired brightness.
- *Tip*: Remember that darker colors might need more kneading time to distribute evenly.
- Make It Sparkle: Add glitter to each portion before kneading it in. Don’t be shy—this is about creating a beautiful, shimmering effect!
Step 4: Bringing the Slime Together
- Layer and Twist: Roll each colored portion into a “snake,” then twist the portions together to create a swirling rainbow.
- Bubble Time: To make ‘bubble slime,’ stretch and pull gently but firmly. The air introduced while you stretch will create cool bubble textures!
- *Safety Note*: Make sure to supervise younger children during this step to prevent any accidents.
Creative Variations
- Extras: You can add a little essential oil for scent or even tiny beads or foam balls for additional texture.
- Themed Colors: Switch the colors based on seasons or occasions. Think pastel colors for spring or dark tones for Halloween!
- Foam Slime Twist: Instead of regular glue, try using foam glue or adding foam beads during the mixing process for extra fluffiness.
Tips and Tricks
- Storing Your Slime: Keep your slime in an airtight container to maintain its consistency. Add a bit of water if it gets too stiff over time.
- Cleaning Up: Slime can be messy; lay down some newspaper or a silicone mat for easy cleanup.
- Safety Tip: Always wash your hands before and after crafting with slime, especially if you’re playing with it for an extended period.
Conclusion: Crafting Memories
Creating Sparkling Rainbow Bubble Slime with a twist isn’t just about the end product; it’s about the joy and creativity that comes with the process. I hope this guide inspires you to try it out for yourself, or even to host a slime-making party! There’s something truly magical about watching colors swirl together, and I can’t wait to hear about your creations and any twists you may have made along the way. Happy crafting, everyone, and don’t forget to embrace the mess—it’s all part of the fun!