How to Make Rustic Wooden Snowman Ornaments: A Step-by-Step Guide
Introduction: Welcome to My Crafting Wonderland!
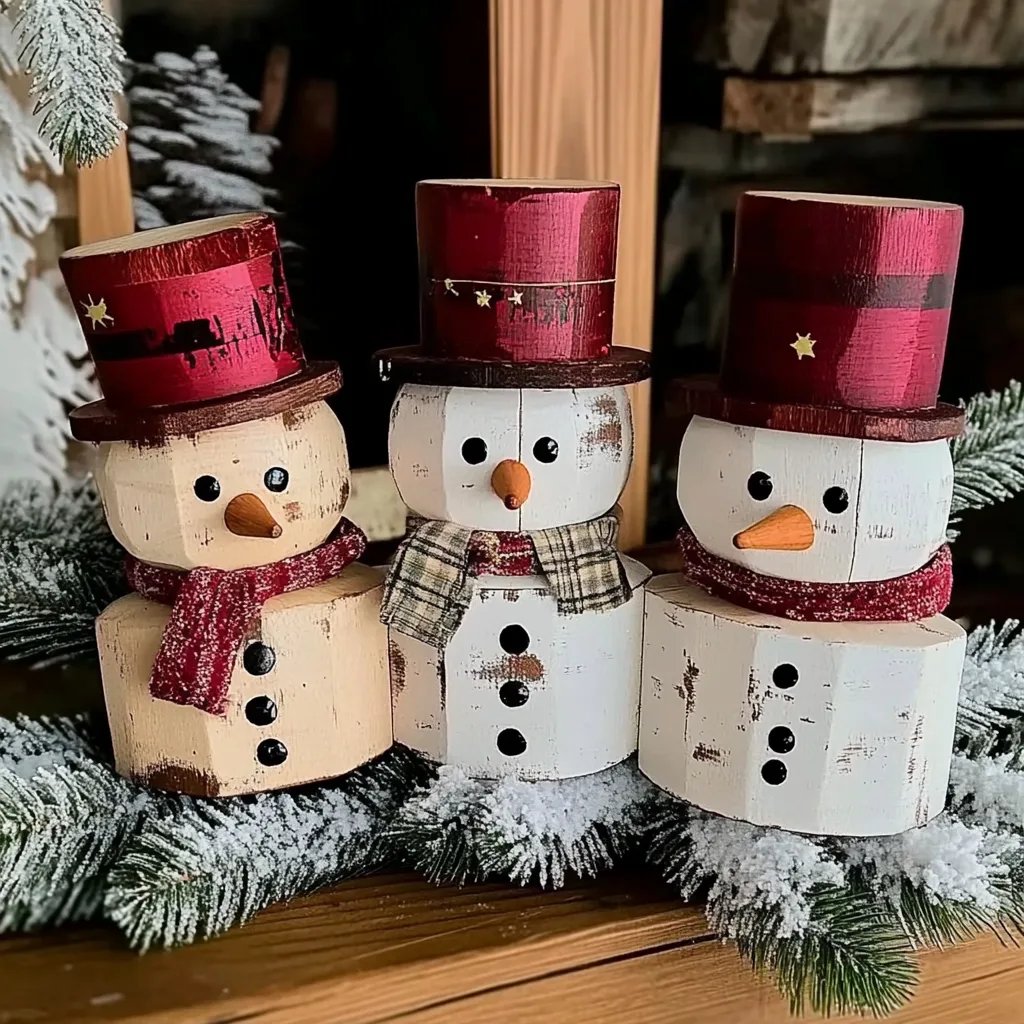
As the winter chill settles in and the holiday spirit begins to twinkle in the air, I find myself drawn to crafting cheerful decorations that evoke warm memories of the season. One of my all-time favorites is making rustic wooden snowman ornaments—delightful handcrafted pieces that add a charming touch to any tree or festive display. Not only are these ornaments visually appealing, but they also capture the essence of winter in a whimsical way.
These snowman ornaments have gained popularity because they seamlessly blend nostalgia with a fresh, handcrafted vibe. They are perfect for holiday gifts, tree decorations, or even as delightful additions to a winter-themed centerpiece. In this guide, I'm thrilled to share my tried-and-true process for creating these adorable ornaments, complete with tips, tricks, and alternatives that will ensure your crafting experience is enjoyable and rewarding.
What You’ll Need:
Before we dive into the crafting, gather these materials:
- Wooden disc slices: You can buy pre-cut slices at a craft store or make your own by slicing a fallen branch (make sure it's dry and free of bark).
- Acrylic paint: White for the snowman body, plus any colors you’d like for the accessories (orange for the carrot nose, black for the eyes, etc.).
- E6000 glue or hot glue gun: For attaching decorations.
- Paintbrushes: A variety of sizes, from large to small.
- Black marker or paint pen: For detail work like the snowman's button eyes and mouth.
- Twine or ribbon: For hanging your ornaments.
- Decorative accessories: Such as fabric scraps (for scarves), mini top hats or beanies (can be made from felt), and buttons or beads.
Make sure to prepare a clean work area with newspaper or a craft mat to protect surfaces from any potential mess.
Step-by-Step Tutorial: Crafting Your Rustic Wooden Snowman Ornaments
Step 1: Prepare Your Wood Slices
Start by sanding your wooden disc slices lightly to remove any rough edges. This step is crucial, as you want a smooth surface to paint on. If you encounter any deep grooves or imperfections, use wood filler to smooth these areas.
Tip: Use a mask while sanding to avoid inhaling dust particles, and always wear gloves if you're handling wood filler.
Step 2: Painting the Base
Once your wood slices are smooth and clean, it’s time to paint! Use your largest paintbrush and dip it into the white acrylic paint. Cover the entire front surface of the wood slice—this will be the snowman’s body.
Why This Matters: A solid base coat helps the additional colors pop and gives the ornament a clean, polished look.
Potential Issues: If the paint doesn’t cover well, consider applying a coat of gesso first; it creates a smooth base layer for acrylics.
Tip: Be patient! Let the paint dry thoroughly before applying a second coat, usually taking about 30 minutes.
Step 3: Adding Details
Once the base coat is dry, it's time to get creative! Using your smaller brushes, paint the snowman's accessories—a top hat, scarf, or buttons. If you're using fabric scraps for the scarf, cut a small piece about 1-2 inches wide and long enough to wrap around the neck of the snowman.
Using E6000 or hot glue, carefully attach your fabric or accessories. This is where your personality shines through; you can experiment with colors and styles.
Creative Variation: Instead of a traditional black hat, how about a bright red beanie? It adds a fun pop of color!
Step 4: Bringing Your Snowman to Life
Using your black marker or paint pen, dot two eyes and draw a smile—your snowman is beginning to come alive! Finish off by creating a small carrot nose with your orange paint.
Why This Detail Matters: The facial expressions of your snowman give it character. Play around with different expressions—grumpy, cheerful, or silly!
Common Mistake: If you mess up when drawing the face, don’t panic. You can simply paint over it and start again, or use a little bit of rubbing alcohol on a cotton ball to erase.
Step 5: Final Touches and Hanging Loop
Now that your snowman is fully adorned, it’s time to create the perfect hanging loop. Use about 10 inches of twine or ribbon and tie a knot at one end. Glue the knotted end to the back of the snowman ornament for secure hanging.
Tip: Make sure your loop is sturdy enough to support the ornament’s weight.
Step 6: Final Sealing
To protect your hard work, consider a final sealing layer. A clear acrylic spray sealant will protect your ornament from moisture and dirt—just spray it outside in a well-ventilated area!
Safety Warning: Always read the label on spray sealants for safety and be sure to use them in an open space away from flammable materials.
Project Variations and Additional Personal Touches
Feel free to alter colors, add glitter, or use smaller wooden discs to create a family of snowman ornaments! You could even personalize each ornament with family member names or the year for a sentimental touch.
A Personal Anecdote: I recall creating a whole set of these snowman ornaments with my children one holiday season. We spent hours laughing and being creative, and those simple wooden ornaments now hold a special place on our family tree, reminding us of the joy we shared.
Conclusion: Embrace Your Crafting Journey
Whether you choose to follow my tutorial to the letter or add your own flair, making rustic wooden snowman ornaments can be a fulfilling and joyful experience. Each ornament tells a story of creativity, family, and the warmth of the holiday season. So gather your supplies, embrace the spirit of crafting, and enjoy the process.
By infusing love and effort into each handmade ornament, you'll create unique decorations that will be cherished for years to come. Happy crafting!