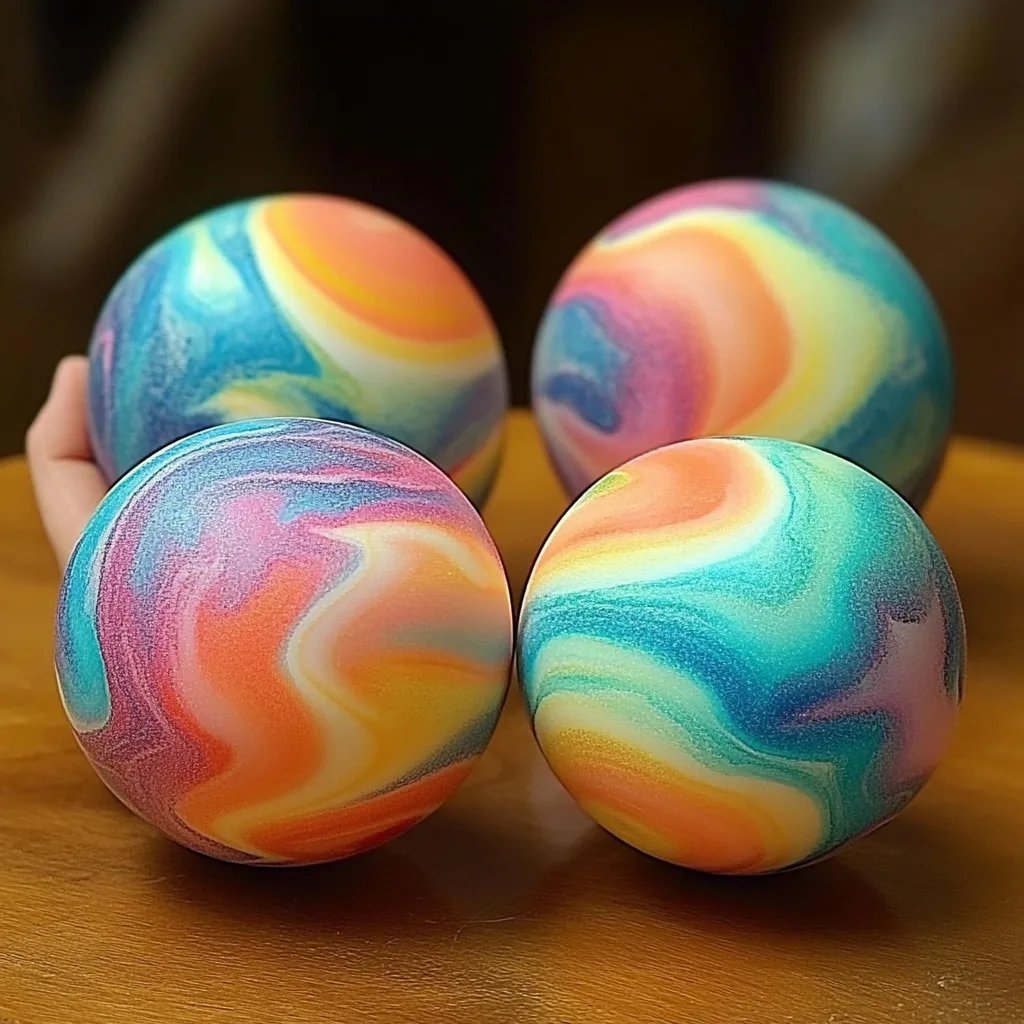
How to Make Rainbow Swirl Bouncy Balls: A Step-by-Step Guide
Hello fellow crafters! Today, I'm excited to share one of my all-time favorite DIY projects: making Rainbow Swirl Bouncy Balls. These little beauties are not only a blast to create, but they also add a delightful pop of color to any playtime. Whether you’re looking to make a unique party favor, a gift for a little one, or just some fun for yourself, these bouncy balls are sure to spread joy.
Why Rainbow Swirl Bouncy Balls?
Rainbow Swirl Bouncy Balls capture the imagination with their vibrant colors and satisfying bounce. They’re perfect for a variety of occasions—think birthday parties, craft days with friends, or even as playful stress relievers! Plus, making them is a wonderful way to engage kids in a fun science activity, blending art with a little bit of chemistry. Trust me, once you experience the satisfaction of crafting your own bouncy ball, you’ll want to make them again and again!
What You’ll Need
Before we dive into the crafting, let’s gather our supplies. Here’s what you’ll need:
- A bouncy ball kit (these typically include borax powder and a polymer)
- Food coloring (choose your favorite shades!)
- Water (the tastiest ingredient in any recipe!)
- Mixing bowls (two or three will work best)
- Spoon or stir stick (for mixing)
- Plastic gloves (optional, but handy to keep your hands clean)
- Measuring spoons (for accurate measurement)
Step-by-Step Tutorial
Step 1: Preparing Your Work Station
First, create a clean and organized workspace. I recommend covering your table with newspaper or a plastic tablecloth, as things can get a little messy. Trust me, a clean workspace makes the process smoother and much more enjoyable!
Step 2: Mixing the Ingredients
Now, let’s get our hands a little sticky!
- In one mixing bowl, combine one tablespoon of borax powder with half a cup of warm water. Stir until the borax fully dissolves. This is the key to the bouncy factor in your ball!
- In another bowl, mix one tablespoon of the polymer with one tablespoon of water. This combination can vary a bit based on the specific polymer you're using, so refer to the instructions on your kit if needed.
- Add your vibrant food coloring: Feel free to get creative! Use a few drops of each color to get the rainbow effect. The number of colors and their arrangement will affect how your bouncy ball looks—don’t be shy!
Step 3: Combining the Mixtures
This step is where the fun begins—watch the magic happen!
- Slowly pour the polymer mixture into the borax solution, while continuously stirring with a spoon. You’ll notice that the mixture starts to clump together as you combine them, forming a gel-like consistency. This is where you'll see how the science of your ingredients comes together.
- Let it sit for a minute. This resting period allows the polymer to react with the borax, creating a bouncy ball material.
Step 4: Shaping Your Ball
Once you’ve let the mixture sit:
- Use your hands (wear gloves if you prefer) to mold the mixture into a ball. Rolling it between your palms will help achieve that perfect bouncy shape! If the mixture is too sticky, you can add a pinch more borax to help firm it up.
- To create the rainbow swirl effect, you can divide the mixture into smaller portions and mix each with different colors before rolling them together. Try to keep the colors separate until the final rolling to maintain distinct swirls.
Step 5: Curing the Ball
Once you have your bouncy ball shaped, let it cure for about 24 hours. This lets the ingredients firm up, ensuring that your ball is as bouncy as possible.
Step 6: Bounce and Enjoy!
After the curing time, your Rainbow Swirl Bouncy Ball is ready to jump into action! Give it a try by tossing it against a wall or taking it outside to see how high it bounces. You’ll be amazed at how much fun this handmade treasure can bring!
Troubleshooting Common Issues
Sometimes, things don’t always go as planned! Here are a few potential hiccups and how to resolve them:
- The ball is too sticky: If you find that your bouncy ball is sticking to your hands or surfaces, it likely needs more borax. Deflate the ball a bit, mix in a little more borax solution, and reshape.
- It’s too crumbly: This means there might have been too much borax. You can try adding a tiny bit of water and mixing thoroughly until you achieve the right consistency.
- The colors blended too much: To maintain vibrant swirls, avoid over-mixing when you combine the colors. Just gently fold the colors together instead.
Tips and Safety Warnings
- Always supervise children: While this project is relatively safe, adult supervision is recommended, especially when kids are handling borax. It can irritate skin if left in contact for too long.
- Clean as you go: It’s much easier to deal with any spills or splatters if you tackle them right away.
- Use gloves: While it’s not strictly necessary, wearing gloves can help keep your hands clean and free of food coloring stains.
Creative Variations
Once you’ve mastered the basic Rainbow Swirl Bouncy Ball, why not try some creative variations?
- Glitter balls: Mix in some biodegradable glitter to add a sparkling touch to your bouncy ball.
- Glow-in-the-dark: Use glow-in-the-dark paint instead of food coloring for a ball that glows in the dark.
- Scented bouncy balls: Consider adding a few drops of essential oil to create a delightful scent to your DIY creation.
Final Thoughts
Crafting Rainbow Swirl Bouncy Balls is not only a great way to spend an afternoon, but it also sparks creativity and fosters a love for DIY projects. I hope this guide inspires you to gather some materials and embark on your own colorful adventure! Remember, the more you practice, the better you become—so don’t fret if your first attempt isn’t perfect. Embrace the process, enjoy the playful colors, and most importantly, have fun! Happy crafting!