How to Make Puffy Painted Fireworks: A Step-by-Step Guide
As an enthusiastic crafter and a lover of all things creative, I find that nothing quite captures the joy of celebration like fireworks—especially when they come to life through art! Today, I'm excited to share with you my process for making Puffy Painted Fireworks, a fun and vibrant craft that not only decorates your space but also makes for a fantastic group activity during holidays, parties, or simply to add some color to your home.
Why Puffy Painted Fireworks?
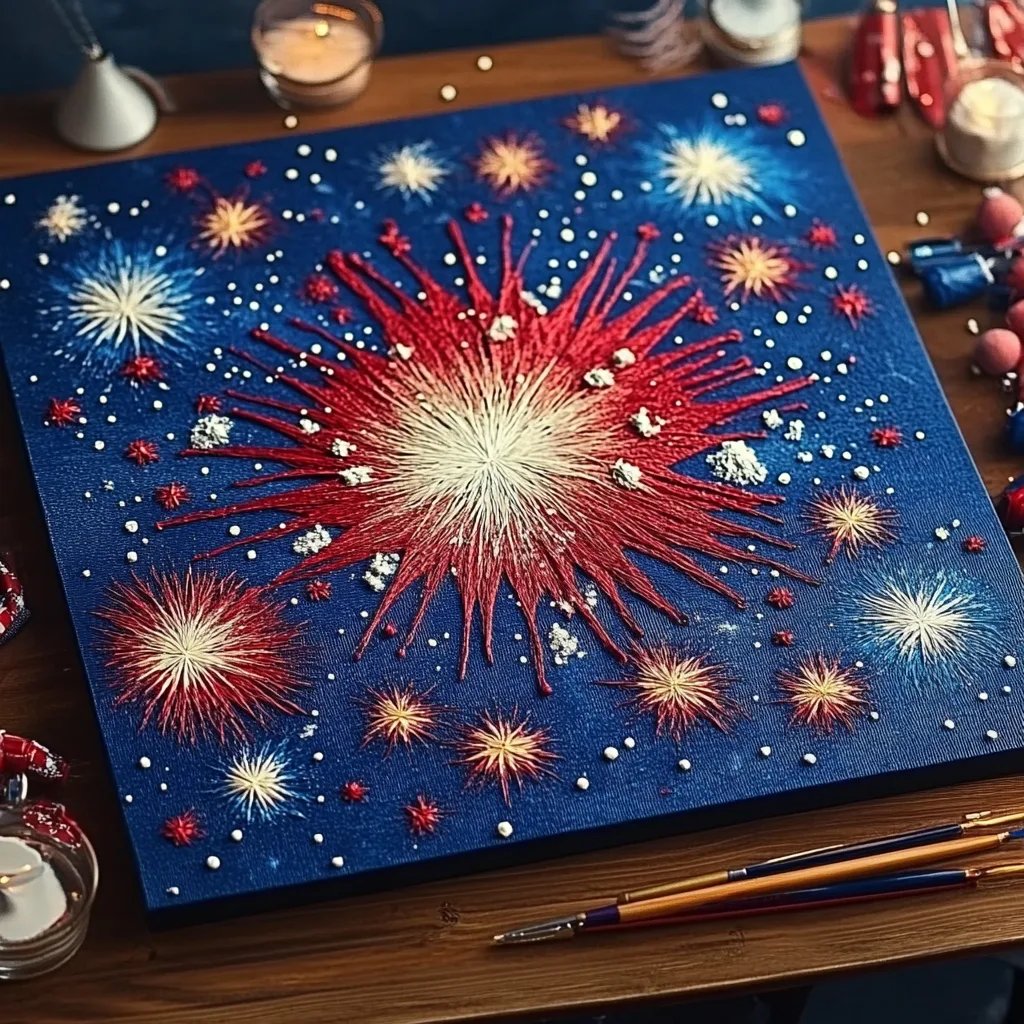
Puffy Painted Fireworks are a popular craft project because they're easy to make, require minimal supplies, and result in stunning, textured designs that can be displayed proudly. Ideal for kids' crafts, fourth of July celebrations, or simply for aspiring artists looking to explore painting techniques, these puffy fireworks stand out due to their 3D effect, making them look almost like they’ve popped right off the canvas.
What You'll Need
To get started, you’ll want to gather the following materials. Most of these are easily found in your home or at a local craft store:
- Puffy Paint: You can either buy pre-made puffy paint or make your own with 1 cup of flour, 1 cup of water, 1 cup of salt, and 1 tablespoon of baking powder. Add food coloring for vibrant hues!
- Canvas or Thick Cardstock: Choose a surface that can hold the puff when it's applied; the thicker, the better!
- Paintbrushes: Various sizes work best, so you can mimic different fireworks designs.
- Plastic Squeeze Bottles or Piping Bags: These allow more control over your paint application.
- Black Construction Paper: This will serve as the backdrop for your fireworks.
- Paper Towels: For cleanup.
- A Baking Sheet (if you're using puffy paint): When you're using homemade puffy paint, this will be great for the final touch if you're baking to set the paint.
- An Oven: Only needed if you’re using homemade puffy paint.
Safety Warnings
While the materials are generally safe, be cautious with food coloring as it can stain clothing and surfaces. I suggest wearing an old shirt and covering your workspace with newspaper or plastic to protect against any spills.
Step-by-Step Tutorial
Step 1: Prepare Your Workspace
Before diving into the dazzling world of puffy paint, it’s crucial to create a clean and organized workspace. Clear your table and lay down newspaper to catch any potential paint spills. You want to set yourself up for success!
Step 2: Create Your Puffy Paint
If you've opted to make your own puffy paint, here’s a simple method to create that vibrant, fluffy texture:
- In a medium bowl, mix 1 cup of flour, 1 cup of water, 1 cup of salt, and 1 tablespoon of baking powder until smooth.
- Add food coloring to achieve your desired hues.
*Tip:* Be generous with color—this isn't the time to hold back!
- Transfer your mixture into your squeeze bottles or piping bags. This step will make your painting process much cleaner and more fun.
Step 3: Prepare Your Canvas
While your puffy paint is resting, take your black construction paper and cut it into pieces the size of your desired canvas. Black provides a stark contrast for those colors to pop!
Make sure your pieces are flat—any creases could disrupt the flow of the paint later.
Step 4: Design Your Fireworks
Now comes the exciting part! Using your freshly made puffy paint, start creating!
- Hold your piping bag or squeeze bottle at an angle close to the canvas for better control.
- Start with a small dot at the center of your firework explosion; this will help give depth.
- From the center, draw lines outward to create the “explosion” effect. You can do short, quick strokes for smaller fireworks or long sweeping strokes for big bursts.
- Experiment with layering different colors. For example, start with yellow at the center, then blue, and top it off with white for an ethereal glow.
Step 5: Let it Dry or Bake It
After you're happy with your fireworks design, it's time to let them dry. If you used homemade puffy paint and want it to be more durable:
- Preheat your oven to 350°F (175°C).
- Place your painted canvas or cardstock on a baking sheet.
- Bake for about 30 minutes. This helps the power of the paint rise and set, creating the puffy effect!
Common Pitfalls
- Paint is Too Thin: If your puffy paint is too runny, add an extra tsp of flour to help achieve that thick consistency.
- Baked Too Long: Keep an eye on your work in the oven as over-baking could make your fireworks lose their puffy character.
*Tip:* Test your first batch on a scrap piece of paper before committing to a final design.
Step 6: Display Your Masterpiece
Once your puffy painted fireworks are completely dry and cooled, it’s time to show off your work! You can mount them on your wall, use them as decorations for parties, or even turn them into greeting cards for a creative touch.
*Personal Anecdote:* I recall making these with my niece for the Fourth of July last year. We spent hours giggling over the colors we used, and her delightful laughter each time she saw her creations ‘explode’ on the page brought so much joy. Seeing her light up at the end result was a significant reminder of why I love crafting!
Creative Variations and Ideas
Feeling adventurous? Here are a few fun variations to try out:
- Glitter Finishing Touch: Before the paint dries, sprinkle some glitter on top to make your fireworks sparkle!
- Glow-in-the-Dark Paint: Use glow-in-the-dark paint for nighttime fun.
- Mixed Media: Incorporate glitter, sequins, or even stickers into the design to enhance textures.
—
Making Puffy Painted Fireworks has been one of my favorite crafting experiences, and I hope you don’t just make memories through this craft, but also create something you can cherish! Share your painted masterpieces with friends or online—a great way to inspire others to join in the fun, too!
Now go grab those supplies and enjoy the process of creativity. Happy painting! 🎨✨