How to Make Painted Strawberry Rocks: A Step-by-Step Guide for Crafters of All Levels
Hello, fellow crafting enthusiasts! If you've stumbled upon this article, you’re likely curious about the delightful world of painted strawberry rocks. As a long-time crafter who has found immense joy in transforming simple stones into charming garden decorations, I’m thrilled to share my process with you.
What Are Painted Strawberry Rocks?
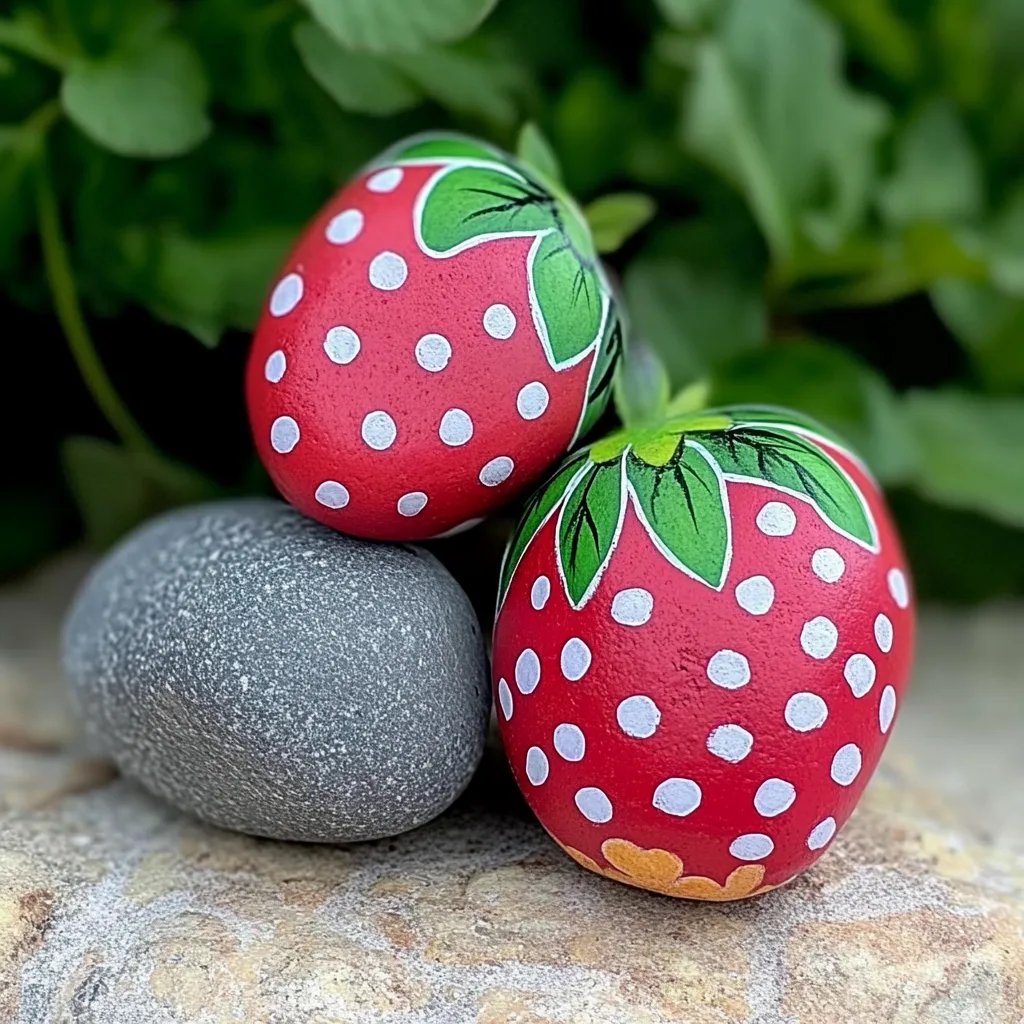
Painted strawberry rocks are exactly what they sound like—rocks adorned with vibrant and whimsical designs that mimic the appearance of strawberries. Not only are they visually appealing, but they also serve various purposes: as garden decorations, thoughtful gifts, or even playful markers in your flower beds. Their popularity has surged due to social media showcasing stunning rock art, and it’s a trend that’s perfect for all ages. Whether you’re a seasoned artist or a beginner looking for a fun project, painted strawberry rocks are an excellent way to express your creativity.
Why You Should Try This Craft
There’s something incredibly satisfying about creating art from nature! Painting rocks allows you to connect with your surroundings, reclaim a bit of outdoor charm, and engage in a meditative crafting process. Plus, they can brighten spaces, evoke smiles, and even inspire others to join in the crafting fun—who wouldn’t want to share a little joy?
Materials You'll Need
Before we dive into the tutorial, let’s prepare by gathering everything you’ll need:
- Smooth river rocks – Look for stones that are relatively flat and at least 3 inches wide; they’ll be easier to paint.
- Acrylic paints – Red, green, white, and black are essential for our strawberry design. You can find these at local craft stores or online.
- Paintbrushes – A variety of sizes will help you achieve different details; a larger flat brush, a round brush, and a fine detail brush work best.
- Palette or plate – This is where you’ll mix your colors.
- Sealant – A clear spray or paint sealant will protect your rocks from the elements if you’re placing them outdoors.
- Water and paper towels – For cleaning brushes and wiping excess paint.
- Pencil – For sketching your design on the rock before painting (optional).
Tip: If you want to experiment with varying textures, consider using non-toxic modeling paste or sponges.
Step-by-Step Tutorial: Creating Your Painted Strawberry Rocks
Step 1: Preparing Your Workspace
Set up a clean and comfortable crafting area. Lay down newspapers or a plastic tablecloth to protect your surfaces. Make sure you have a small cup of water and a paper towel nearby for easy cleanup.
Why does this matter? A tidy workspace not only keeps you organized but also allows you to focus on your creative process without distractions.
Step 2: Selecting and Cleaning Your Rocks
Choose stones that are smooth and have a good surface for painting. Wash them with water to remove any dust or dirt, and let them dry completely.
Tip: If your rock is particularly porous, consider applying a base coat of white acrylic paint. This can enhance the vibrancy of the top colors you’ll be using.
Step 3: Sketching Your Design
Using a pencil, lightly sketch the outline of your strawberry on the rock. This step is optional, but it’s especially helpful if you’re nervous about painting freehand.
What could go wrong? If your sketch looks off, don’t hesitate to erase and redraw—remember, it’s all part of the creative process!
Step 4: Painting the Base Color
Grab your red acrylic paint and your larger flat brush. Start painting the main body of the strawberry, using even, smooth strokes. Aim for full coverage.
Why this step matters: A solid base color provides the foundation for your design and will make your strawberry rock visually striking.
Step 5: Adding Details
Once the base coat is dry, use a fine detail brush and black paint to add seeds to your strawberry. Just small dots will do! After that, switch to green paint for the leaves and the stem.
Insight: Varying the sizes and placements of your dots makes them appear more natural—so don’t stress about being perfect!
Step 6: Final Touches
For an artistic flair, you might want to add white highlights to the seeds and the leaves using a tiny round brush. This will give your strawberry rock a more three-dimensional feel.
What could go wrong? If you accidentally make a mistake, don’t panic! Just let the paint dry and paint over it with your base colors.
Step 7: Seal Your Creation
Once all your paint is dry, it’s time to seal your rock with your chosen sealant. This is crucial if you’ll expose your artwork to rain or sun—it preserves your hard work!
Safety Warning: When working with sealants in a spray can, make sure to do this in a well-ventilated area and wear a mask to avoid inhaling any fumes.
Personal Insights and Tips
Creating painted strawberry rocks has been a calming and fulfilling hobby for me. There’s joy in experimenting with different colors and designs, making each stone uniquely yours. I often find myself incorporating other themes—like watermelon rocks or sunflower designs—into my collection.
Alternative Methods and Creative Variations
Feel free to switch the design! Not everyone loves strawberries, and that’s perfectly okay. Try painting tropical fruits, flowers, or even patterns like polka dots or stripes. Use neon paints for a bright summer vibe, or pastel colors for a soft, whimsical feel.
Conclusion
I hope this guide to making painted strawberry rocks provides you with the inspiration and confidence to embark on your crafting journey. Rock painting is a beautiful way to express individuality while enjoying a relaxing pastime. Remember, as with any creative endeavor, it’s the process that counts, so have fun with it!
Happy crafting! I can’t wait to see what stunning painted strawberry rocks you create. Don’t forget to share your masterpieces on social media and inspire others to unleash their inner artist.