How to Make Neon Pink Candy Apples: A Sweet and Colorful Crafting Adventure
Hello, fellow crafters! Today, I am excited to share my experience on how to make Neon Pink Candy Apples—vibrant, sugary delights that are sure to turn heads at any gathering. Whether you’re planning a birthday party, a Halloween event, or just want to add a pop of color to your dessert table, these eye-catching candy apples are a fun project that allows you to flex your creativity.
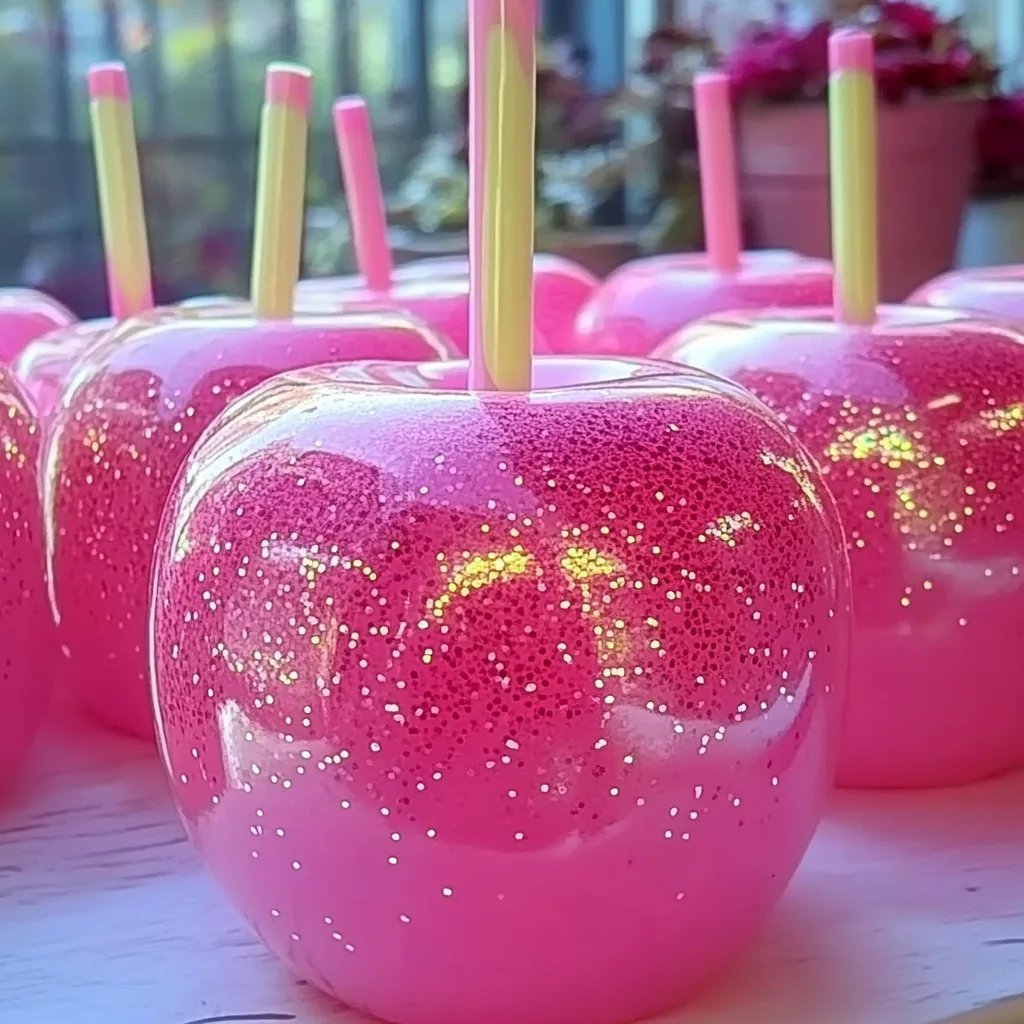
What Are Neon Pink Candy Apples?
Candy apples, also known as toffee apples, are coated in a hard, glossy candy shell. Traditionally, they’re made using simple ingredients like sugar, corn syrup, and water, but the addition of neon food coloring elevates these treats into something extra special. They’re not just confections; they're also a visual feast that captures the spirit of celebration!
Preparing neon pink candy apples is an enjoyable crafting experience that also doubles as a delicious snack. And let me tell you, they’re perfect for a variety of occasions—think parties, fairs, or even just a fun afternoon at home with the kids. Plus, who can resist that gorgeous color?
Gathering Your Materials
Before we dive into the steps, let’s gather the materials you’ll need. Here’s a comprehensive list:
For the Candy Apples:
- 6 medium-sized apples (I prefer Granny Smith for their tartness)
- 1 cup granulated sugar
- 1/2 cup corn syrup (to add shine and prevent crystallization)
- 1/2 cup water
- 1/2 teaspoon neon pink gel food coloring (you can vary this based on how vibrant you want the color)
- 1/4 teaspoon vanilla extract or flavored extract (optional for enhancing flavor)
- Wooden skewers or craft sticks (for holding the apples)
For Gear and Tools:
- Heavy-bottomed saucepan (to help control the heat)
- Candy thermometer
- Parchment paper or silicone baking mat (for cooling)
- Cooking spray or butter (to avoid sticking)
- Heat-resistant gloves (for safety)
- Optional: sprinkles or edible glitter for decoration
Step-by-Step Tutorial
Step 1: Preparing the Apples
First things first—clean your apples! I like to wash them thoroughly under cool water to remove any wax. This is essential as it helps the candy coating adhere better. Once cleaned, dry them completely with a towel.
Tip: Leaving a little moisture on the apples can cause the candy coating to become sticky, which we definitely want to avoid.
Next, remove the stems and insert a wooden skewer into each apple, pushing it about halfway through the fruit. This makes it easier to dip and handle.
Step 2: Making the Candy Coating
In a heavy-bottomed saucepan, combine sugar, corn syrup, and water. Place the saucepan over medium heat, stirring constantly until the sugar dissolves completely. This step is crucial: if you don’t dissolve the sugar fully, your candy might crystallize later on.
Next, attach your candy thermometer to the side of the pan and allow the mixture to come to a boil. Don’t stir once it starts boiling—this can cause unwanted crystallization.
Warning: Be cautious, as the syrup can get extremely hot. Keep kids at a safe distance!
Step 3: Reaching the Right Temperature
You're aiming for a temperature of 300°F (hard crack stage). This is where the magic happens, so keep an eye on that thermometer! Swirling the pan gently is fine, but sticking a spoon in can lead to problems.
Once the temperature is reached, remove it from the heat immediately and allow it to cool for about 10 seconds. While the syrup is still bubbling, add the neon pink gel food coloring and vanilla extract if using. Stir quickly to combine—you’ll see the color come alive!
What Could Go Wrong: If you see crystallization forming on the sides of your pan, use a damp brush to wash it down while the sugar cooks.
Step 4: Dipping the Apples
Now comes the fun part! Place a piece of parchment paper or a silicone mat on your work surface. Dip each apple into the syrup, twirling it to coat thoroughly but quickly (about 5 seconds). Allow excess syrup to drip back into the pan.
Tip: If the candy coating seems too thick or not coating well, your syrup might be too hot or too cold—adapt accordingly!
Once dipped, place the apple on the parchment paper. If you want to add sprinkles or edible glitter, do it while the coating is still warm so that the decorations stick nicely.
Step 5: Letting Them Cool
Let the candy apples sit at room temperature until the coating hardens—this usually takes about 30 minutes. Resist the urge to touch them during this time to ensure they set properly.
Step 6: Serving and Enjoying
Once set, your neon pink candy apples are ready to be served! Display them on a cake stand or food display for a stunning centerpiece.
Creative Variations
Feel free to get creative! Here are a few ideas:
- Flavor Variations: Incorporate unique flavored extracts like almond or raspberry for an exciting twist.
- Toppings: Instead of plain sprinkles, consider using crushed nuts, coconut flakes, or flavored sugars that match your theme.
- Drizzles: Once the candy coating has set, drizzle some melted chocolate over the top for an eye-catching and tasty contrast.
Final Thoughts
Creating neon pink candy apples is an exciting blend of cooking and craft, and I hope this guide inspires you to give it a try! Remember, practice makes perfect. Even if your first batch isn't picture-perfect, it’ll still taste amazing.
Keep experimenting with colors, flavors, and decorations, making each batch uniquely yours. Most importantly, have fun and enjoy the sweet reward of your hard work!
And when you’ve created your neon pink candy apples, be sure to share your creations on social media. I’d love to see how your endeavors turned out!
Happy crafting! 🍏✨