How to Make Ice Chalk Cubes: A Comprehensive Guide
Hello, fellow crafters! Today, I’m excited to share a fun and colorful project that will not only spark joy but also inspire creativity in people of all ages: Ice Chalk Cubes! This delightful project combines art, science, and a bit of magic into a crafty concoction that can be used to paint vibrant colors on sidewalks, walls, and driveways. Whether you’re planning a summer activity for the kiddos, hosting a community event, or simply looking for a mindful way to unleash your creativity, Ice Chalk Cubes are the perfect medium to express yourself.
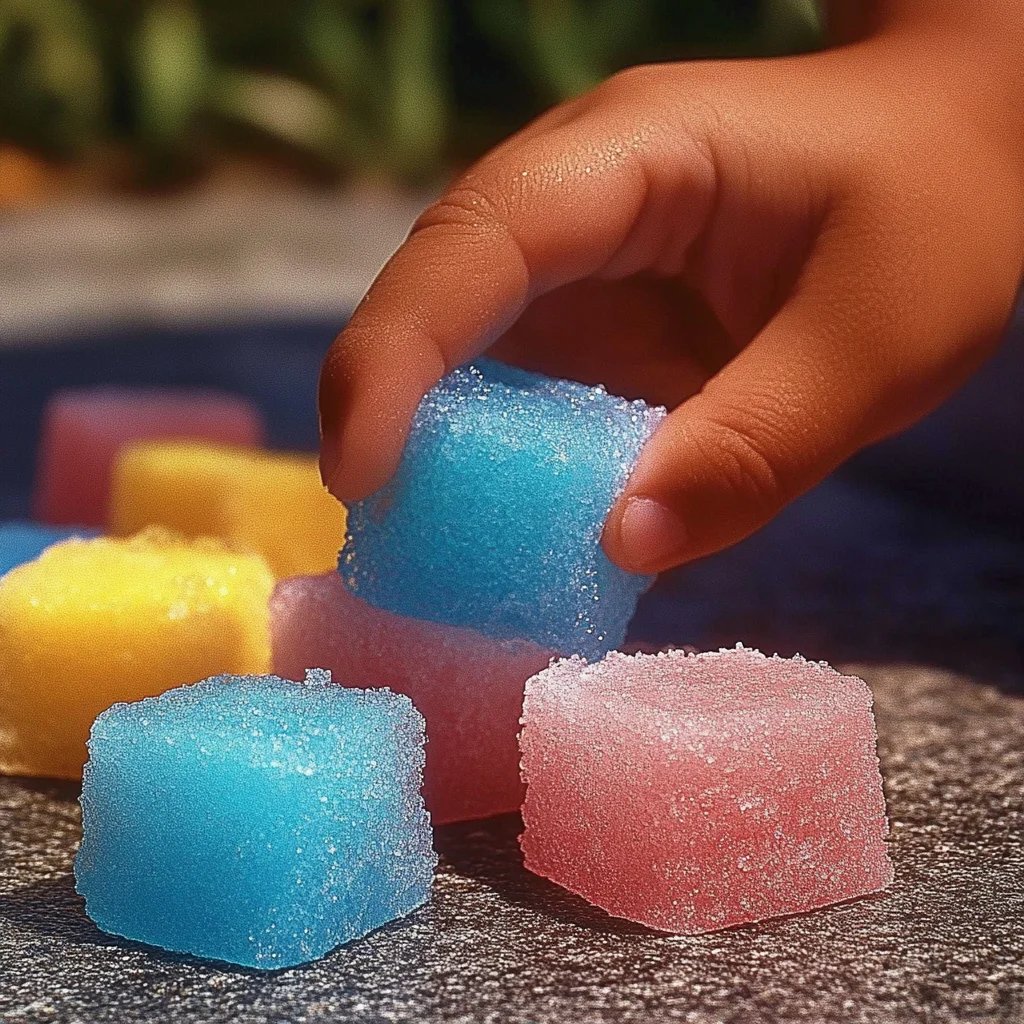
What Are Ice Chalk Cubes?
Ice Chalk Cubes are beautifully pigmented blocks of chalky ice that can melt onto surfaces, creating stunning artwork that brings color and life to outdoor spaces. Their popularity skyrocketed during the warmer months, perfect for kids who love to create art but want something a bit cooler (literally!). As they layer down colors, it's like watching a mini landscape unfold, making it an art experience unlike any other!
When to Use Ice Chalk Cubes
The best time to use Ice Chalk Cubes is fresh out of the freezer on a warm sunny day! They’re wonderful for artistic expression, group projects, or simply enjoying the outdoors. This project is also a great way to teach kids about color mixing, melting, and the changing nature of materials—perfect for a little hands-on science as well! So, gather your supplies and let’s dive into the making of these magical cubes!
Materials You Will Need
- Water: The primary ingredient.
- Food Coloring or Liquid Watercolors: For vibrant colors. Liquid watercolors are especially ideal because they offer richer pigments.
- Ice Cube Tray: Silicone ice cube trays work best for easier removal.
- Mixing Cups: For blending water and colors.
- Stirring Stick or Spoon: To mix the colors.
- Baking Sheet: To catch drips when the Ice Chalk Cubes melt during use.
- Optional: Salt, which can help the colors hold better on the surface.
Step-by-Step Tutorial
Step 1: Prepare Your Work Area
Start by selecting a clean, flat surface to work on. I recommend laying down some old newspaper or a drop cloth to catch any spills. Remember, crafting can get a little messy, and that’s all part of the fun!
Step 2: Mix Your Colors
Pour about half a cup of water into a mixing cup. Add a few drops of food coloring or liquid watercolors. Mix thoroughly with a stirring stick until you achieve your desired color intensity. Keep in mind that the colors will be slightly lighter once frozen, so don’t hesitate to go bold!
Why This Matters: Mixing your colors ahead of time ensures that you have a uniform and vibrant color throughout your Ice Chalk Cubes.
Step 3: Fill the Ice Cube Tray
Carefully pour the colored water into the ice cube tray. Fill each compartment about three-quarters full, leaving some space for expansion as the water freezes. Repeat this for each color you’ve created and have fun experimenting with mixing colors!
Tip: To make your Ice Chalk Cubes even more unique, consider creating gradient colors. You can pour different shades into the same compartment for a marbled effect.
Step 4: Freeze the Cubes
Place your filled ice cube tray in the freezer and allow the cubes to freeze completely. This usually takes about 4-6 hours, but I’ll let you in on a little secret: they’re best left overnight to ensure they’re frozen solid.
Mistake to Avoid: If the colored water spills or mixes in the tray, you might end up with a muddy color instead of distinct hues. Keep a steady hand while pouring!
Step 5: Remove the Ice Chalk Cubes from the Tray
Once the cubes are frozen, gently twist the silicone tray or run warm water over the bottom to loosen the cubes. Be patient; a little gentle bending will help release them without breaking!
Step 6: Get Creative!
Find an outdoor space where you can let your imagination run wild. Set up your baking sheet to catch any drips, or use the chalk directly on sidewalks, driveways, and walls. As the chalk melts, it will leave vibrant colors beautifully painted onto the surfaces.
Troubleshooting Tips
- If your Ice Chalk Cubes won’t come out of the tray: Run warm water on the outside of the tray. This will help them to slide out.
- If colors are too light: Next time, add more food coloring or switch to a thicker liquid watercolor.
- If the chalk doesn’t leave a mark: Try adding a pinch of salt to the mixtures before freezing; it may enhance the chalk's abilities to stick!
Safety Warnings
- Always supervise children when using these materials, especially outdoors. And that brings us to the most important point—make sure you’re using non-toxic food coloring.
- If using liquid watercolors, check for any allergies beforehand.
Alternative Methods and Ingredient Substitutions
If you prefer a natural option, consider using fruit and vegetable purees (like beet juice for red or spinach for green) instead of food coloring. You might need to adjust the water ratio a bit, but it’s a fun way to get creative with what you have on hand.
Personal Anecdotes
I remember the first time I made Ice Chalk Cubes with my kids. We mixed up vibrant shades of red, blue, and yellow and spent an entire afternoon creating a colorful masterpiece on our driveway. It was such a joy to watch them experiment with blending colors and creating different shapes—this project has become an annual tradition in our household.
Creative Variations
- Swirls & Gradients: Experiment with swirling two colors together in the ice cube tray before freezing to create marble-like effects.
- Frozen Shapes: Use fun-shaped silicone molds instead of an ice cube tray for customized Ice Chalk shapes. Think hearts, stars, or any playful design!
- Chalk Paints: If you’re feeling adventurous, try adding a little corn starch to make a thicker mixture to create chalk paint for a different texture.
Conclusion
There you have it—your complete guide to making Ice Chalk Cubes! I hope you find joy in crafting, whether you’re working solo, crafting with family, or teaching friends how to make these little artistic wonders. Remember, the key is to experiment, have fun, and let your creativity flow.
Be sure to share your colorful creations on social media or with friends! I’d love to see how your Ice Chalk Cubes turned out. Happy crafting!