#How to Make Homemade Saltwater Taffy: A Sweet Adventure
Ah, homemade saltwater taffy! This chewy, delightful treat brings back memories of summer boardwalks, beach vacations, and childhood bliss. As I unwrap each piece, I can almost hear the sound of crashing waves and laughter filling the air. Saltwater taffy is not just a nostalgic candy; it’s a labor of love that’s bursting with creativity, customization, and a sprinkle of magic.
Why Saltwater Taffy?
You might wonder, why is this confection so beloved? Originating from the charming seaside towns of the United States, particularly Atlantic City, saltwater taffy is known for its unique chewy texture and mouthwatering flavors. It's not just a hit at carnivals or candy shops; it can also be made at home for special occasions or simply as a fun weekend project. Whether you’re looking to impress guests at a party, create homemade gifts, or just treat yourself, making saltwater taffy from scratch is incredibly rewarding.
Let’s dive into this delicious adventure and turn a few simple ingredients into a batch of taffy that will have everyone asking for seconds!
What You’ll Need
Before we start, it’s essential to get your ingredients and equipment ready. Trust me, being organized will make this process much smoother!
Ingredients:
- 2 cups granulated sugar
- 1 cup light corn syrup
- 1/2 cup water
- 1/4 teaspoon salt
- 1 teaspoon vanilla extract (or any other flavoring of your choice)
- 1 tablespoon unsalted butter (plus more for greasing)
- Food coloring (optional)
Equipment:
- Heavy-duty saucepan
- Candy thermometer
- Wooden spoon or spatula
- Silicone baking mat or parchment paper
- Greased countertop or cutting board
- Kitchen scissors or a knife for cutting
Step-by-Step Guide: Making Saltwater Taffy
Step 1: Prepare Your Workspace
First things first—safety and cleanliness! Grease your countertop with butter and set out your silicone mat or parchment paper nearby. Making candy can get sticky, and you’ll want to quickly transfer your taffy once it’s cooled.
Step 2: Combine Ingredients
In your heavy-duty saucepan, mix together the sugar, corn syrup, water, and salt. Stir over medium heat until the mixture comes to a full boil.
Why It Matters: This is the foundation of your taffy. Ensuring no sugar crystals remain means achieving that perfect chewy texture. If you notice sugar crystals on the sides of the pan, don’t hesitate to wash them down with a wet pastry brush.
Step 3: Cook to Temperature
Insert your candy thermometer into the mixture and continue boiling without stirring until it reaches the soft-ball stage, which is about 240°F (115°C).
What Could Go Wrong: Undercooking will result in a sticky mess instead of chewy taffy, while overcooking can make it hard. Keep a close watch, especially towards the end!
Step 4: Remove from Heat
Once it hits the right temperature, remove the pan from the heat. Stir in the vanilla extract and butter quickly, and then pour the mixture onto your prepared surface.
Step 5: Cool and Knead
Let the candy cool for about 10 minutes. Then, once it’s cool enough to handle, grease your hands with butter and begin to knead the taffy. This step is crucial as it gives the taffy its distinctive texture.
Personal Anecdote: I remember the first time I made taffy; I was so excited, I forgot to knead it for long enough. The result? More of a sweet goo than candy! Knead it until it’s smooth and elastic—about 10 minutes usually does the trick.
Step 6: Pull the Taffy
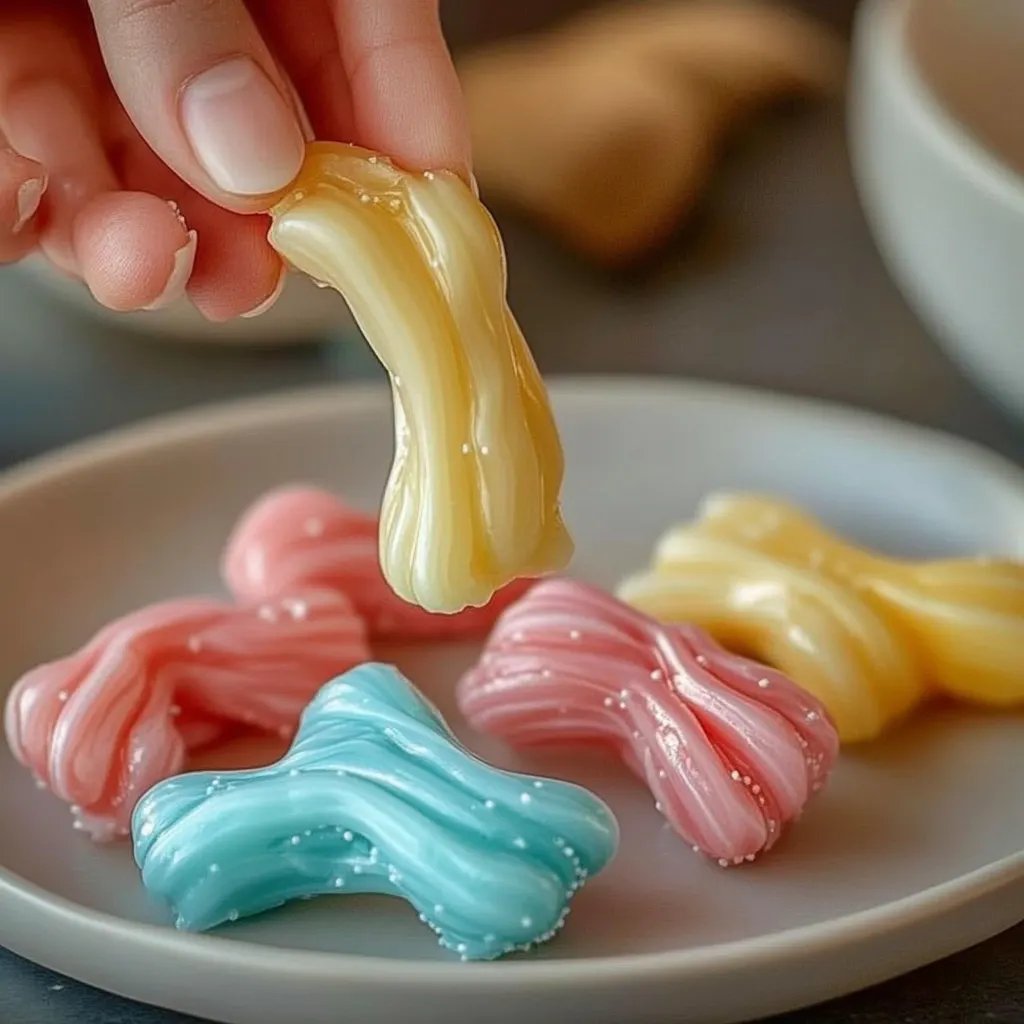
Now comes the fun part—pulling! Stretch the taffy and fold it over itself repeatedly. This process aerates the candy and contributes to its lovely texture. If you’re feeling adventurous, this is a great time to add some food coloring and divide the taffy into portions for different colors.
Step 7: Shape the Taffy
Once you’ve pulled the taffy into a shiny, smooth ball, form it into a log shape about 1-inch in diameter. You can also decided to twist different colored pieces together for a marbled effect.
Step 8: Cut and Wrap
Use kitchen scissors or a knife to cut your taffy into small pieces, approximately 1-inch long. Wrap each piece in wax paper or parchment to keep them fresh.
Creative Variations: Why stop at vanilla? Try out different flavors like peppermint, watermelon, or even a touch of cinnamon! Just make sure to keep your flavorings balanced—too much can easily overpower the delicate taffy.
Tips and Safety Warnings
- Temperature Control: A reliable candy thermometer is essential. Without it, you might have a sticky mess or hard candy.
- Watch Your Hands: The candy can get very hot, so be cautious when handling it! Use heat-resistant gloves if you need to.
- Don’t Rush the Kneading: It’s tempting to stop early when you see the taffy getting smooth, but patience is critical for achieving that perfect chewy texture.
Storing Your Taffy
You’ll want to keep your homemade taffy stored in an airtight container at room temperature. It can last several weeks, but good luck keeping it around that long—everyone will want a taste!
Final Thoughts
Making homemade saltwater taffy has been truly one of my favorite kitchen projects. Not only is it delicious, but it also brings joy and creativity into the kitchen. The process can be a bit tricky at times, but don’t shy away from challenges. Every small mistake is just a step towards perfecting your craft—and hey, even if something goes a little haywire, you still have something sweet to enjoy!
Now, roll up your sleeves, bring out those sprinkles of creativity, and embark on your sweet adventure. I can’t wait for you to make your own saltwater taffy—may your candy be cheerful, chewy, and absolutely delicious!