How to Make Homemade Kinetic Sand: A Crafting Adventure
Hello, fellow crafters! Today, I'm excited to share with you my journey into the world of homemade kinetic sand—a wonderfully fun crafting project that will bring out your inner child. You might be thinking, "What is kinetic sand?" Well, let me tell you, it’s a mesmerizing sensory experience that has gained immense popularity among both children and adults alike.
Kinetic sand is a magical substance that holds shape like wet sand but doesn’t dry out. It flows through your fingers, is easily moldable, and creates an incredibly satisfying texture that kids (and adults) love to squish and shape. Whether you're creating elaborate sand sculptures or simply looking for a calming sensory experience, kinetic sand is perfect for a variety of occasions—from rainy day activities to stress relief after a long week. Ready to dive in? Let’s get crafting!
Why Make Homemade Kinetic Sand?
Let me start by saying, making your own kinetic sand is not only cost-effective, but it’s also a fun and rewarding project. You get to choose your colors, adjust the texture to your liking, and even add scents or glitter for that extra touch of creativity. Plus, it’s a fantastic activity to share with kids; you’ll find that they’re thrilled to participate in the entire process.
Now that you’re on board, let’s gather our materials. I promise you, they’re all easily accessible!
What You’ll Need:
- Sand: Look for fine, clean sand. I usually use play sand, readily available at any home improvement store.
- Cornstarch: This helps create that signature kinetic feel.
- Water: Just enough to dampen the sand.
- Vegetable Oil: This adds that silky texture we love.
- Food Coloring (optional): Use this to personalize your kinetic sand with fun colors.
- Mixing Bowl: To combine everything.
- Spoon or Spatula: For mixing.
- Containers for storage: If you want to keep your sand fresh.
Step-by-Step Tutorial: Making the Perfect Kinetic Sand
Step 1: Gather Your Ingredients
Before we dive in, making sure you have everything at hand is crucial. Lay out your sand, cornstarch, water, oil, and food coloring. I find it helps to be organized; a clean workspace can make all the difference in your crafting experience.
Step 2: Combine Sand and Cornstarch
Start by pouring 2 cups of sand into your mixing bowl. Next, add 1 cup of cornstarch. This is where the magic begins! The cornstarch binds with the sand, giving it the unique texture we associate with kinetic sand.
Why It Matters: The ratio of sand to cornstarch is crucial. Too much sand will lead to a grainy texture, while too much cornstarch can make it too soft.
Tip: If there’s clumpy cornstarch, you can sift it before adding it to the sand for an even smoother mix.
Step 3: Add Water and Oil
Now for the fun part! Gradually add 1 cup of water to your sand and cornstarch mixture. Stir well—this is an experiment in patience as you work the water into the dry ingredients. The mix may seem too dry at first, but trust the process!
Next, drizzle in 2 tablespoons of vegetable oil. This is what gives your kinetic sand that silky, satisfying texture.
Common Pitfall: If at any point your mixture seems too sticky, you can remedy this by adding a little more sand. If it feels too crumbly, a little more water helps.
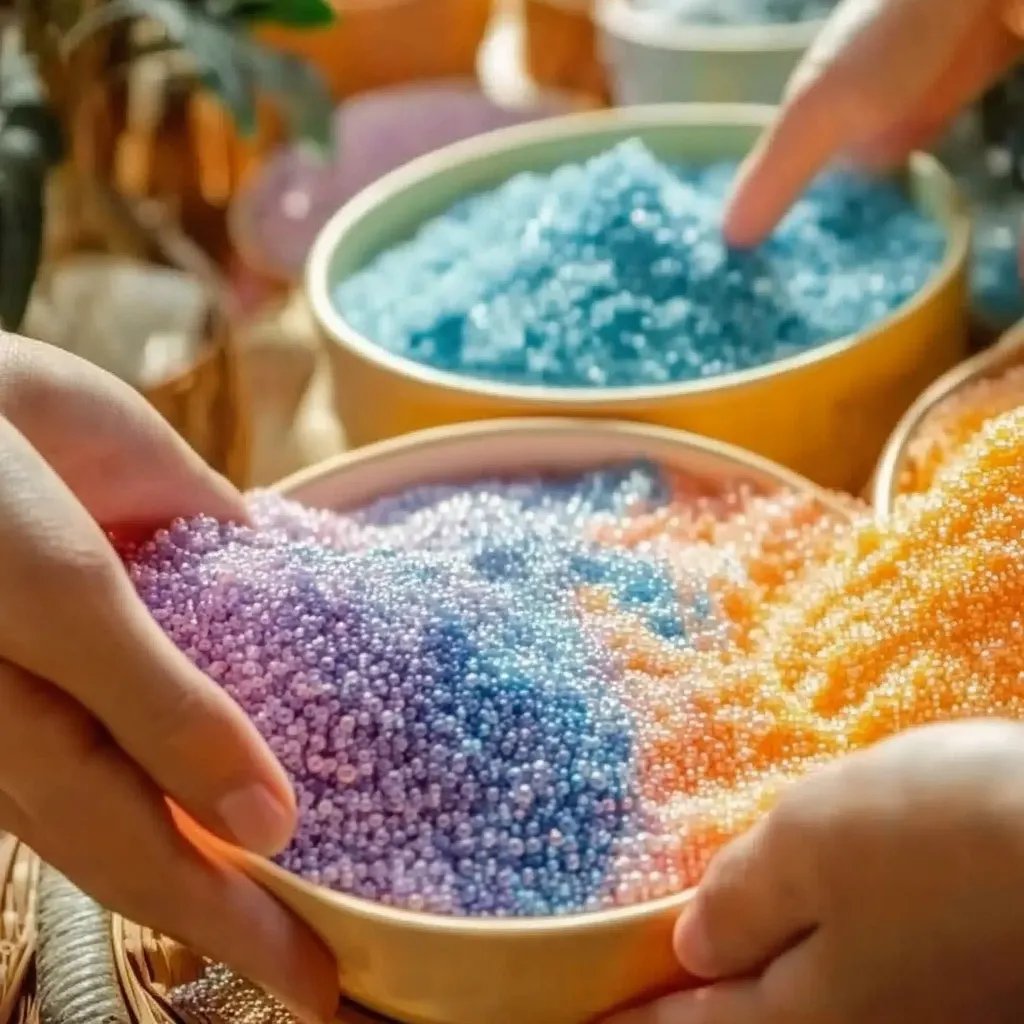
Step 4: Colour Your Sand
If you want to jazz up your kinetic sand, this is the perfect time to add food coloring. You can put a few drops into your mixture and stir until it's evenly distributed.
Personal Anecdote: I once tried making a vibrant rainbow batch by dividing the dough into sections and adding different colors. The kids loved the process, and it turned into a colorful crafting activity!
Step 5: Mix Until Smooth
Take a moment to really get your hands in there. It’s the best part! Kneading the mixture until it’s well combined is crucial. If it feels chunky, keep mixing until you reach a smooth consistency.
Safety Warning: While the materials are generally safe, ensure that younger kids don't ingest any of the ingredients.
Step 6: Store Properly
Once you’re pleased with your creation, it’s time for storage. I recommend keeping your kinetic sand in airtight containers. This will keep it fresh and ready for play.
Troubleshooting Tips
- Too Sticky? Add more sand; a little bit goes a long way.
- Too Dry? A few drops of water will bring it back to life.
- Too Grainy? Ensure your sand didn’t have larger particles; fine sand is key for that smooth texture.
Creative Variations: Let Your Imagination Run Wild
Now that you’ve mastered the basics, why not get creative? Here are a few variations that I’ve enjoyed:
- Scented Kinetic Sand: Add a few drops of essential oils during the mixing process for a delightful smell!
- Sparkling Sand: Mix in some fine glitter for a bit of sparkle; kids will love it.
- Themed Colors: For holidays or events, create color themes like red and green for Christmas or orange and black for Halloween.
The Joy of Kinetic Sand
In conclusion, making homemade kinetic sand is a wonderful way to bond with children and unleash your creativity. It’s incomparable to store-bought versions—both in quality and in the joy of creating something from scratch. Plus, watching your kids squish, mold, and play with their unique creation is undoubtedly one of life’s simple pleasures.
So, roll up your sleeves and dive into the world of kinetic sand! You may just find that you enjoy it as much as the children do. Happy crafting!