How to Make Glow-in-the-Dark Cotton Candy Bombs: A Step-by-Step Guide
Hello there, fellow crafters! Today, I’m thrilled to share an exciting and whimsical project that has taken the internet by storm: Glow-in-the-Dark Cotton Candy Bombs! Whether for a fun party favor, a unique Halloween treat, or an eye-catching addition to a kids' birthday bash, these glowing sweet delights are guaranteed to add a spark of magic to any gathering. Plus, they’re surprisingly easy to make with a bit of patience and creativity. So, let’s dive in!
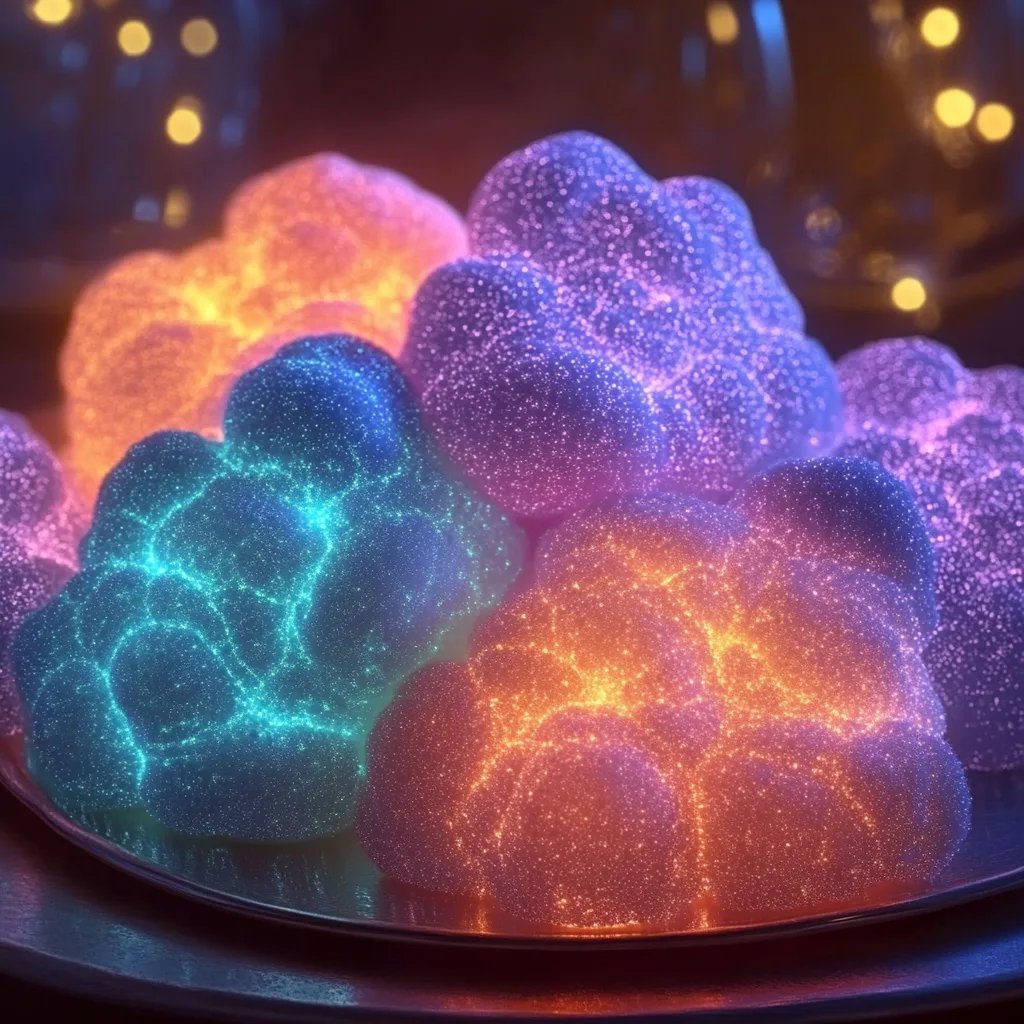
What Are Glow-in-the-Dark Cotton Candy Bombs?
Glow-in-the-dark cotton candy bombs are delightful little edible spheres filled with fluffy cotton candy and a twist of luminescence from safe glow-in-the-dark ingredients. When exposed to UV light or just a dark room, they light up with a soft ethereal glow, making them perfect for late-night gatherings or spooky celebrations. In my crafting journey, these bombs have become a crowd favorite because they spark joy and fascination – who doesn’t adore that sugary, fairy-like glow?
Why Are They Popular?
The popularity of these whimsical treats stems from their striking appearance, their nostalgia for childhood, and the sheer joy they bring when shared with others. They allow one to take a trip down memory lane, evoking fond thoughts of cotton candy stalls at carnivals and fairs. Moreover, they make fantastic gifts, party favors, or a unique surprise – especially when you want to impress family and friends!
A Brief Word on Safety
Before we get started, please remember that the glowing powder (also known as phosphorescent powder) used in this project should be food-safe! I highly recommend researching brands thoroughly to ensure you’re using a non-toxic, edible version. It's best to opt for powdered sugar candy for safety rather than glow sticks or other non-edible products.
Materials You’ll Need
Oh, let’s gather our supplies! You’ll need:
- Cotton Candy (store-bought or homemade)
- Glow-in-the-Dark Powder (food-safe)
- Hard Candy Shell (homemade or store-bought lollipops, or a mold)
- Microwave-Safe Bowl
- Silicone Molds (for shaping your bombs, optional)
- Candy Coloring (if you want a colorful touch)
- Plastic Wrap (for wrapping the bombs)
- Optional: Decorative Bags, Twines, or Labels for presentation
Alternative Ingredients
If you're looking for variations:
- Substitute cotton candy with colored sugar or flavored powdered sugar for an exciting twist.
- Use Jolly Ranchers or any other hard candy to create a crunchy outer shell.
Step-by-Step Tutorial
Step 1: Create the Cotton Candy
If you’re making your cotton candy, start by spinning it according to your candy machine’s instructions. Here’s my pro tip: make sure to use granulated sugar (preferably flavored or colored) that is free of any additives for the best results. This step is all about locking in that sugary delight!
Common Pitfall: If you’re not spinning and just bagging cotton candy, it can become flattened or lose its fluffiness. Solution: Store it in an airtight container until you’re ready to use it.
Step 2: Infusing with Glow-in-the-Dark Powder
Take your freshly made (or store-bought) cotton candy and gently mix in 1-2 teaspoons of food-safe glow-in-the-dark powder. Make sure to do this in a bright area to avoid negative exposure to the powder. The glow should be subtle, so be cautious with your measurements!
Note: Too much powder can make your cotton candy grainy and less fluffy. If you think you've added too much, simply add a little more cotton candy to balance it out!
Step 3: Prepare the Hard Candy Shell
You can either make your hard candy shells at home or utilize pre-made lollipops for convenience. To make your own:
- Combine: In a microwave-safe bowl, combine sugar, corn syrup, and a little water.
- Heat: Microwave the mixture in intervals, stirring in between until it reaches 'hard crack stage' (about 300°F).
- Add Glow Powder: Once heated, let it cool slightly before incorporating a pinch of glow-in-the-dark powder, then pour it into your molds.
Pro Tip: If you're unsure about the temperatures, using a candy thermometer will work wonders!
Step 4: Assemble the Bombs
After your shells have set:
- Fill: Carefully pop your candy shells out of the molds. Fill half of each shell with the glow-infused cotton candy.
- Seal: Warm the edges of the remaining half shell briefly and press it onto the filled side to secure them together. You can also use a bit of melted candy to glue the halves!
Potential Mistake: If they don’t stick well, check your heating—too hot or too cold can make a difference. Just reheat gently!
Step 5: Final Touches
Once the bombs are assembled, you can wrap them in plastic wrap or put them in decorative bags. I love to tie a little twine around them or attach a lovely label for a personal touch.
Tips & Creative Variations
- Flavor Variations: Experiment with flavored cotton candy. Think watermelon, blue raspberry, or sour apple!
- Colorful Additions: You can add colored sugar along with the glow powder for a vibrant look.
- Presentation: Display these bombs in clear jars with LED lights to create instant party vibes.
Conclusion: Enjoying the Glow!
And there you have it! Glow-in-the-dark cotton candy bombs that are not just a treat but a delightful spectacle. You can add them to goodie bags, use them as party centerpieces, or perhaps challenge your guests to eat them in the dark for added fun!
Remember, crafting should be fun, and every step is an opportunity to express your creativity. So, gather your materials, roll up your sleeves, and enjoy the whimsical process of creating these magical little treats. I can’t wait to hear how your glow-in-the-dark cotton candy bombs turn out – happy crafting!