How to Make Gel Air Fresheners at Home: A Complete Guide for Crafting Enthusiasts
Hello, dear crafters! If you're anything like me, you appreciate the delightful aroma of a freshly scented space. Air fresheners are an easy way to add a touch of fragrance to our homes. Today, I want to share my personal journey in crafting gel air fresheners—a simple, budget-friendly method that not only saves money but also allows you to customize scents that breathe life into your personal spaces.
Why Gel Air Fresheners?
Gel air fresheners have gained immense popularity over the years due to their effectiveness, longevity, and low maintenance. Unlike spray air fresheners, gel versions release a gentle aroma over time, providing a consistent and enjoyable scent that fills your room. From combating unwanted odors in your kitchen to creating a calming atmosphere in your bedroom, these little pots of joy can be used virtually anywhere—whether it's your home, office, or even your car!
The Allure of DIY
One of the best parts about making your own gel air fresheners is the ability to customize them. With natural ingredients, you have complete control over the scents and colors used. Plus, you can create variations with seasonal aromas that evoke memories or match the ever-changing moods of the environment. It's an affordable alternative to store-bought air fresheners and a fantastic activity that taps into your creative spirit!
Crafting Your Own Gel Air Fresheners: A Step-By-Step Tutorial
Now, let’s get into the nitty-gritty of creating your own gel air fresheners from scratch. You’ll be amazed at how easy and satisfying it is!
Materials You'll Need
- 1 cup water: Distilled water is preferred to avoid impurities.
- 1 tablespoon gelatin: This helps create the gel texture.
- 1 tablespoon salt: Acts as a preservative and helps retain moisture.
- Essential oils (10-30 drops): Choose your favorite scents; more oils = stronger fragrance.
- Food coloring (optional): For those who want a splash of color!
- Container: Small jars or decorative containers work beautifully.
- Stirring stick or spoon: For mixing ingredients.
- Small saucepan: For gentle heating.
Tip: Gather all your materials before starting to keep the process smooth and enjoyable!
Step-by-Step Instructions
- Heat the Water: Pour 1 cup of distilled water into a small saucepan and bring it to a gentle boil over medium heat. This step ensures that the gelatin dissolves smoothly without clumps. Be careful not to overboil!
- Add the Gelatin: As soon as the water is boiling, remove it from heat and gradually whisk in 1 tablespoon of gelatin. Stir continuously for 2-3 minutes until the gelatin completely dissolves.
What could go wrong? If you notice clumps, it's likely that the water wasn't hot enough. Don’t fret—just place it back on low heat while stirring until it’s fully dissolved.
- Add Salt: Mix in 1 tablespoon of salt, stirring until it’s thoroughly dissolved. This step is crucial as it extends the shelf-life of the gel air fresheners. Feel free to adjust the amount based on your container size!
- Essential Oils and Color: Now comes the fun part—adding fragrance! Start with about 10 drops of your chosen essential oils, then feel free to increase according to your scent preference. If you're feeling adventurous, combine different scents for a unique blend. If you desire color, add a drop or two of food coloring to achieve your desired look.
Safety Warning: Always use 100% pure essential oils; avoid synthetic fragrances for a healthier option.
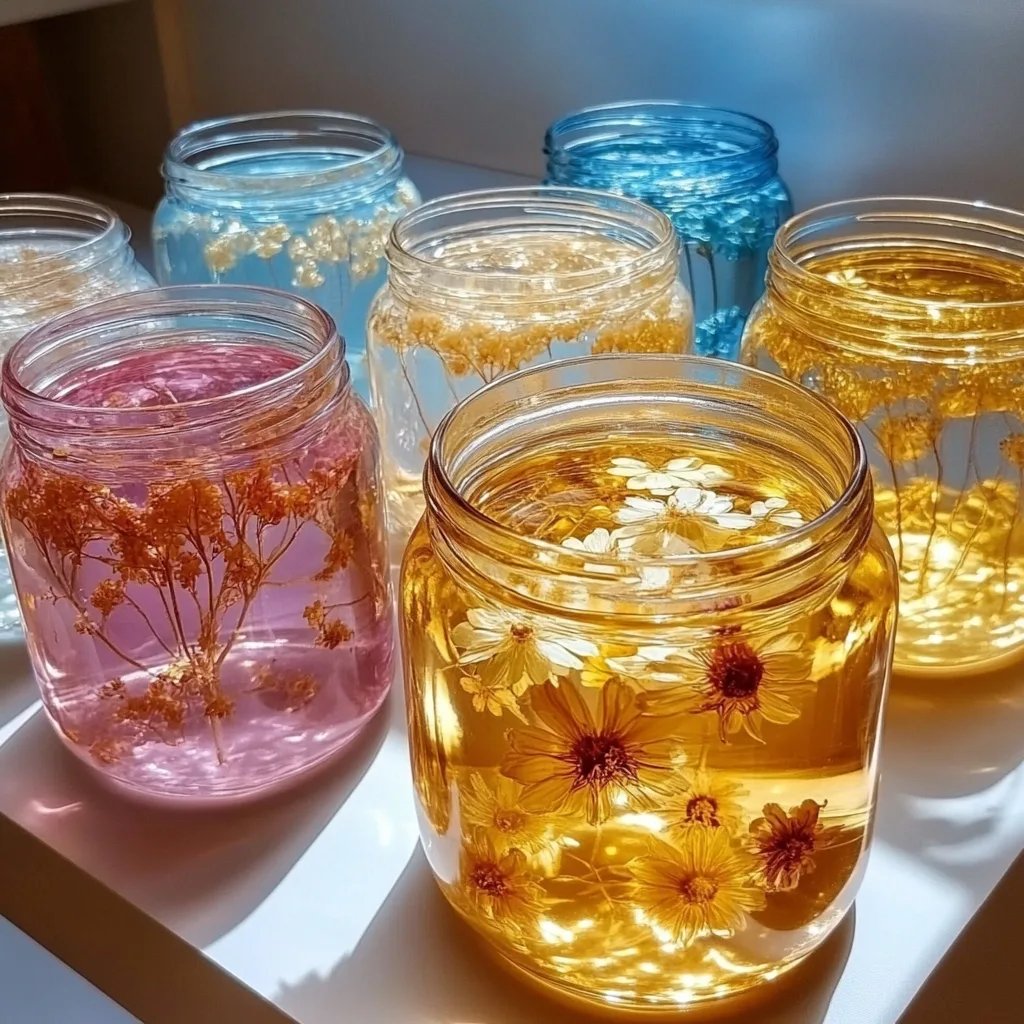
- Pour into Containers: Carefully pour your mixture into the containers. Allow them to cool at room temperature until the gel fully sets (usually a few hours). If using glass jars, be cautious—hot mixtures can break them!
Personal Anecdote: I once accidentally poured too hot a mixture into a mason jar and ended up with a huge crack! Lesson learned: let it cool slightly first.
- Finishing Touches: Once your gel air fresheners have set, you can place them anywhere in your home. I personally love putting them in our living room, bathroom, or even in the car!
Troubleshooting Common Issues
- Unset Gel: If your gel doesn’t set properly, it may be due to too little gelatin or not heating the water sufficiently. Simply remelt the gel and add a bit more gelatin, then re-pour into your containers.
- Overwhelming scent: If your air fresheners are too strong, you can dilute them by adding a bit of distilled water and gently heating to combine.
Tips for Success
- Experiment with Scents: Try mixing lavender with eucalyptus for a calming blend, or citrus with peppermint for a refreshing aroma. The possibilities are endless!
- Seasonal Scents: Reflect the seasons in your home with scents like cinnamon and apple in the fall or coconut and lime in the summer.
- Personalized Gift Ideas: Package your gel air fresheners in cute jars with decorative labels for thoughtful, personalized gifts!
Alternative Methods & Ingredient Substitutions
- Natural Preservatives: If you're looking for a completely natural approach, you can also substitute salt with a few drops of vitamin E oil, which acts as a preservative while adding some nourishing benefits to the air.
- Agar-Agar Instead of Gelatin: For a vegan alternative, you can replace gelatin with agar-agar. Use about 1 tablespoon of agar flakes to every cup of water, and follow the same steps.
Final Thoughts
Creating gel air fresheners at home is an enriching experience that not only beautifies your space but also empowers you with creativity and sustainability. I hope this guide has inspired you to embark on your own crafting journey. With just a few simple ingredients and a dash of creativity, you can turn your living space into a fragrant haven. Enjoy the process, and don’t hesitate to experiment until you find the perfect scent that resonates with you!
Happy crafting, and may your home always feel warm and welcoming! 🏡✨