How to Make Fluffy Pet Rocks: A Step-by-Step Guide to Crafting Your Own Cuddly Companions
As an experienced crafter and self-proclaimed rock lover, I can’t tell you how much joy I find in creating Fluffy Pet Rocks. These delightful little pals are not only fun to make but also serve as fantastic decorative pieces for your home or thoughtful gifts for friends and family. In this article, I will guide you through the entire process of crafting your own Fluffy Pet Rocks, sharing tips, tricks, and personal anecdotes along the way. By the end, you'll understand why this whimsical DIY project has gained popularity in recent years and how you can create your own version from the comforts of home.
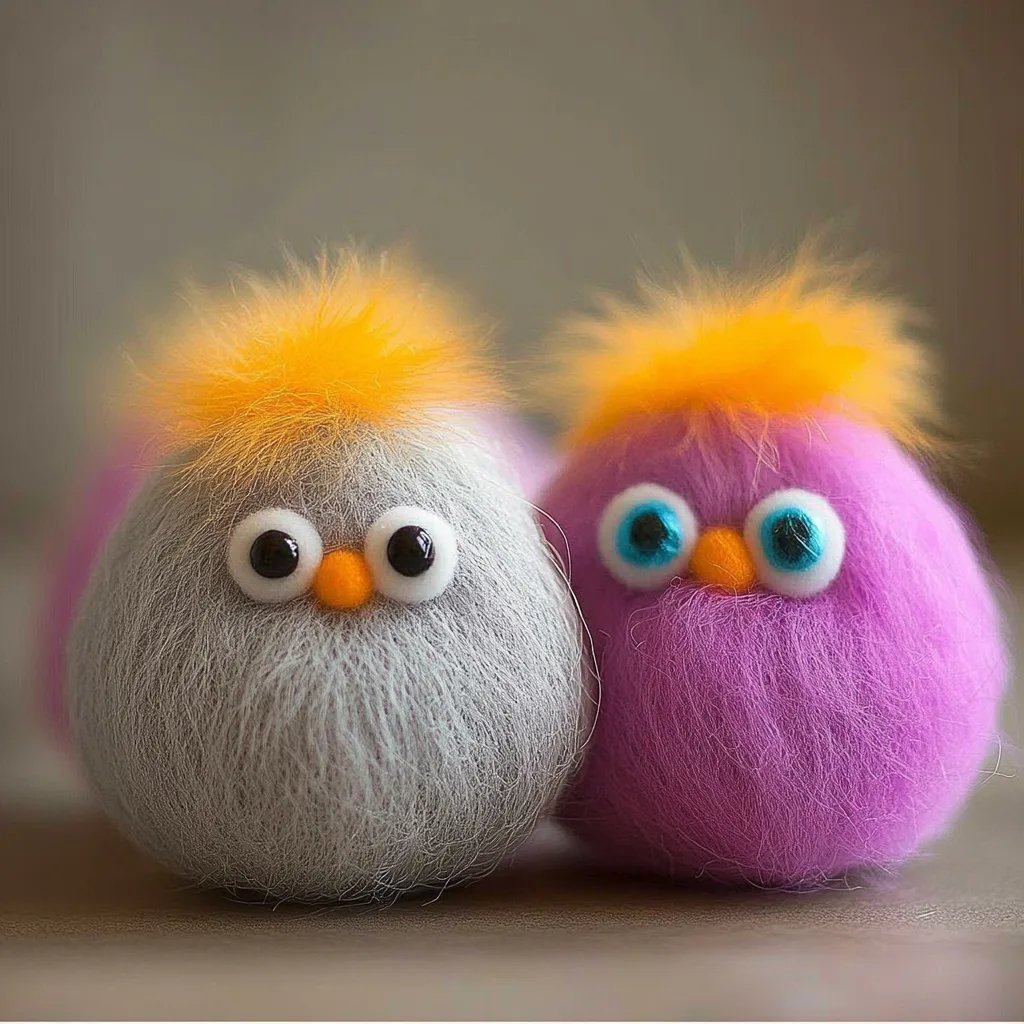
What Are Fluffy Pet Rocks?
Fluffy Pet Rocks are essentially painted rocks adorned with soft, fluffy faux fur. They’re not just ordinary stones; they possess quirky personalities, often resembling actual pets. Easy to make and requiring minimal materials, these creatures can be used for various occasions. Whether you’re looking for a unique gift, a fun activity during family gatherings, or just a creative outlet for stress relief, Fluffy Pet Rocks fit the bill perfectly!
The Allure of Fluffy Pet Rocks
Why have Fluffy Pet Rocks become such a hit? For starters, crafting these adorable creatures provides an avenue for creativity and self-expression. Plus, it allows us to reconnect with our playful side in an increasingly digital world. Fluffy Pet Rocks can brighten up your home decor, serve as conversation starters, or even act as humorous paperweights. Trust me; no one can resist the charm of a cuddly rock!
Materials You Will Need
Before we dive into the crafting process, let’s gather our materials. Here’s a comprehensive list of what you’ll need:
- Smooth, clean rocks (ensure they fit comfortably in your hand; about 2-3 inches is ideal)
- Acrylic paint (your choice of colors; I usually recommend picking at least three to create a fun design)
- Faux fur (available at craft stores or online; choose the color and texture that appeals to you)
- Craft glue (a strong, quick-drying adhesive works best)
- Safety scissors (important for trimming the faux fur)
- Googly eyes or felt for eyes (for added personality)
- Paintbrushes and sponges (for applying paint)
- Optional: fabric scraps or embellishments (like ribbons, buttons, or paint pens for details)
Step-by-Step Tutorial: Crafting Your Fluffy Pet Rock
Now that we have everything ready, let’s get crafting! Here’s a detailed step-by-step guide on how to create your very own Fluffy Pet Rock.
Step 1: Clean and Prepare the Rocks
Why This Matters: Cleaning rocks removes dirt and dust, ensuring that paint adheres well.
Step 2: Paint the Rocks
Why This Matters: Adding a layer of paint not only adds color but also acts as a base for attaching faux fur.
- _Process:_ Choose your base color (I love using vibrant or pastel colors) and apply a thick coat of acrylic paint using a brush or sponge. Allow your first coat to dry completely before applying a second coat to achieve a rich color (approximately 15-30 minutes).
- _What Could Go Wrong:_ If the paint dries unevenly, you may need to sand down rough patches before applying additional coats.
- _Solution:_ Ensure even coverage by applying paint in light strokes and checking for missed spots.
Step 3: Cut the Faux Fur
Why This Matters: The faux fur will give your rock its lovable and fuzzy character.
- _Process:_ Measure and cut the faux fur to a size that will comfortably wrap around your rock with some extra to allow for gluing. I usually cut rectangles about 4-5 inches wide and long.
Step 4: Attach the Faux Fur
Why This Matters: This step transforms your painted rock into a cuddly pet.
- _Process:_ Apply a generous amount of craft glue on the back of the faux fur. Press it firmly against the rock, ensuring it adheres well on all sides. Use your scissors to trim any excess fur.
- _What Could Go Wrong:_ If you find the fur isn't sticking well, try applying more glue or holding it in place with a gentle pressure until it adheres.
Step 5: Add the Eyes and Details
Why This Matters: Adding eyes and little embellishments is where your rock gains personality.
- _Creative Variation:_ Use paint pens to add patterns or designs on the rock—polka dots, stripes, or even flower patterns can add an extra flair!
Step 6: Finishing Touches
Why This Matters: It’s the little details that make your Fluffy Pet Rock truly shine.
- _Process:_ Once you’ve completed the main design, let it sit for a few hours to ensure everything is securely in place.
- _Tip:_ If you want to add a layer of protection, seal your rock with a clear acrylic spray sealer once everything is dry.
Safety Warnings
- Hazards of Acrylic Paint: Always work in a well-ventilated area when using acrylic paints and ensure they are non-toxic, especially if crafting with children.
- Scissors Safety: When using scissors for cutting fur, be cautious and avoid cutting toward yourself.
Personal Anecdotes and Tips
I’ve been making Fluffy Pet Rocks with my kids for years, and it's become a cherished family tradition. One time, we created a whole rock family with different fur colors and patterns! Watching their creativity flourish was incredibly rewarding.
Sometimes, the rocks don’t turn out as expected. If a rock ends up looking a bit more peculiar than planned, embrace it! I always say, the charm of these Fluffy Pet Rocks lies in their quirky imperfections.
Creative Variations
- Themed Rocks: Create holiday-themed Fluffy Pet Rocks for Halloween or Christmas with relevant colors and accessories.
- Pet Memoirs: Use photos of your real pets to create a Fluffy Pet Rock that resembles them as a cute tribute!
Final Thoughts
Crafting Fluffy Pet Rocks is a simple yet fulfilling activity that embraces creativity and encourages fun. As you embark on this project, remember to let your imagination soar and enjoy the process! Whether you’re creating these cute companions alone or with loved ones, the joy they bring is unparalleled.
Happy crafting, my friends! I can’t wait to hear about your adorable creations!