How to Make Fireworks in a Cup: A Sparkling Crafting Adventure
Hello, fellow crafters! If you're anything like me, you love infusing a bit of magic into everyday moments. Today, I'm excited to share a delightful and visually stunning project that brings the festivity of fireworks right to your kitchen—yes, I'm talking about *Fireworks in a Cup*! This simple yet mesmerizing DIY craft is perfect for parties, family gatherings, or even just a rainy day activity with the kids. Not only is it a fantastic way to spark creativity, but it also serves as a great science experiment that beautifully demonstrates the principles of density and color mixing.
Why Are Fireworks in a Cup Popular?
Fireworks in a cup are all the rage for a variety of reasons. First and foremost, they're visually striking and sure to capture the attention of both kids and adults alike. Who doesn’t enjoy the joy of seeing vibrant hues come alive as they swirl and mix in a delightful cup? Beyond aesthetics, this project serves as an educational tool to teach important concepts about chemistry and reactions. Plus, it’s simple enough to whip up at a moment’s notice, using ingredients you likely already have in your pantry.
When to Use Fireworks in a Cup?
You can employ this fun craft during a variety of occasions:
- Birthday Parties: A sensational centerpiece!
- New Year's Celebrations: Bring in the New Year with a bang, without the noise.
- Science Projects: An engaging way to illustrate density and reactions.
- Family Fun Night: A wonderful bonding experience for parents and kids!
What You’ll Need
Before diving into the step-by-step tutorial, let’s gather our materials. Here’s what you’ll need:
- A clear cup (preferably a glass cup to showcase the effects)
- Warm water (¾ full)
- Vegetable oil (or any other cooking oil)
- Food coloring (liquid or gel; a mix of colors is fun!)
- A toothpick or a skewer
- Optional: Glitter for an extra sparkly effect!
Step-by-Step Tutorial: Making Fireworks in a Cup
Step 1: Prepare Your Base
First, pour warm water into your clear cup, filling it about three-quarters of the way. The warm water is crucial because it helps the colors spread evenly throughout the liquid, creating that stunning "firework" effect.
What could go wrong? If you use cold water, the colors may not disperse as beautifully, and you’ll end up with less vibrant results. Trust me; warm is the way to go!
Step 2: Make the Oil Mixture
In a separate bowl, add about two tablespoons of vegetable oil. This step is essential for creating that lovely separation between the water and the oil. The oil will float on top because it’s less dense than water.
Step 3: Add Color
Next, it's time to bring in the fun! Take your food coloring and drop a few drops of different colors into the oil mixture using a toothpick. If you're using gel food coloring, you can dip the toothpick directly into the gel and then swirl it into the oil.
Tip: Use a variety of colors to make your 'fireworks' even more vibrant. I often use red, blue, and yellow for a classic palette.
What could go wrong? If the colors sink straight into the water, it means your oil wasn’t mixed well or was too cold. Just ensure your oil mixture is at room temperature before starting this step.
Step 4: Combine the Mixtures
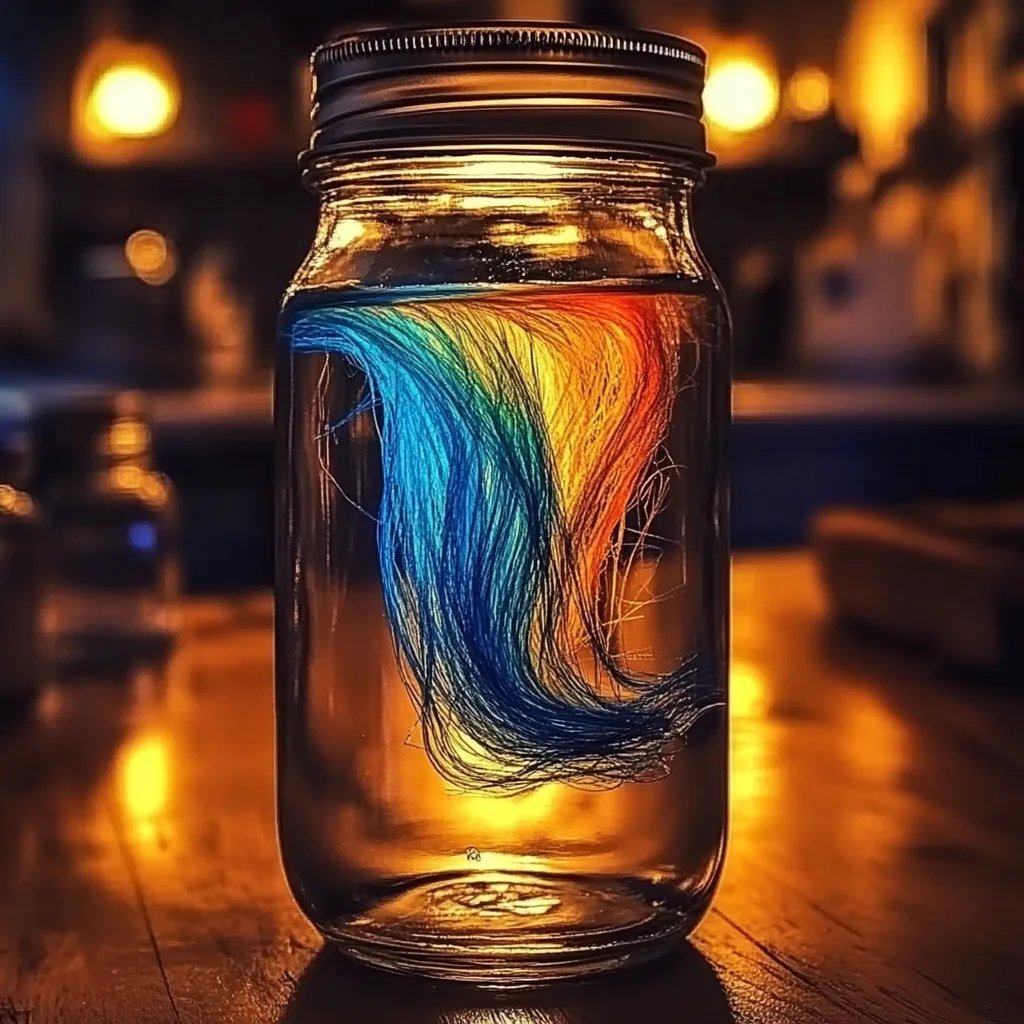
Now, here comes the magic moment! Carefully pour your oil mixture over the warm water in the cup. Watch as the colorful droplets start to sink and spread through the water, creating a whimsical explosion of colors.
Why this matters: The oil and water do not mix, so the food coloring bursts into the water like miniature fireworks as it breaks through the oil layer. This is where the chemistry magic happens!
Step 5: Optional – Add Sparkle
For a dazzling effect, sprinkle some glitter on top of your fireworks in the cup. It adds an extra layer of excitement and visual appeal. Kids especially love this part!
Troubleshooting Common Issues
Sometimes, despite our best efforts, things don’t go as planned. Here are a few issues you might encounter and how to fix them:
- Colors sink straight to the bottom: This usually happens when the oil mixture isn’t prepared correctly. Ensure to let the oil sit for a minute after adding the color before pouring it over the water.
- Colors blend too much: If you’re looking for distinct bursts and your colors end up mixing too much, try adding fewer drops or spacing them out more.
Safety Warnings
While this activity is generally safe, always supervise young children to prevent them from accidentally spilling liquids. Make sure not to use any poisonous or inedible materials in your mixtures. Stick to food-safe supplies to ensure a fun and safe crafting experience.
Creative Variations on Fireworks in a Cup
- Rainbow Fireworks: Use a variety of food colors in layers to create a rainbow effect. Just be careful to layer the colors to prevent blending.
- Glow in the Dark: Add a little tonic water (which contains quinine) to your water mixture before adding the oil and colors. Under a black light, you’ll see a mesmerizing glow!
- Scented Fireworks: Add a drop of essential oil to your water for a fragrant experience.
Final Thoughts
Creating Fireworks in a Cup is more than just a craft—it's an experience filled with wonder and creativity. I love this project because it marries science with art, making it a reliable go-to for any occasion. Whether you’re crafting alone, sharing with family, or teaching a group, this project breeds a sense of awe that everyone will appreciate.
I hope this guide inspires you to ignite some joy and color into your space with Fireworks in a Cup. Remember, crafting is about exploration—don't hesitate to experiment and tailor this project to your heart's desire. Happy crafting, and may your creations be as vibrant as a night sky filled with fireworks!