How to Make Easy DIY Crayon Sun Catchers: A Step-by-Step Guide
Crafting has always been my go-to stress reliever, and there's something truly magical about creating sun catchers from crayons. Crayon sun catchers are not just colorful décor; they are brilliant ways to add a splash of color to your home while embracing the art of recycling. Whether you’re looking to brighten your windows, make a thoughtful gift, or simply create a fun activity for the kids, crayon sun catchers check all the boxes.
In my experience, these sun catchers shimmer and glow when the sunlight hits them, transforming any space into a colorful oasis. Plus, the process is so simple and enjoyable that I've made it a staple project for my crafting sessions. So, if you’re ready to embark on a colorful crafting journey, let’s dive into how to create your very own DIY Crayon Sun Catchers!
Why Crayon Sun Catchers?
Crayon sun catchers have surged in popularity for several reasons:
- Recycling: They help breathe new life into broken or unused crayons, reducing waste.
- Educational Value: Great for kids, this project teaches them about color mixing and creativity.
- Customization: You can experiment with colors and shapes based on the seasons or personal preferences.
- Simple & Safe: No complicated tools or materials are needed, and it's relatively safe even for younger crafters under supervision.
Materials You'll Need
To ensure a smooth crafting experience, gather the following materials ahead of time:
- Crayons (your choice of colors – used or even whole)
- Wax paper (two sheets)
- An iron (with adult supervision if kids are involved)
- Parchment paper (for protection)
- Scissors
- Shaped cookie cutters (optional, for fun shapes)
- String or ribbons (for hanging, optional)
- A flat, heat-safe surface (like a countertop or an ironing board)
Step-by-Step Tutorial
Step 1: Prepare Your Workspace
Before diving in, let’s get organized. I like to spread out my materials on a clean, flat surface. It helps minimize mess and ensures that I can find everything I need without interruption. Safety is also paramount, so make sure your area is free of clutter, and if children are involved, supervise them closely.
Step 2: Crayon Preparation
Start by preheating your iron on a low setting. Meanwhile, peel the wrappers off the crayons. This is often the most time-consuming part, but it’s essential. Removing the wrappers helps the crayons melt evenly. If you’re dealing with particularly stubborn wrappers, a small pair of scissors can help cut them off.
Tip: If the wrappers stick too much, placing the crayons in the freezer for about 10 minutes can sometimes help break the adhesive.
Step 3: Shaving the Crayons
Now comes the fun part—shaving the crayons! Using a cheese grater or a craft knife (be careful with the knife!), produce crayon shavings. The finer the shavings, the smoother the melted process will be. I often mix colors to create interesting effects. Just imagine a swirl of blue, yellow, and green dancing together!
What Could Go Wrong: If the shavings are too large, they may not melt correctly, resulting in a less vibrant sun catcher. If this happens, no worries! Just re-shred them into smaller pieces.
Step 4: Layering the Crayon Shavings
Take one of your sheets of wax paper, and lay it flat on your work surface. Sprinkle your crayon shavings onto one half of the wax paper. Feel free to get creative with colors. I like to create patterns for added visual interest, but that’s completely up to you!
Once you’ve spread the shavings out, carefully fold the other half of the wax paper over to cover the shavings.
Step 5: Ironing
Here’s where the magic happens! Place a piece of parchment paper over the folded wax paper to protect it from the heat of the iron. With your iron set to low heat, gently press down on the parchment-lined wax paper. Keep it moving to avoid burning – no one wants burnt crayon on their project!
Safety Warning: Always be cautious when ironing, especially with children around. It’s best to have an adult handle this part if kids are helping.
Troubleshooting: If the shavings aren’t melting fully, increase the heat slightly (but not too much, as it can burn the wax). If you accidentally over-iron and the wax paper starts to warp, just carefully remove the parchment paper, let it cool, then reposition it and briefly press the iron again.
Step 6: Cutting Your Shapes
Once the crayons have completely melted and cooled (about 5-10 minutes), remove the parchment and gently pull apart the wax paper. The melted crayon will now be a beautiful, translucent sheet of color!
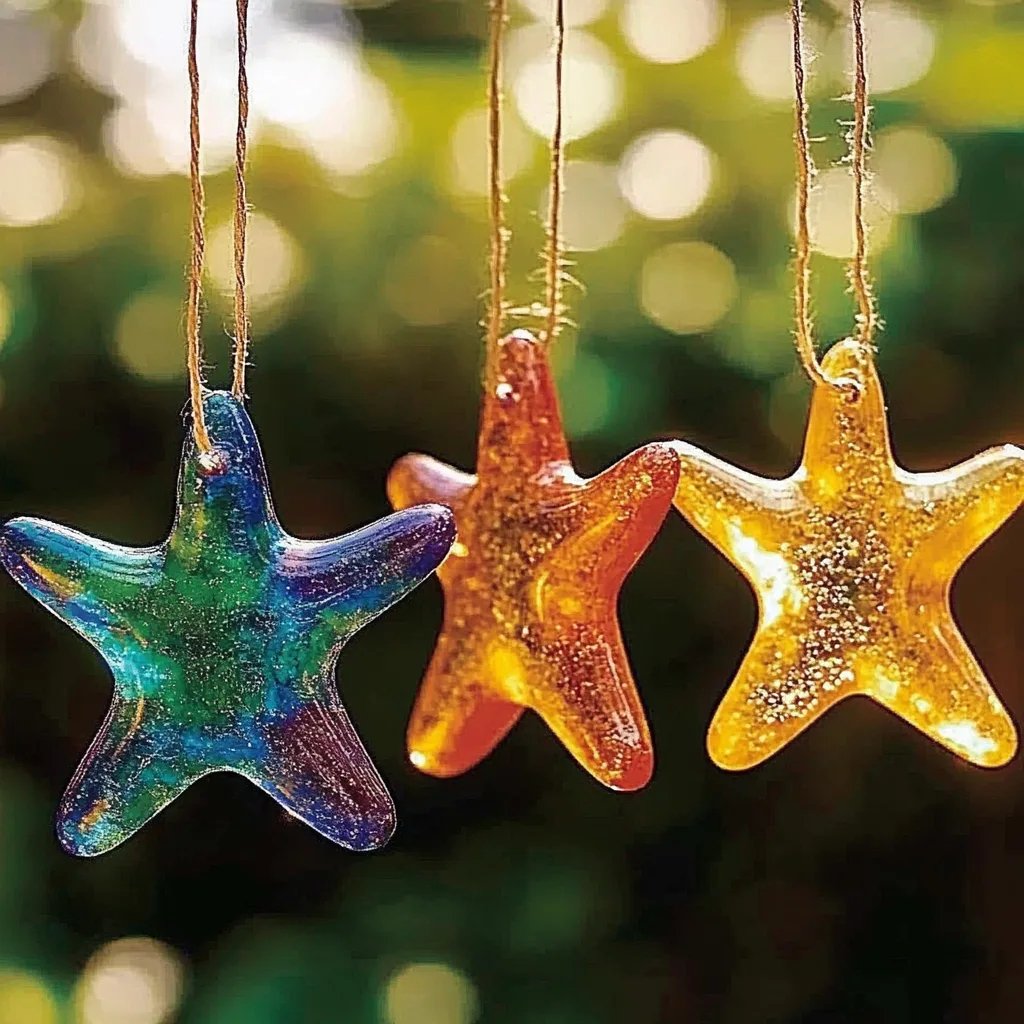
Using your scissors (or shaped cookie cutters) carefully cut out your desired shapes. They can be circles, hearts, stars, or anything you fancy!
Step 7: Hang Your Sun Catcher
Now the last step—hang them up! You can use string or ribbon to create a charming display. A simple double knot works well to secure it. I love to hang mine in my windows and watch how the light transforms the room.
Creative Variations
- Layered Colors: Experiment with layering different colored shavings on top of each other before melting for a marbled effect.
- Add Glitter: For an added sparkly touch, sprinkle in some eco-friendly glitter before melting!
- Seasonal Themes: Use seasonal colors (like red and green for Christmas, or pastels for Easter) to match the holiday spirit.
Conclusion
Making easy DIY crayon sun catchers is not just an enjoyable activity, but it also serves as a fantastic way to recycle and foster creativity. From choosing colors to perfecting your cutting skills, there are numerous ways to tweak this project to suit your style.
I encourage you to gather your materials and set aside some quality crafting time. Whether you're with family, friends, or on your own, creating these sun catchers will provide a sense of accomplishment and joy. Plus, every time you see your colorful creations hanging in the sunlight, you’ll be reminded of the fun-filled process to get there.
Happy crafting, and may your windows always shine bright with your beautiful DIY crayon sun catchers!