How to Make DIY Nature Suncatchers: A Detailed Guide for Crafting Your Own Sunlit Masterpieces
Welcome, crafty friends! If you’re searching for a delightful way to bring a touch of nature’s beauty into your home while basking in every sunbeam, DIY Nature Suncatchers might be just the project for you. Not only do these artistic creations brighten up any space, but they also make fantastic gifts and are a wonderful way to celebrate the changing seasons. As an avid crafter, I’ve spent countless happy hours in my studio concocting these lovely pieces, infused with the colors and textures of the outdoors. Today, I’m excited to share my detailed process for making these charming suncatchers, as well as insights and tips that can help you achieve great results.
What Are Nature Suncatchers?
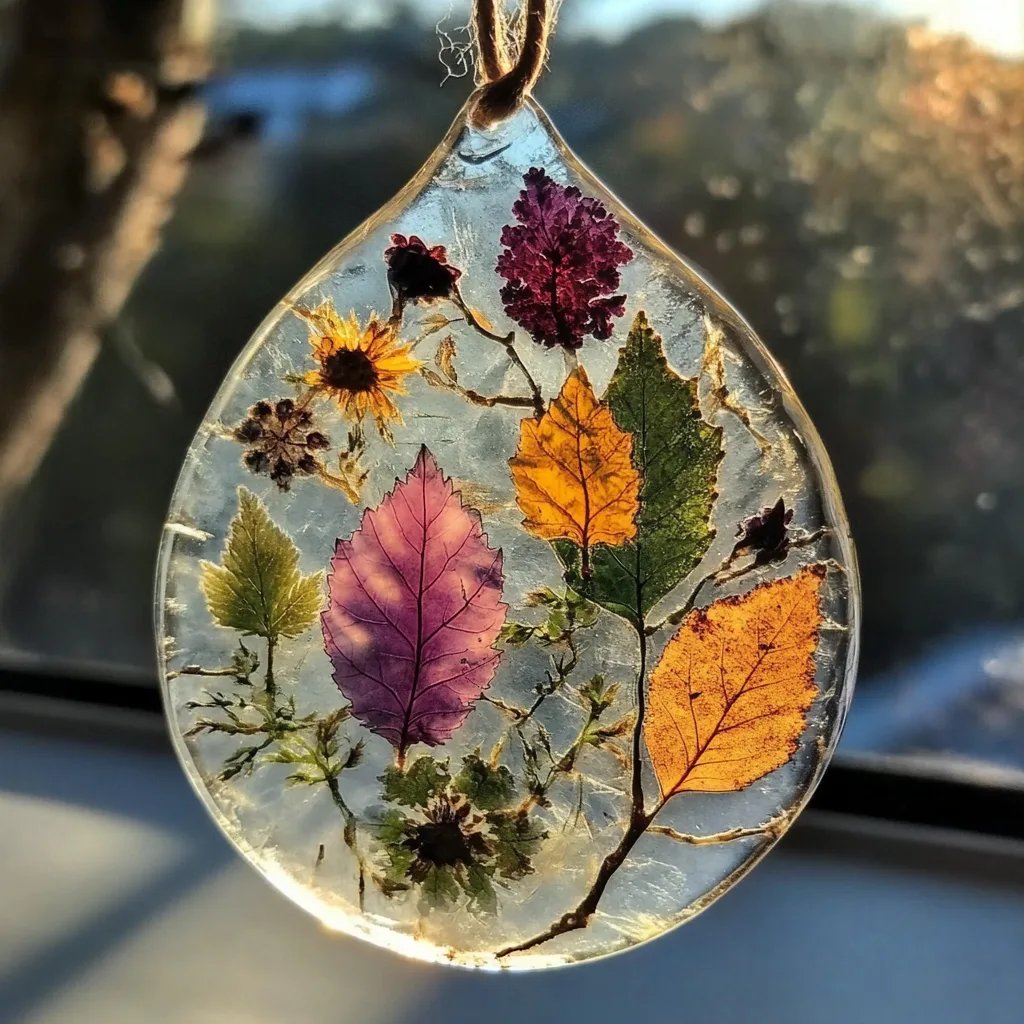
Nature suncatchers are decorative art pieces that incorporate real elements from nature—think leaves, flowers, and other organic materials—embedded in a transparent medium, allowing sunlight to filter through and create beautiful patterns on your walls. They are popular for their simplicity, versatility, and the way they connect us to the natural world, making them a favorite project for families, educators, and anyone who appreciates crafts.
Whether you want to hang them in a window, use them as garden décor, or give them as gifts, they’re perfect for brightening your space and spirit.
What You'll Need
Before we get started, let’s gather our materials. Here’s what you’ll need:
- Natural Elements: Fresh flowers, leaves, petals, or even seeds. The world is your oyster here! Consider picking seasonal items for varied colors and textures.
- A Transparent Medium: This can be clear gelatin, clear resin, or even a mixture of corn syrup and water as a simple alternative. I’ll discuss these options in detail below.
- A Surface to Work On: Waxes paper or parchment paper are excellent for this project as they allow for easy removal once dry.
- A Mold or Frame: You can use cookie cutters, silicone molds, or simply cut a frame from cardboard to create a base for your suncatcher.
- A Spoon: For spreading your medium.
- Natural Pressed Flowers and Leaves (optional): If you have any items you’ve dried previously, these can add character.
- Scissors: You might need these for cutting down any oversized leaves or petals.
Step-by-Step Tutorial
Step 1: Collect Your Natural Materials
First things first—get outside and gather your favorite natural elements! I find early mornings are the best time to pick flowers and leaves; they’re often dewy and fresh, making them perfect for suncatchers. Look for vibrant colors and varying textures; the more diverse, the better. Just remember to gather only what you need and don’t strip plants bare.
Step 2: Choose Your Medium
Now let’s talk about your transparent medium. Here’s a breakdown of your options:
- Clear Gelatin: This is a simple, easy-to-use option. I love using it because it’s inexpensive and widely available. To use, dissolve the gelatin in hot water according to the package instructions.
- Clear Resin: This is a more advanced option, but the results can be stunning. Be sure to follow the instructions carefully and work in a well-ventilated area. Safety warnings include wearing gloves and a mask to avoid inhaling fumes.
- Corn Syrup and Water: Mix equal parts corn syrup and water. This is a less durable but very fun and approachable option that slightly resembles a thick glue.
Step 3: Prepare Your Work Surface
Lay down your waxed or parchment paper on your workspace. This will prevent the medium from sticking and make cleanup a breeze. What a time-saver!
Step 4: Arrange Your Natural Items
Begin arranging your collected materials on the wax paper. This is where you can let your creativity shine! Consider layering different elements or using a small store-bought flower bouquet for a collage effect. Take a moment to visualize how the light will hit these items once finished. But watch out—leaves with too much moisture can cause the gelatin to mold, so ensure everything you use is relatively dry.
Step 5: Pour in the Transparent Medium
Now here comes the fun part! Using your spoon, carefully pour your chosen medium over the arranged natural elements. You want to ensure everything is adequately covered; this is crucial because any uncovered parts may not adhere properly and trim down the overall quality of your suncatcher.
Common Pitfall: If you pour too fast, bubbles can form. If this happens, gently tap the surface with your spoon to encourage the bubbles to escape.
Step 6: Let it Set
Once your medium covers everything, allow it to set according to the instructions for your chosen medium. If you're using gelatin, it typically takes about 30 minutes to an hour depending on the thickness. For resin, it can take up to 24 hours, so be patient!
Step 7: Unmold Your Suncatcher
After your medium has dried, gently peel it away from the wax paper. If you used a mold, carefully pop the suncatcher out. It should come out relatively easily; if it’s sticking, wait for a bit longer.
Step 8: Adorn and Hang
Using scissors, trim any rough edges. Here’s where you can add a bit of flair with decorative twine or hang them with hooks. I like to stage mine near a window where the light filters in beautifully, casting rainbows on the floor.
Bonus: Creative Variations and Personal Anecdotes
Over the years, I’ve experimented with many variations for these suncatchers. One of my favorites is creating a layered effect by using different thicknesses of natural elements. For instance, I’ve layered some dried flowers with robust leaves to help create depth. Another fun twist is to sprinkle glitter on top of your natural elements before pouring the medium for a touch of sparkle!
If you’re looking for an eco-friendly alternative to resin, consider making sun-catchers with pressed flowers by simply laminating them between sheets of transparent contact paper and cutting them into fun shapes.
Safety Notes and Tips
- If using resin, always work in a well-ventilated area and wear proper safety gear.
- If crafting with kids, I recommend sticking to the gelatin or corn syrup mixtures. They’re safer and easier to handle.
- Lastly, always clean your utensils and workspace immediately after use; it can be challenging to clean once the medium hardens!
Wrapping Up
And there you have it—your very own DIY Nature Suncatchers! This project has brought me so much joy, not only as a creative outlet but as a way to reconnect with nature and share the beauty of my surroundings. Whether you’re gifting these to a friend or brightening up your home, I hope this guide inspires you to get crafty. Remember, the great thing about crafting is that there’s no right or wrong. Embrace the process, and let your creativity flow!
Happy crafting, and may your windows sparkle with the magic of sunshine!