How to Make DIY Cornstarch and Chalk Dough: A Comprehensive Guide
As an avid crafter, I’ve dabbled in a variety of materials and mediums. One that holds a special place in my heart is DIY cornstarch and chalk dough. This delightful material is not only incredibly easy to make but also provides endless opportunities for creativity, making it a favorite among both children and adults alike. Whether you’re looking to make unique crafts, ornaments, or just enjoy a fun modeling experience, this dough is a great choice!
In this article, I’ll guide you through the entire process of making cornstarch and chalk dough, sharing helpful tips and insights from my own crafting journey. Let’s dive in!
What Is Cornstarch and Chalk Dough?
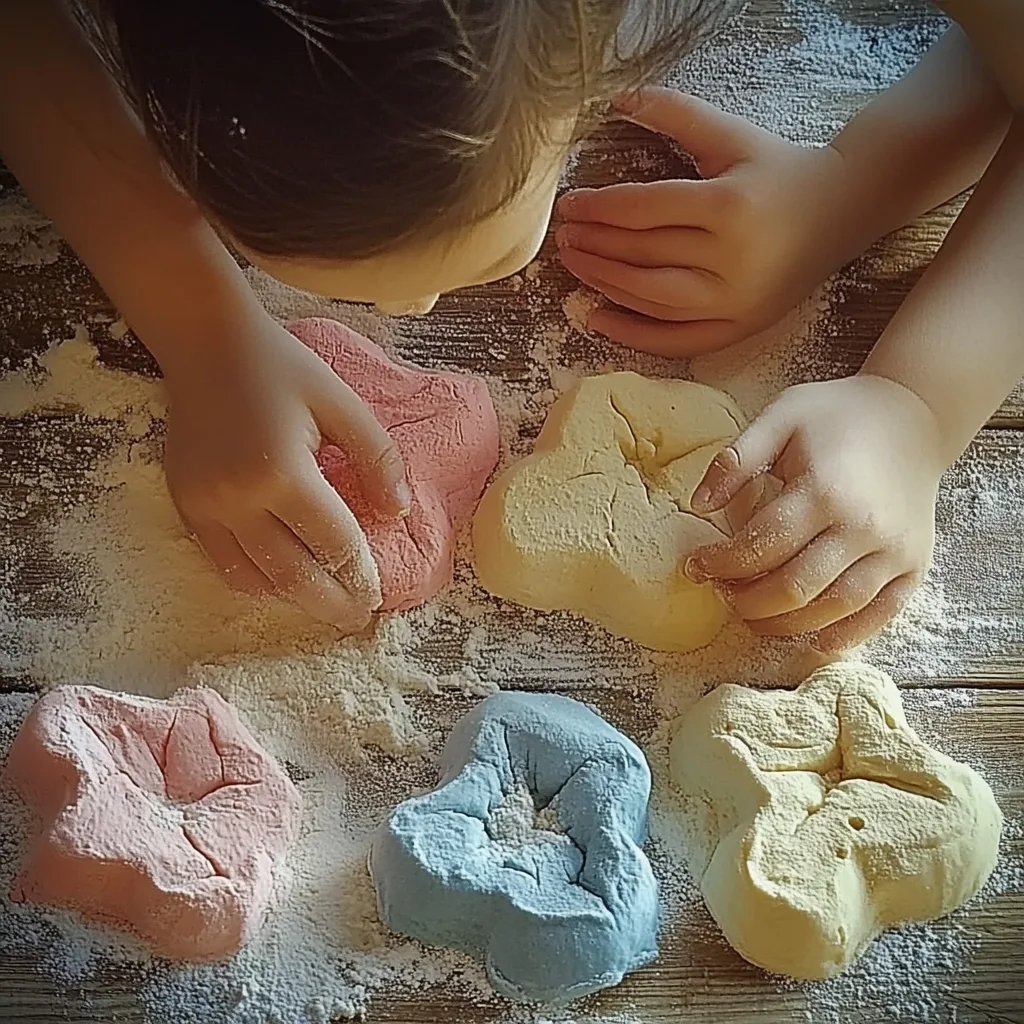
Before we get started, let’s clarify what cornstarch and chalk dough is. This versatile modeling dough is primarily made from cornstarch and chalk. It has a smooth texture, dries hard, and is safe for kids—making it an ideal option for teachers, parents, and craftspeople. After drying, you can paint or decorate your creations any way you want!
I love using cornstarch and chalk dough for a variety of projects, from holiday decorations to handmade gifts. Its malleability allows for great detail and creativity, and the non-toxic materials mean you can feel good about what you're making, whether it's for your kids or for an expressive craft day by yourself.
Why It's Popular
The popularity of cornstarch and chalk dough has spiked due to its accessibility, safety, and ease of use. With minimal ingredients that you likely already have in your kitchen, it provides an inexpensive way to engage in creative activities. Plus, it offers a great sensory experience for kids, making it a go-to choice for playdates, rainy days, and crafting clubs.
What You Need: Materials for Cornstarch and Chalk Dough
Basic Ingredients:
- Cornstarch: This is your primary base ingredient and provides the dough's structure.
- Chalk Powder: You can use crushed chalk, sidewalk chalk, or chalkboard chalk. For those who want vibrant colors, pastel chalks work best.
- Water: This helps to bind the ingredients and gives the dough its malleable consistency.
- Glitter (Optional): For a bit of sparkle in your projects!
Tools:
- Mixing bowl
- Measuring cups
- Spoon for mixing
- Plastic wrap or an airtight container for storage
- Rolling pin (optional)
Step-by-Step Tutorial: Making Cornstarch and Chalk Dough
Now, let’s get to the fun part! Follow this detailed tutorial to make your very own cornstarch and chalk dough.
Step 1: Gather Your Ingredients
First things first—gather all your ingredients and tools. Having everything ready makes the process smoother and more enjoyable.
Step 2: Measure Your Ingredients
In a mixing bowl, combine 1 cup of cornstarch with 1 cup of chalk powder. If you want to add glitter, mix in about 1/4 cup at this stage. The glitter gives your creation an extra sparkle, and who doesn’t love a little shimmer?
Step 3: Mix the Dry Ingredients
Use a spoon to mix the dry ingredients together thoroughly. It's important to break up any clumps in the chalk powder; this ensures that the dough will have a smooth texture later on. You want a homogeneous mixture before adding water, as this makes it easier to achieve the desired consistency.
Step 4: Add Water Gradually
Now it’s time to add water. Start with 1/2 cup of water, pouring it slowly into your dry mixture while stirring. This gradual approach allows you to monitor the consistency and prevents the dough from becoming too sticky.
If the dough appears too dry, add more water—1 tablespoon at a time—until you get a doughy consistency. If you accidentally add too much water, don’t panic! Just add a little more cornstarch to balance it out.
Step 5: Knead the Dough
Once combined, your mixture should form a soft dough. It’s time to knead! Turn it out onto a clean surface and knead it for about 5 minutes. This step helps to incorporate air into the dough, making it pliable and workable.
If your dough feels sticky, sprinkle a little cornstarch on your surface and on your hands as you knead. Conversely, if it's too crumbly, it might need a splash more water.
Step 6: Shape and Craft!
Now comes the fun part! You can roll it out, shape it, mold it into whatever your heart desires. Whether you’re making ornaments, figurines, or just enjoying the tactile experience, the opportunities are endless.
Step 7: Let It Dry
Once you’ve shaped your creations, place them on a tray or drying rack. Allow them to dry completely—this could take 24-48 hours depending on the thickness of your pieces.
Step 8: Paint and Decorate
After your pieces have dried, it’s time to let your creativity shine even brighter! Use acrylic paints to decorate your dried projects. This is where you can customize and make your creations truly unique.
Troubleshooting Tips
- Dough is too sticky: Add a little more cornstarch.
- Dough is too crumbly: Add some water, but do so sparingly.
- Pieces crack while drying: If you notice cracks developing, these could be from fast drying. Try to let them dry slowly at room temperature.
Safety Warnings
Always supervise young children when crafting. While cornstarch and chalk are non-toxic, avoid letting them ingest any materials. Ensure your crafting area is clean and free of small choking hazards.
Creative Variations
- Flavoring: For a sensory twist, try adding a few drops of essential oil to the dough for a pleasant smell.
- Coloring: Experiment with adding food coloring to make colorful dough right from the start.
- Molds: Use cookie cutters or silicone molds to create customized shapes easily!
Personal Anecdote
I remember the first time I made cornstarch and chalk dough with my little sister. We had such a blast creating tiny animal figurines to decorate our room. Years later, those same colors are still vivid in my memory, and we still laugh about the messy kitchen cleanup! This dough is not just craft material; it’s a gateway to family bonding and creative expression.
Conclusion
Making DIY cornstarch and chalk dough is an engaging, straightforward process that opens the door to a world of creativity. From crafting ornaments to indulging in imaginative play, the possibilities are endless! Whether you’re a seasoned crafter or just dipping your toes into the world of DIY, I hope this guide empowers you to try your hand at making this delightful dough.
Remember, there are no mistakes—only opportunities to create something wonderfully unique. So gather your ingredients, invite some friends or family, and let your imagination run wild! Happy crafting!