How to Make DIY Air Dry Clay Coasters: A Step-by-Step Guide
Hello, fellow creatives! Today, I’m excited to take you through the enchanting process of crafting your very own air dry clay coasters. I’ve been a passionate crafter for several years now, and these coasters are a staple in my DIY repertoire. Not only are they functional, protecting your surfaces from water rings and heat damage, but they also allow you to unleash your creativity in a fun and tactile way. Utilizing air dry clay means you don’t need any special equipment, and the best part? You can customize them to fit your home’s aesthetic.
Why Coasters?
Coasters are incredibly versatile! Whether you're hosting a dinner party, enjoying a cozy evening at home, or giving thoughtful gifts, these handcrafted pieces add a personal touch that impresses every time. They're friendly to all occasions and can elevate your decor, making them not only practical but also a delightful part of your home’s design.
Materials You'll Need
Before we jump into the crafting, let’s gather all our materials. Here’s what you’ll need:
- Air Dry Clay: Opt for a high-quality air dry clay that remains pliable until dry. While I prefer white, you can find colored varieties for a vibrant touch.
- Rolling Pin: You can use a standard rolling pin or even a wine bottle!
- Cookie Cutters or a Knife: To shape your coasters. Consider circular shapes, but feel free to experiment with different designs.
- Smoothing Tool: A simple spatula or your fingers can do the trick, but specific clay smoothing tools certainly come in handy.
- Paint or Acrylic Sealant (optional): To embellish and protect your design.
- Pencil or Pen: For any marking you want to do.
- Wax Paper or Baking Sheet: To work on and help prevent sticking.
- A Small Cup of Water: For smoothing or adjusting the clay.
Step-by-Step Tutorial to Create Your Coasters
Step 1: Prepare Your Workspace
Before diving into the fun, organize your workspace. I like to cover my table with wax paper or a baking sheet to catch any clay crumbs and to make cleaning easier. This is crucial, as it allows for a smooth crafting experience without worrying about a messy area.
Step 2: Condition the Clay
Take your air dry clay and knead it with your hands. This step is vital as it warms the clay, making it easier to roll out and mold. If your clay feels crumbly, it might need some moisture. A few drops of water should rejuvenate it.
Step 3: Roll Out the Clay
Using your rolling pin, roll the clay to your desired thickness. I generally recommend about ¼ inch thick—thicker coasters are sturdier but may take longer to dry. Also, the thickness will determine the coaster's overall appearance. If you roll it too thin, your coasters may crack or break easily—so keep an eye on your work!
Step 4: Cut the Shapes
Now comes the fun part! Use your cookie cutters to cut out your coaster shapes. If you don’t have cookie cutters, you can simply use a knife to create custom shapes. Don’t forget to save any excess clay; you can recondition it and use it for other projects.
Step 5: Smooth the Edges
Once your shapes are cut, take your smoothing tool or your fingers and gently smooth the edges of the coasters. This detail is crucial because it not only gives your coasters a polished look but also helps prevent chipping when they dry.
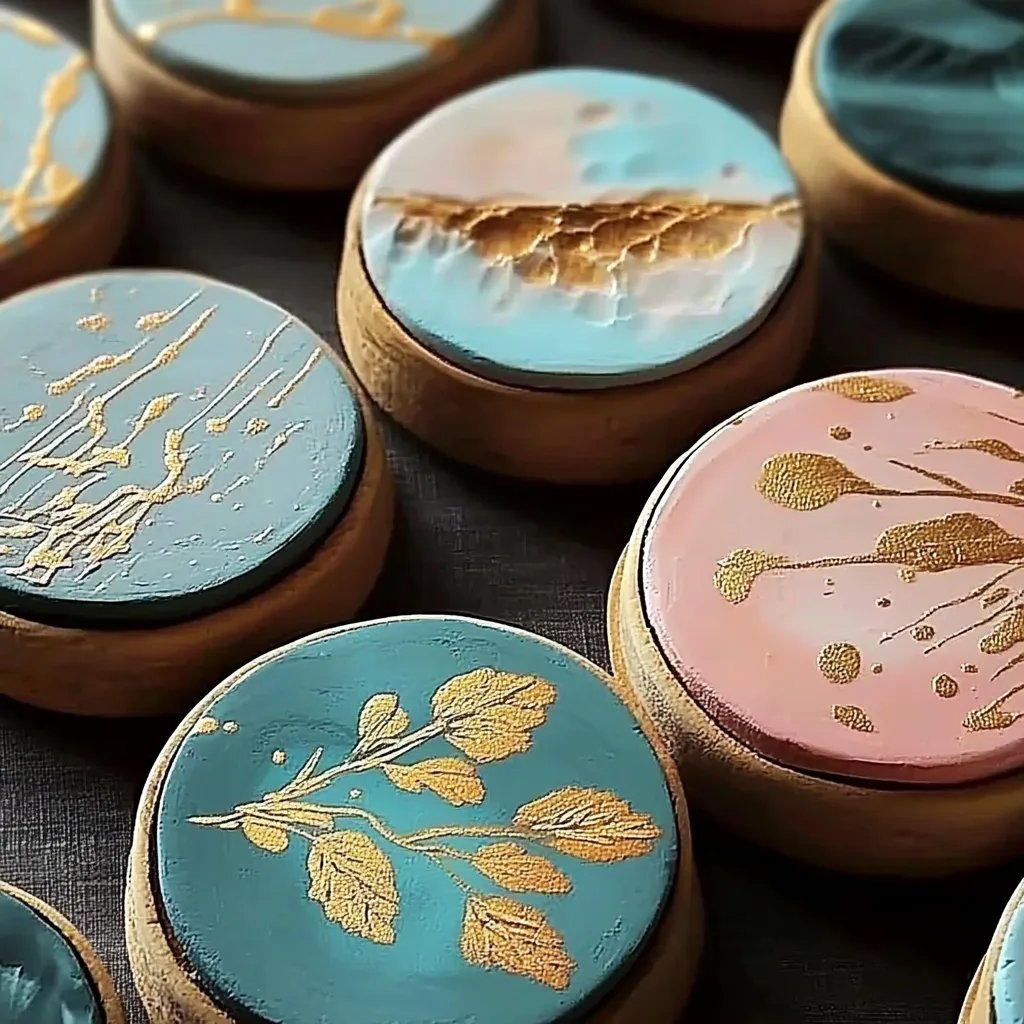
Step 6: Creating Designs (Optional)
This is where you can personalize your coasters! You can imprint patterns, draw designs with a pencil, or even carve initials or quotes directly into the clay. Be creative! Just remember that deep impressions might require additional drying time.
Step 7: Drying Time
Leave your coasters on the wax paper or baking sheet for at least 24 hours, turning them halfway if your environment is particularly humid. Patience is key here; if you try to rush the drying, you may end up with cracked coasters!
Step 8: Painting and Sealing (Optional)
Once completely dry, you can paint your coasters with acrylic paint or leave them as they are for a natural look. I adore a pop of color! After painting, seal your coasters with an acrylic sealant to keep them looking fresh and ready for use.
Tips and Troubleshooting
- What Could Go Wrong?
If your clay is too dry, it won’t hold its shape when you cut it. Add water gradually until it reaches the right consistency. Conversely, if it’s too wet, it may lose its form and deform when you move it. Pay attention during the conditioning process!
- Creative Variations
Why not try using a stencil with paint for a chic geometric design? Or mold your coasters into varying thicknesses to create a unique set that showcases different art styles!
- Alternative Materials
If you are looking for something other than air dry clay, consider polymer clay, but remember that it will need to be baked in the oven. Alternatively, you can try using concrete or resin for a more industrial look.
Personal Reflections
Creating air dry clay coasters has become one of my favorite relaxation activities. I remember the first set I made after a long week of work; it was therapeutic to get my hands dirty and craft something beautiful from scratch. Beyond that, sharing them with friends at a gathering transformed them into conversation starters.
Final Thoughts
I hope that this comprehensive guide to making DIY air dry clay coasters inspires you to get crafty! Remember, the process should be enjoyable, so embrace experimentation and let your personality shine through your creations. Share your projects with me or leave a comment—I’d love to see your innovative designs!
Happy crafting, my fellow creators! Your home is waiting for your personal touch.