How to Make Cotton Candy Ice Cream: A Sweet Delight for Everyone
Hello, sweet friends! Today, I’m thrilled to share one of my all-time favorite treats: Cotton Candy Ice Cream. As someone who loves both ice cream and the whimsical, nostalgic essence of cotton candy, this creation holds a special place in my heart. It's a delightful treat that brings a smile, whether at summer barbecues, birthday parties, or cozy evenings at home.
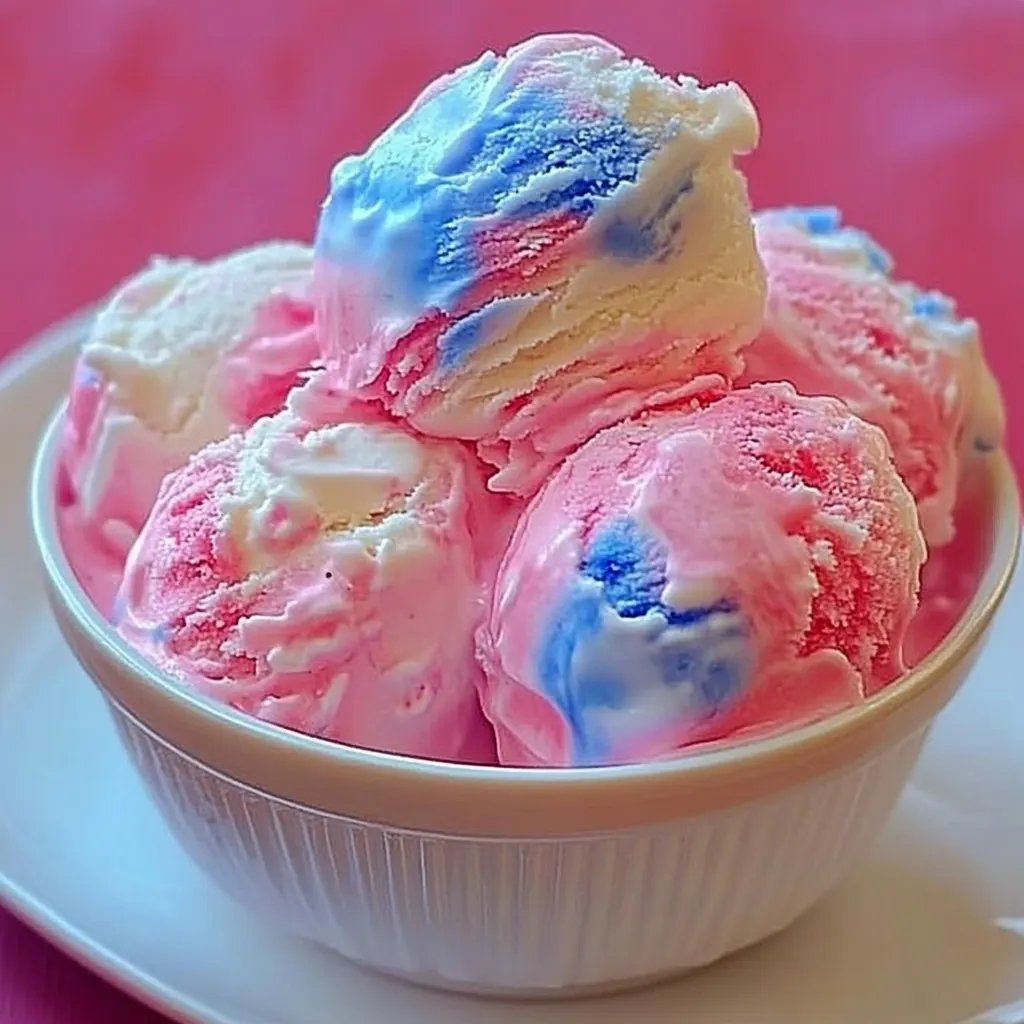
Why Cotton Candy Ice Cream?
Cotton candy has a magical quality—its light, fluffy texture and whimsical flavors evoke childhood memories of fairs, carnival rides, and carefree summers. Combining that lightness and sweetness into creamy ice cream makes for an extraordinary dessert. This ice cream is perfect for all occasions, from birthday parties to casual family gatherings. Its vibrant colors and sweet essence are sure to impress guests of all ages!
In this article, I’ll take you through my detailed, step-by-step process for creating your very own Cotton Candy Ice Cream from scratch. Not only will I share the ingredients and the method, but I’ll also provide tips and tricks I’ve learned along the way, plus creative variations to inspire your own unique creations. Let’s dive in!
What You’ll Need
To make this whimsical treat, here’s what you’ll need:
Ingredients:
- 2 cups heavy cream – This is crucial for achieving that luscious, creamy texture.
- 1 cup whole milk – Milk helps balance the creaminess while adding smoothness to the mixture.
- ¾ cup granulated sugar – This ingredient is vital for sweetness. You can adjust based on your preference.
- 1 teaspoon pure vanilla extract – This adds depth to the flavor.
- ¼ teaspoon salt – A small touch of salt enhances the sweetness.
- Cotton candy flavoring – Any good-quality cotton candy flavoring will do, generally available at candy supply stores or online. Make sure to read instructions for your preferred brand.
- Pink food coloring – Optional but highly recommended for that classic cotton candy look. Feel free to get creative!
Equipment:
- An ice cream maker (this can be a manual or electric model based on your preference)
- Mixing bowls
- Whisk or electric mixer
- Airtight container for storage
- Measuring cups and spoons
Step-by-Step Tutorial
Step 1: Combine the Base Ingredients
In a large mixing bowl, whisk together the heavy cream, whole milk, sugar, and salt. Make sure the sugar dissolves completely, as undissolved granules can lead to a gritty texture in your ice cream.
Tip: This step is crucial! If your sugar doesn’t dissolve, it could create a grainy mouthfeel. If you’re using an electric mixer, you can whip it until combined, but be careful not to over-whip the cream; we want it to be smooth, not fluffy.
Step 2: Add the Flavoring and Color
Now it’s time to get that delightful cotton candy flavor in there! Add 1-2 teaspoons of cotton candy flavoring, depending on how strong you want the taste to be. I always start with 1 and add more if it seems necessary. For the food coloring, a few drops of pink (or blue for a fun twist!) will give your ice cream that classic carnival look.
Tip: Always start with a small amount when adding flavoring and coloring; you can always increase, but you can't take it out! Mix it well until everything is evenly combined.
Step 3: Chill the Mixture
This step is essential for achieving the best texture. Cover the bowl with plastic wrap and refrigerate it for at least 2 hours (or overnight, if possible). Chilling helps the flavors meld together and ensures a smoother base when churning.
Pro tip: If you're in a rush, you can place your mixture in a shallow pan to cool faster.
Step 4: Churn the Ice Cream
Once chilled, follow the instructions for your ice cream maker. Pour the chilled mixture into the machine and churn until it reaches a soft-serve consistency, usually about 20-30 minutes.
Warning: Make sure your ice cream maker’s bowl is completely frozen (if applicable) before you pour in the mixture. Failure to do so can lead to a slushy mess instead of creamy goodness.
Step 5: Freeze the Ice Cream
Transfer the churned ice cream into an airtight container. Cover it with a lid or plastic wrap to prevent ice crystals from forming. Freeze for at least 4 hours to help it firm up.
Tip: If you plan to add attractive toppings, now’s a great time! You can swirl in more cotton candy or even colorful sprinkles before freezing.
Troubleshooting Common Issues
- Ice Cream Too Hard: If your ice cream becomes too solid after freezing, simply let it sit at room temperature for about 5–10 minutes before scooping.
- Gritty Texture: This can happen if the sugar doesn’t dissolve properly. Make sure to mix thoroughly in the initial step.
- Flavor Too Weak: If you find the flavor too subtle, you can always mix a little extra flavoring into the churned ice cream before it goes back into the freezer.
Creative Variations
As an ice cream enthusiast, I love to play around with different mixes. Here are some creative variations you might enjoy:
- Cotton Candy Swirl: Fold in some crushed cotton candy right before transferring it to the freezer for extra texture and sweetness.
- Rainbow Cotton Candy: Divide the base into separate bowls; add different food colorings to each batch and layer them in the storage container.
- Mix-in Delights: Add a sprinkle of mini marshmallows or colorful sprinkles just before finishing the churning process.
Personal Touches
Every treat I create has a memory attached to it. I remember making cotton candy ice cream with my daughter when she was young, the two of us laughing as we tried to guess how much cotton candy flavor was just right. Each scoop became a family tradition, packed full of laughter and joy.
Final Thoughts
Making Cotton Candy Ice Cream at home is not only fun but also a rewarding experience that allows you to bring a touch of whimsy to any occasion. It's a fantastic treat to share with family and friends or even to indulge in all by yourself while binge-watching your favorite shows. The vibrant color, the sweet flavor, and the creamy texture will surely make this an instant hit.
So, gather your ingredients, roll up your sleeves, and start this delightful journey in your kitchen. Remember, the best part is the joy of creation and experimenting with flavors and textures. Happy crafting, and enjoy every scoop of your dreamy cotton candy ice cream!