How to Make Colorful Bioplastic Suncatchers: A Step-by-Step Guide
Hello fellow crafting enthusiasts! Today, I'm excited to share a project that combines creativity, sustainability, and a touch of magic—Colorful Bioplastic Suncatchers. These delightful creations not only brighten up your space but also showcase how fun and eco-friendly crafting can be. As someone who has wandered through the vibrant world of crafting for years, I've learned a lot about making beautiful items that are kinder to our planet. So let's dive in!
What Are Colorful Bioplastic Suncatchers?
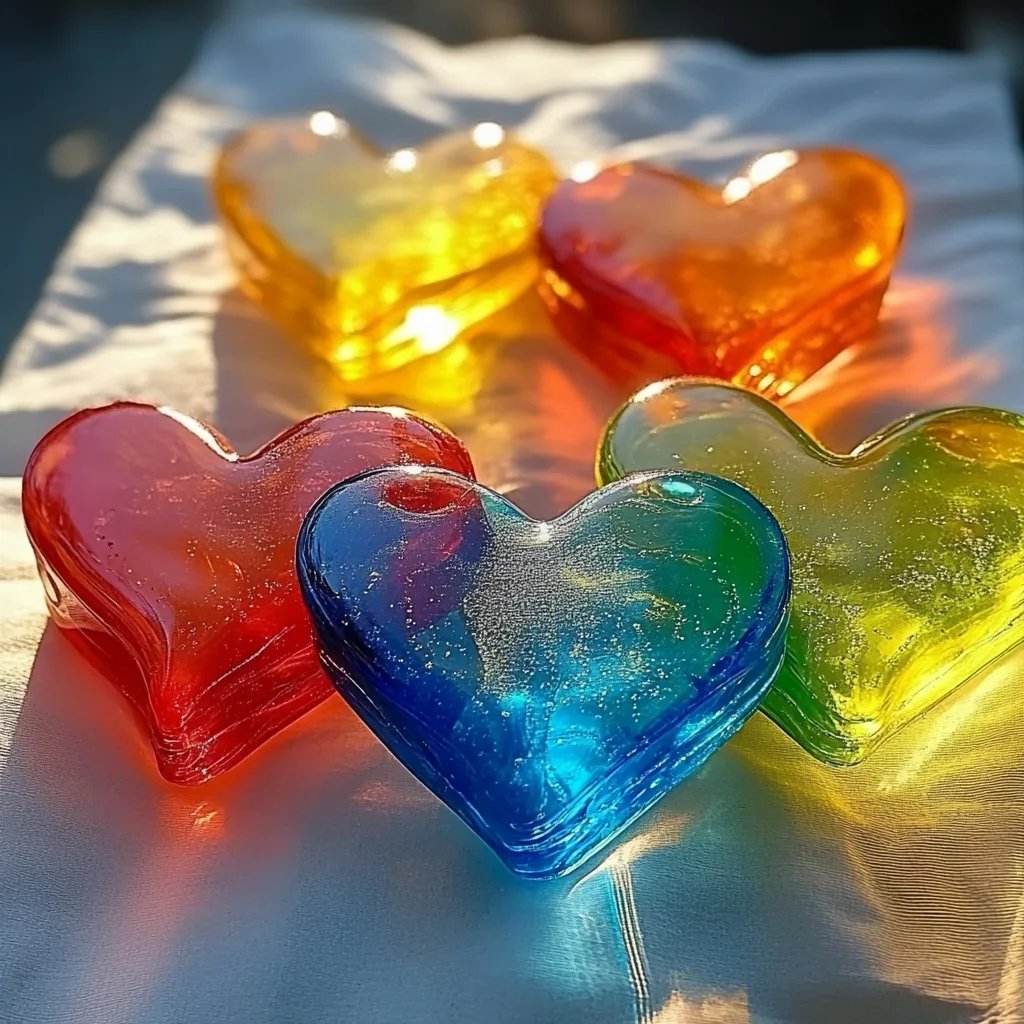
Colorful Bioplastic Suncatchers are decorative items made from a unique bioplastic material—typically derived from natural sources like cornstarch or gelatin. When the light shines through them, they cast vibrant colors and mesmerizing patterns in your space. These suncatchers are especially popular for brightening up windows, creating cheerful fiestas for children, or even adding a whimsical touch to parties and seasonal celebrations.
Not only do these suncatchers look gorgeous, but they also provide an excellent opportunity to engage in eco-friendly crafting that avoids single-use plastics and other synthetic materials. Imagine waking up in the morning, sipping your coffee, and watching the sunlight create a dazzling display right in your living room. It’s a simple pleasure that makes your home feel more vibrant.
Why Make Suncatchers?
- Eco-Friendly: Using bioplastic helps reduce waste and environmental impact.
- Customizable: You can personalize colors, shapes, and sizes to fit your style.
- Fun for All Ages: This project is perfect for crafting with kids or enjoying solo.
- Covenant Decor: Perfect for brightening your windows year-round or giving as gifts.
Let’s Gather Our Materials
Before rolling up your sleeves, let’s ensure you have everything you need for this project. Here's a comprehensive list of what you'll need:
Ingredients for the Bioplastic
- Cornstarch (1 cup): This serves as our base and gives the suncatcher its structure.
- Water (1 cup): Essential for mixing with cornstarch to create our bioplastic.
- Food Coloring: Multiple colors for a vibrant stained-glass effect. Neon colors work wonderfully!
- Vinegar (1 tablespoon): This acts as a preservative and helps the bioplastic hold its shape.
Tools
- Saucepan: For mixing the ingredients on the stove.
- Whisk or Spoon: For stirring.
- Wax Paper or Silicone Molds: To shape your suncatchers.
- Cookie Cutters: For creating fun and unique shapes.
- Baking Sheet: To place your molds on while they set.
- Pencil and Scissors: If you're crafting intricate designs.
Step-by-Step Guide to Crafting Colorful Bioplastic Suncatchers
Step 1: Prepare the Mixture
First, let’s make our bioplastic. In a saucepan, combine the cornstarch, water, and vinegar. Stir well until you achieve a smooth mixture with no lumps. As you do this, it’s essential to mix thoroughly because any lumps may lead to uneven textures in your final product—nobody wants that!
Tip: Pour the mixture through a fine mesh strainer if you see lumps—we want a velvety bioplastic!
Step 2: Heat the Mixture
Place the saucepan over medium heat and continue stirring the mixture. You'll notice it starting to thicken. This is a key moment! Keep stirring to avoid any burning at the bottom of the pan. It might take about 5-10 minutes for it to reach a gel-like consistency.
What Could Go Wrong: If your mixture burns, it can create a bitter smell and ruin the entire batch. If this happens, don’t panic—just start over with fresh ingredients.
Step 3: Add Color
Once thickened, remove the saucepan from the heat. Now comes the fun part: add your food coloring! Don’t be shy—experiment with mixing colors to create your desired hues. Keep in mind that brighter colors will yield more vibrant suncatchers, so let your imagination flow!
Personal Anecdote: I remember crafting these with my niece—she loved swirling the colors and ended up with some beautifully marbled designs.
Step 4: Shape Your Suncatchers
Now it’s time to shape the mixture. Pour a generous spoonful onto your wax paper or into your silicone molds. Flatten or spread it out to about 1/4 inch thickness using a spatula or your fingers. If you’re feeling adventurous, use cookie cutters to create unique shapes, such as hearts, stars, or flowers.
Once shaped, carefully poke a tiny hole at the top using a straw or skewer for hanging. This ensures you’ll have a spot to insert a string or ribbon later.
Safety Warning: Be careful not to touch the mixture if it’s still hot, as it can cause burns.
Step 5: Let It Dry
Allow your suncatchers to dry at room temperature for 24 hours. If you’re in a hurry, you can speed up the process by placing them in a low oven (around 150°F) for a few hours. Just keep an eye on them to avoid over-drying.
What Could Go Wrong: If it’s too humid in your space, your suncatchers might not dry completely. If you notice they’re still tacky after a day, consider putting them in a warmer, drier area.
Step 6: Display
Once your suncatchers are fully dry, gently peel them from the wax paper or molds. Thread a piece of string or ribbon through the hole you made earlier and hang them in a sunny spot.
Creative Variations: Consider layering multiple colors, making smaller pieces to create a mobile, or adding beads to your hanging strings for extra flair.
Final Thoughts
Making Colorful Bioplastic Suncatchers is not only a rewarding experience, but it’s also a wonderfully sustainable choice to decorate your home. Each suncatcher tells a story of creativity and mindfulness. I encourage you to share this project with friends and family. Crafting, after all, is not just about creating beautiful items—it's about the connections we make and the memories we create along the way.
So gather your materials, unleash your creativity, and illuminate your space with these colorful bioplastic masterpieces! Happy crafting!