How to Make Candy Sushi: A Sweet Crafting Adventure
Hello, fellow crafters! Today, I’m excited to share a delightful project that brings creativity and deliciousness together: Candy Sushi! If you've ever wanted to partake in a fun, edible craft that’s perfect for parties, family gatherings, or just a cozy afternoon at home, then you're in for a treat!
Candy Sushi has become incredibly popular among kids and adults alike—not only because it’s fun to make, but also because it’s a whimsical twist on traditional sushi that everyone can enjoy. You can serve it at birthday parties, as a unique dessert at a family get-together, or even as a fun activity for a playdate. Essentially, it’s a versatile and delightful way to get creative in the kitchen.
So, let’s roll up our sleeves and dive into the process of making Candy Sushi!
What is Candy Sushi?
At its core, Candy Sushi is a playful take on the culinary art of sushi-making—but instead of rice, fish, and seaweed, we use sweet ingredients like Rice Krispies, fruit roll-ups, and candy. The best part? While traditional sushi can be intimidating to some, making Candy Sushi is straightforward and accessible! Plus, it offers endless possibilities for customization that can cater to all taste preferences.
Materials Needed
Before we jump into the step-by-step process, let’s gather our materials:
Essential Ingredients:
- Rice Krispies cereal: About 4 cups (this serves as the base).
- Marshmallows: 10-12 large or 4 cups of mini marshmallows (the glue that holds our Candy Sushi together).
- Butter: 2 tablespoons (for greasing your hands and the pan).
- Fruit roll-ups or seaweed sheets: For wrapping the sushi (these add color and flavor).
- Assorted candies: Think gummy worms, Sour Patch Kids, chocolate bars, and M&M’s—anything that can serve as your candy “fillings”!
Optional Tools:
- Large mixing bowl
- Rubber spatula
- 9×13 inch pan: For shaping the Rice Krispies mixture.
- Sharp knife: For slicing the finished sushi.
- Parchment paper: If you want an easy cleanup.
Step-by-Step Instructions
Step 1: Prepare Your Workspace
Make sure that your workspace is clean and organized. I like to lay out all my ingredients and tools before starting. It makes the process smoother and far more enjoyable! Grease your hands with a bit of butter to prevent the mixture from sticking (a vital tip!).
Step 2: Make the Rice Krispies Mixture
- In a large pot over medium heat, melt 2 tablespoons of butter.
- Once melted, add the marshmallows to the pot and stir continuously until they are completely melted and smooth.
- Remove the pot from the heat and quickly add the Rice Krispies cereal. Stir until every piece is well coated with the gooey marshmallow mixture.
Why This Step Matters: This is the foundation of our Candy Sushi! If the marshmallows don’t melt completely, the mixture won’t bind well, and you’ll end up with a crumbly mess instead of a cohesive roll.
Step 3: Shape the Rice Krispies
- Pour the Rice Krispies mixture into the greased 9×13 inch pan and press it down evenly into the bottom. I like to use a piece of parchment paper over my hands to avoid sticking.
- Allow this to cool for about 10-15 minutes.
What Could Go Wrong: If you don’t press the mixture evenly into the pan, some parts may be thicker than others, making it difficult to cut consistently later. Just use your palms or a spatula to spread it out evenly—no pressure!
Step 4: Assemble Your Candy Sushi
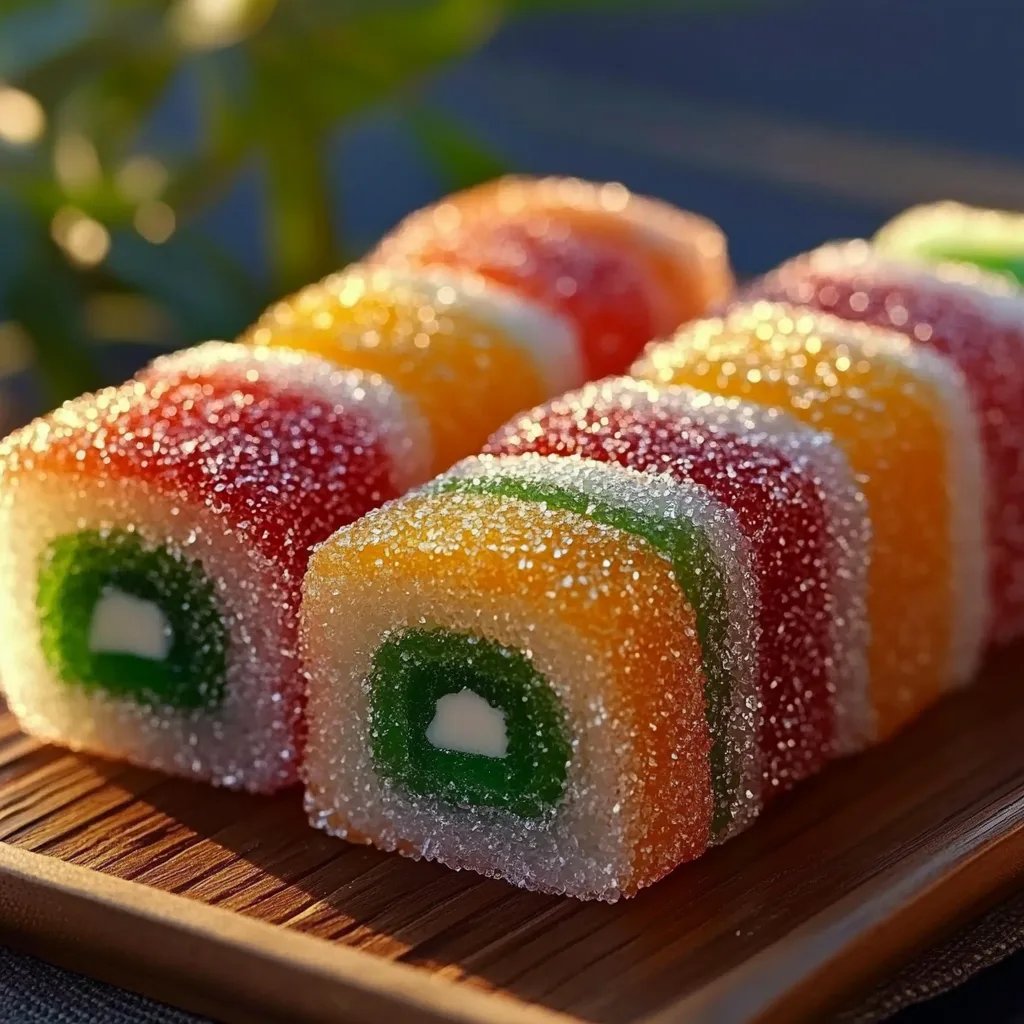
- Tear off a piece of fruit roll-up or place a seaweed sheet down. This will be the “wrap” for your sushi!
- Once your Rice Krispies mixture is cool and firm, cut it into rectangles (3×5 inches is a good size).
- Place a rectangle on top of your fruit roll-up or seaweed, add your chosen candies in the center, and roll it up tightly.
Where Things Can Go Sideways: If your Rice Krispies base is too warm, it may become mushy and difficult to roll. If this happens, let it cool a little more before trying again. Alternatively, you might also want to flatten it down a bit if it's too thick.
Step 5: Slice & Serve
- Use a sharp knife to slice the rolled sushi into bite-sized pieces. You can wipe the knife with a damp cloth between cuts to ensure clean slices.
- Arrange your Candy Sushi on a platter, and if you're feeling extra creative, garnish with extra candies or a drizzle of chocolate sauce!
Creative Variations: Don’t limit yourself to just one flavor! You can experiment with different kinds of fruits or candies, or even use flavored Rice Krispies for added fun.
Tips & Tricks for Success
- Be Creative: Your Candy Sushi can take on various themes! Use tropical candies for a summer vibe, Halloween candies for spooky fun, or holiday colors for festive cheer.
- Colorful Additions: Incorporate sprinkles or colored coconut for extra flair on the outside.
- Practice Patience: If at first your rolls are messy, don’t be discouraged. With a little practice, you’ll become a Candy Sushi pro!
Safety Warnings
While Candy Sushi is mostly a safe endeavor, always supervise young children when using knives for slicing, and be mindful of potential choking hazards with small candies.
Final Thoughts
I hope you’re feeling inspired to create your own Candy Sushi after reading this article! It’s an absolute joy to make and share with family and friends. This project is as much about the fun of crafting as it is about indulging in something sweet and special.
Whether you’re making Candy Sushi for a gathering or simply for the joy of creation, remember to savor the experience. Be bold, be creative, and most importantly, enjoy the delicious results of your hard work!
Happy crafting, and I can’t wait to see the Candy Sushi you create! Don’t forget to share your adventures with me! 🍭🍣