How to Make Candy Geode: A Sweet Crafting Adventure
The world of crafting can be a magical place where simple ingredients transform into stunning creations. One of my favorite projects that embodies this transformative nature is making candy geodes. These edible masterpieces have gained popularity across social media platforms, and it’s no wonder why—they are gorgeous, colorful, and provide a delightful surprise when you crack them open to reveal their crystalline centers. Whether you’re hosting a party, creating a unique cake topper, or looking for a fun activity to do with kids, candy geodes are a scrumptious choice that will impress everyone.
In this detailed tutorial, I’ll take you through the process of making candy geodes step-by-step. We’ll cover everything from the materials you’ll need to common pitfalls to avoid, along with safety tips and creative variations to elevate your candy geode game. So, let’s dive right in!
What Are Candy Geodes?
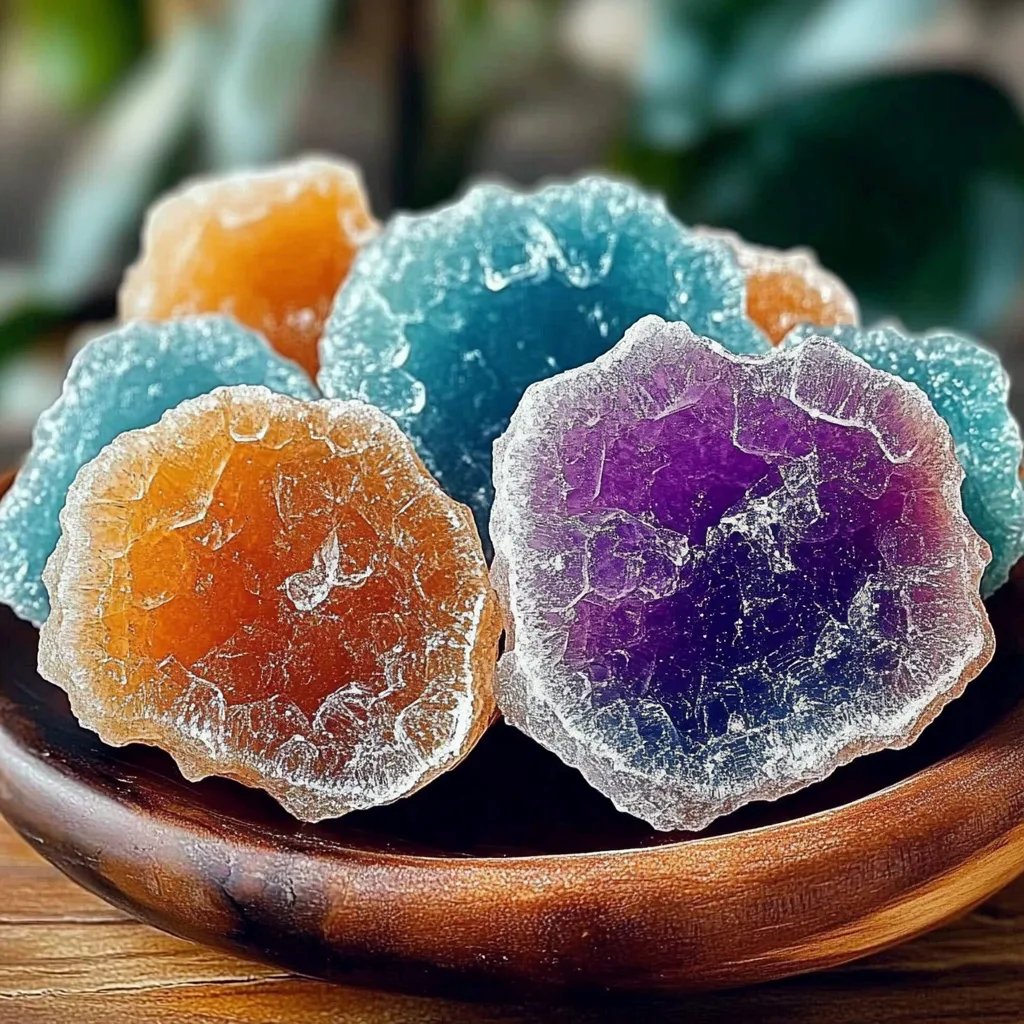
Candy geodes are edible replicas of the beautiful igneous rocks found in nature. They are generally made from sugar, corn syrup, and food coloring, cast in molds that mimic the shape of real geodes. A candy geode might look complex, but with the right guidance, you can create a stunning piece of art to delight anyone with a sweet tooth.
These eye-catching treats can be used for various occasions: as decorations for birthday cakes, as unique favors for bridal or baby showers, or simply for enjoying as a special dessert. Their versatility allows them to shine in any context!
Materials Needed
Before we embark on our candy geode adventure, let’s gather our materials. Here’s what you'll need:
Base Ingredients
- Granulated Sugar: The foundation of your candy. Typically, you'll need 2 cups.
- Corn Syrup: This gives the candy its glossy sheen and helps with binding—1 cup should suffice.
- Water: Essential for dissolving the sugar—about 1/2 cup.
Additional Ingredients
- Food Coloring: Gel colors work best, as they create vivid hues without adding excess liquid.
- Confectioners’ Sugar: Used for dusting and preventing stickiness.
Tools & Equipment
- Candy Thermometer: A must-have for monitoring sugar temperatures accurately.
- Silicone Molds: Geode-shaped molds or any round silicone molds will do.
- Spatula: For stirring the mixture.
- Heat-Resistant Gloves: Safety first! The candy will get very hot.
- Sheet Pan: For cooling the candy.
Step-by-Step Tutorial
Step 1: Prepare Your Work Area
Before you start, it’s essential to prep your workspace. Make sure to cover your surfaces with parchment paper or a silicone mat. This keeps things clean and makes for easy cleanup. It helps to have all your tools and ingredients ready to go so you won’t be rushing around once the candy starts melting.
Step 2: Combine Ingredients
In a medium-sized saucepan, combine the granulated sugar, corn syrup, and water. Stir the mixture over low heat until the sugar is dissolved. This is a crucial step—if the sugar doesn’t dissolve completely, the candy will end up grainy instead of smooth, so be patient!
Step 3: Heat the Mixture
Once dissolved, increase the heat to medium-high and let the mixture come to a boil. Do not stir after this point, as this can cause sugar crystals to form. Instead, monitor the mixture closely.
Step 4: Check the Temperature
Using your candy thermometer, keep an eye on the temperature as it rises. You want your candy to reach the hard crack stage, which is 300°F (150°C). This temperature gives the candy its hard and crunchable texture.
Common Mistake: Overheating or Underheating
If you leave the mixture unattended, it can quickly exceed this temperature and burn. Conversely, if it’s undercooked, it won’t harden correctly. To remedy this, stay vigilant and remove from heat as soon as it reaches 300°F.
Step 5: Add Food Coloring
Once your mixture hits the right temperature, remove it from heat. This is where the magic happens! Divide the mixture into separate bowls and add your chosen gel food coloring to each one. The more vibrant the colors, the more spectacular your geodes will look! Be cautious and wear gloves during this step to prevent staining your hands.
Step 6: Pour into Molds
Carefully pour the colored sugar mixtures into your silicone molds. You can layer colors or swirl them for a more natural geode effect. Tap the molds gently on the counter to remove any air bubbles, which can leave unsightly holes in your finished product.
Step 7: Cool Down
Let your candy geodes sit at room temperature until completely cooled. This may take several hours, but the anticipation is part of the fun! If you’re in a hurry, you can pop them in the fridge for about 30 minutes to speed things up.
Step 8: Unmold and Dust with Confectioners' Sugar
Once the candy has cooled completely and hardened, carefully remove it from the molds. Dust the exterior with confectioners’ sugar to give the geodes a sparkling, frosty appearance while simultaneously preventing them from sticking together.
Troubleshooting
While I hope you sail through your candy geode crafting, here are some potential hiccups and their solutions:
- GRANULAR TEXTURE: If your candy turns out grainy, it often means the sugar didn’t dissolve properly. Next time, try stirring more thoroughly at a lower heat.
- TOO SOFT: If the candy doesn't harden, it may not have reached the hard crack stage. A candy thermometer is invaluable here—invest in a good-quality one.
- STICKING TO MOLDS: If your candy geodes are sticking, dust the inside of the mold with a light coating of confectioners’ sugar or cooking spray prior to pouring in the mixture.
Tips and Safety Warnings
- Skill Level: Crafting these candies requires some temperature control and patience. Be sure to read the steps fully before commencing.
- Safety First: Candy can reach extremely high temperatures—handle it with care. Always wear gloves when working with hot sugar and keep children away from the stove.
- Ingredient Substitutions: If you don’t have corn syrup, you can substitute light golden syrup or honey, but the texture may vary slightly.
Creative Variations
Here are some ideas to customize your candy geodes further:
- Natural Flavoring: Add extracts like vanilla or almond to impart additional flavor.
- Garnishes: Use edible glitter or luster dust after dusting with confectioners’ sugar for a sparkling effect.
- Alternative Shapes: Instead of traditional geode molds, try using cookie cutters or other unique forms to create themed shapes for events.
Personal Anecdote
The first time I made candy geodes, it was for my niece’s birthday. I was a bit nervous because I had seen some impressive creations online, and I wanted to live up to those standards. However, as I mixed the ingredients, the process felt intuitive. Watching those vibrant colors come together was sheer joy! When I presented the finished geodes, my niece’s eyes lit up—it was a moment I’ll never forget. It reminded me that crafting is not just about the end result but also the memories we create along the way.
Conclusion
And there you have it! A comprehensive guide to making your own candy geodes. Whether you choose to keep them for yourself, gift them to friends, or use them as cake decorations, these candy geodes are sure to bring a smile to anyone’s face. Remember, crafting is about exploration and creativity, so don’t hesitate to experiment with colors and shapes. Happy crafting, and may your kitchen be filled with sweet, sparkling wonders!