How to Make Bloody Pumpkin with Candy Fingers: A Spooktacular Halloween Craft
As the crisp air of October rolls around, so does the enchanting season of Halloween—full of spooky decor, trick-or-treating, and, of course, fun crafts! One of my favorite projects to get into the spirit is creating my Bloody Pumpkin with Candy Fingers. This eerie yet delightful creation not only serves as a standout centerpiece for your Halloween festivities but also doubles as a playful snack. Plus, it's an ideal way to unleash your inner artist while keeping the crafting vibe festive and light-hearted.
Why Make Bloody Pumpkins with Candy Fingers?
The beauty of crafting a Bloody Pumpkin with Candy Fingers lies in its irresistible charm and versatility. It's perfect for family gatherings, Halloween parties, or even as a unique gift for your neighbors. The combination of a spooky pumpkin and sweet candy fingers can evoke both laughter and fright, making it a great conversation starter.
When to Use This Craft?
- Halloween Parties: It’s sure to steal the show at any fright fest.
- Decorative Displays: Amp up your home decor, bringing a fun, festive spirit.
- Trick-or-Treat Alternatives: Hand these out as innovative, homemade goodies.
Now that I've whetted your appetite for creepiness, let’s dive into the step-by-step process of creating our Bloody Pumpkin with Candy Fingers.
—
Materials You’ll Need
For the Bloody Pumpkin:
- 1 Medium-sized Pumpkin: Look for a pumpkin with a smooth surface for better painting and carving.
- Red Acrylic Paint: This will give us that oozy, bloody effect.
- Black Acrylic Paint: Ideal for detailing and creating the pumpkin's face.
- Fine Paintbrushes: To help with the detailed designs.
- Paper Towels: For quick clean-ups and drying paint.
- Mod Podge (optional): A sealing agent for added shine and durability.
For the Candy Fingers:
- Candy Corn: These will form the 'fingertips.’
- Chocolate-covered Almonds or Pretzels: Great for the base of the fingers.
- White Chocolate (for melting): This will be the glue for assembling fingers.
- Green Food Coloring: If you'd like to add a touch of color to the fingers.
- Wax Paper: Useful for cooling and assembling your candy fingers.
—
Step-by-Step Tutorial: Crafting Your Bloody Pumpkin with Candy Fingers
Step 1: Preparing Your Pumpkin
I always start by cleaning the pumpkin thoroughly. Make sure to remove any dirt or chemicals from the surface, as this will affect how well your paint adheres. Simply wash it with soap and water, and dry it with a towel.
Tip: Choose a pumpkin with a sturdy stem so it doesn't break when you’re painting.
Step 2: Painting the Base
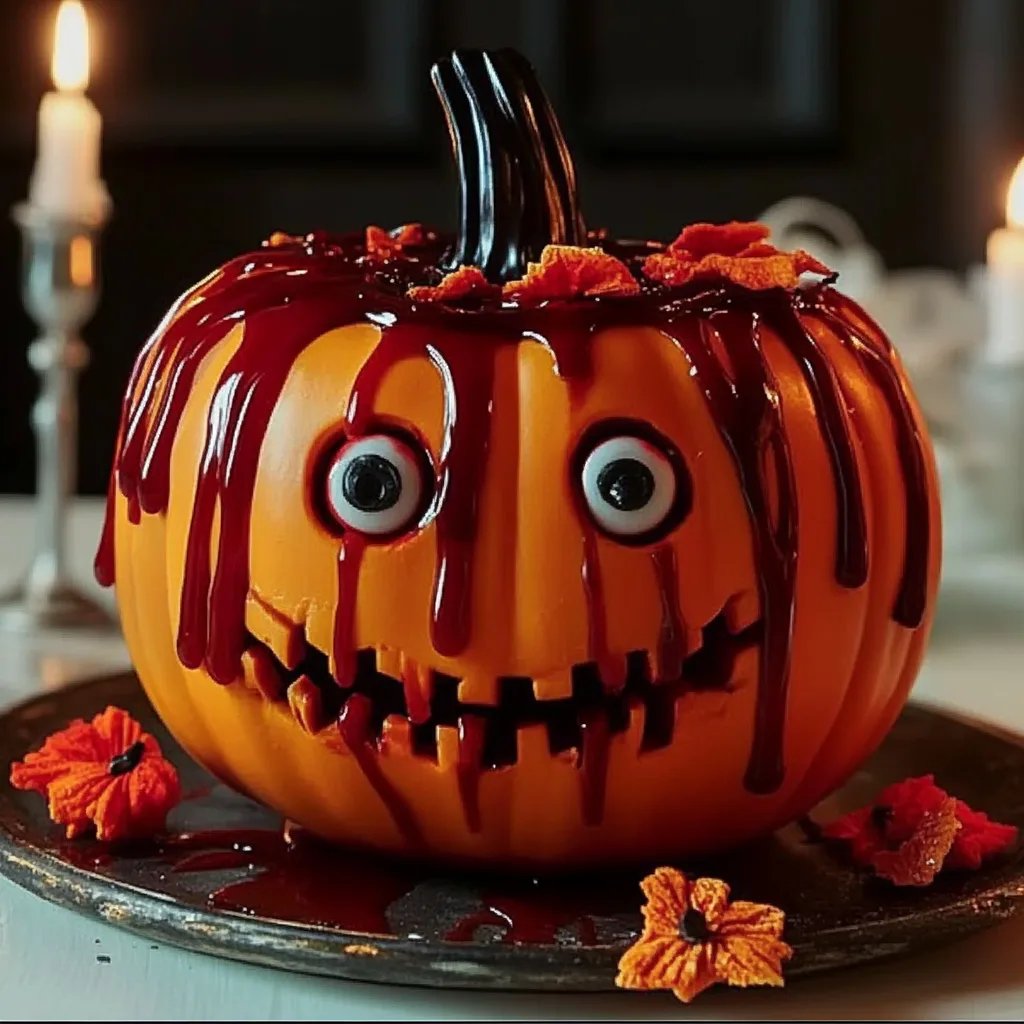
In a well-ventilated area, take your red acrylic paint and begin painting the top half of the pumpkin, letting it drip down to create a “bloody” effect. This is where the drama unfolds! You can use a sponge brush if you prefer a less uniform look or a regular brush for more precise drips.
Why It Matters: The texture and allow some segments to remain untouched to mimic blood splatters rather than a single coat of paint. Allow it to dry completely—at least 30 minutes.
Mistakes to Avoid: If the paint clumps, simply lightly brush it out with a clean paintbrush.
Step 3: Adding Details
Now comes the fun part: using black acrylic paint to create a spooky face. You can go for traditional jack-o’-lantern eyes, nose, and mouth, or let your creativity run wild with wacky designs.
Tip: Sketch out your designs with a light pencil beforehand if you're unsure.
Step 4: Create Candy Fingers
While your pumpkin dries, let’s focus on prepping those creepy candy fingers. Melt white chocolate in a microwave-safe bowl, heating for 30 seconds at a time, stirring in between until smooth.
- Assemble the Fingers: On a piece of wax paper, place your chocolate-covered almonds or pretzels, and drizzle melted white chocolate over the top, letting it drip like fingernails.
- Add Candy Corn Tips: Before the white chocolate hardens, press a piece of candy corn onto each finger to form the ‘nail’ of the finger and let it set.
Step 5: Garnishing the Pumpkin
Once the pumpkin paint has entirely dried, seal it with a layer of Mod Podge if you want extra protection.
Personal Anecdote: I remember the first time I forgot this step. After a week outside, the weather ruined all my hard work! Never skimp on sealing it.
Step 6: Final Assembly
Carefully place the completed candy fingers around the base of your pumpkin. You can even lean some against the pumpkin or lay them on a nearby platter for additional flair!
Creative Variations & Alternative Ingredients
- For a Gooey Middle: If you want to add extra appeal, create a mixture of jam and corn syrup to pour into the top of the pumpkin, giving it an even bloodier appearance.
- Differentiating Colors: Experiment with different colors of candy fingers. Maybe make the "nails" red or purple for added horror.
- Non-Candy Options: For a healthier version, use fruit slices (like apple wedges) with almond slivers as fingers.
—
Safety Warnings
While crafting, remember to keep acrylic paints and melted chocolate away from children if they aren’t directly supervising. Cross-contamination can occur if you use utensils for multiple ingredients.
Conclusion
And there you have it! Your very own Bloody Pumpkin with Candy Fingers is ready to be the talk of your Halloween neighborhood. This project is perfect for all ages—whether you’re a seasoned crafter or a newbie. The joy of creating something spooky and delicious combines art with a little bit of sweet indulgence.
I hope this tutorial has inspired you, offering both insight and encouragement. Happy crafting, and may your Halloween be filled with creativity, joy, and just the right amount of spookiness! 🎃