How to Make an Under the Sea Sensory Play Tub: A Comprehensive Guide
Introduction: Dive into the World of Sensory Play
Welcome, fellow crafters! As an experienced creator and a devoted proponent of sensory play, I’m excited to share one of my favorite projects: the Under the Sea Sensory Play Tub. This delightful activity not only offers endless hours of fun for kids but also plays a vital role in developing their fine motor skills, enhancing their imaginations, and providing calming benefits through tactile experiences.
Whether you're planning a beach-themed party, looking for an educational activity during summer break, or merely seeking a creative way to engage indoor minds, this sensory tub will be a hit! As a parent (and a kid at heart), I’ve found that sensory tubs serve as a great way to explore textures, colors, and even the fascinating underwater world, all while engaging multiple senses. Ready to dive in? Let’s get started!
—
What is Sensory Play?
Before I get into the nitty-gritty of creating your sensory tub, let’s discuss what sensory play is. Sensory play involves activities that stimulate a child’s senses—touch, smell, sight, sound, and even taste (with particular care!). The Under the Sea Sensory Play Tub is perfect because it invites kids to touch various materials that mimic the ocean's textures, dive into imaginative play, and learn about marine life.
—
Step-by-Step Tutorial: Creating Your Under the Sea Sensory Play Tub
Now that we’ve set the scene, let’s roll up our sleeves and get crafting! Here’s a comprehensive guide to making your sensory tub using simple, accessible materials.
Materials Needed
- Plastic tub or container: A large storage bin works best. I usually opt for one that’s at least 20 inches long for ample space.
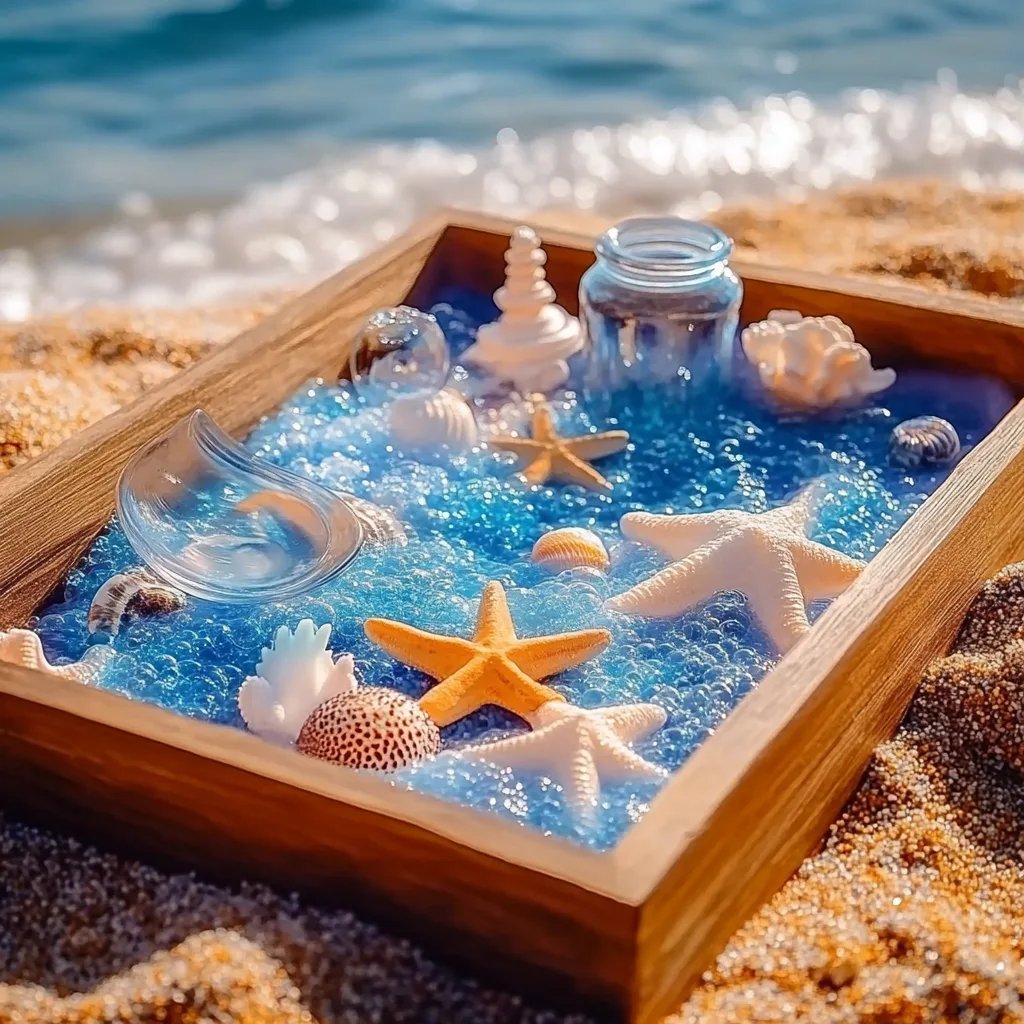
- Blue colored water beads or gel beads: These mimic the ocean’s surface. You can find them in craft stores or online.
- Shells and rocks: Real or faux shells give a realistic touch. I collect seashells during beach trips which add a personal touch!
- Small plastic sea creatures: Think of fish, octopuses, crabs, and starfish. Dollar stores or toy shops are excellent places for these.
- Sensory tools: Tweezers, scoops, and small cups can add another layer of fun and engagement.
- Water (optional): Some sensory tubs incorporate water for added exploration. Here’s where you can decide your method.
- Food coloring: For a natural touch, I recommend using natural dyes; these can color the water without overwhelming it.
Step-by-Step Process
Step 1: Prepare Your Tub
Why It Matters: Having a clean and organized workspace sets the tone for your project.
- Choose a workspace that is appropriate for messy play. If possible, do this outside or on a surface that can be easily cleaned.
- Clean the plastic tub with warm soapy water; rinse well and dry it completely.
Step 2: Add Your Base Material
What Could Go Wrong: Beads can scatter, so use a large enough container.
- Pour the blue water beads or gel beads into the tub until it’s filled to about halfway.
Tip: If you’re using dry water beads, hydrate them according to package directions, allowing them to sit for several hours before adding them to your tub. To prevent overflow, you can start with a smaller amount and gradually add more as your child plays.
Step 3: Create Texture with Shells and Rocks
Why It Matters: Adding varied textures allows children to explore and discuss differences in shapes and sizes.
- Arrange seashells, rocks, and other items into the tub. I like to hide some shells beneath the beads so that children can go on a “treasure hunt” to find them.
- Encourage imaginative play by asking your little ones to describe their findings—what type of creature they think it is!
Step 4: Introduce Marine Life
What Could Go Wrong: If your child is younger, they might put small objects in their mouths.
- Scatter small plastic sea creatures across the tub, integrating them with the beads, shells, and rocks.
Safety Warning: Ensure that all items are age-appropriate and not a choking hazard. For children under three, I prefer using larger toys with vibrant colors.
Step 5: Add Water (Optional)
Why It Matters: Water can heighten sensory experiences by creating a splash zone!
- If you choose to add water, pour gently until the beads are just submerged (or leave them dry, which is easier!).
- You may also incorporate drops of food coloring into the water for extra fun! Encourage children to mix colors and see the changes.
Step 6: Provide Tools for Exploration
What Could Go Wrong: Overloading the tub with tools can create chaos. Use only a few at a time.
- Include sensory tools like tweezers, scoops, or small cups that allow kids to practice fine motor skills as they play.
—
Creative Variations
- Theme It Up: Add storybooks about the ocean, or play soft ocean-themed music to enhance the underwater experience.
- Seasonal Sensory Tub: For summertime, I often add mini beach umbrellas or toy surfboards to keep it fresh and fun.
- Color Exploration: You can create multi-colored sensory bins by incorporating different colors of water beads or adding colored pasta.
Personal Anecdotes
I remember the first time I created an Under the Sea Sensory Play Tub for my children. They were instantly enthralled! The simple act of scooping beads turned into deep sea adventures. My son pretended to be a marine biologist while my daughter initiated a conversation about the creatures she was “discovering.” It was heartwarming to see their imaginations come alive!
—
Additional Tips
- Storage: When playtime is done, or if the sensory experience becomes overwhelming, allow your children to help you gently put everything away. Having a system for your sensory tub will teach organization while maintaining excitement for next time!
- Supervision is Key: Always supervise children while they engage in sensory play. Certain components could pose a choking hazard or cause a mess (especially if water is involved).
- Experiment: Don’t hesitate to mix elements from different sensory bins! Swap in aquarium rocks, glitter, or natural elements to keep the experience versatile and engaging.
—
Conclusion: Dive into the Fun!
Creating an Under the Sea Sensory Play Tub is not just an arts and crafts project; it's a gateway to imagination, exploration, and learning for children of all ages. By following these steps and tailoring the experience to meet the needs and interests of your little ones, you can create a magical sensory world that’s just waiting to be discovered.
If you give this project a try, I would love to hear about your experiences and any unique variations you introduce. Happy crafting, and let the undersea adventures begin!