How to Make an Edible Mason Jar Aquarium: A Crafting Journey
Greetings, fellow crafters! Today, I’m thrilled to share my experiences in creating an Edible Mason Jar Aquarium—a visually stunning and scrumptiously delightful treat that genuinely brings a wave of joy and creativity to your table. Not only does this edible creation impress guests at parties and gatherings, but it also serves as a fantastic family craft project. Imagine sitting around the table, collaborating, and crafting your delicious underwater scene while sharing laughter and artistry.
In this expansive guide, I’ll walk you through every step of the process, from selecting your ingredients to nurturing your inner artist. You don’t need an extensive background in baking or crafting to create this charming treat. Whether you’re planning a birthday party, a summer picnic, or simply want to elevate your dessert game, an Edible Mason Jar Aquarium is sure to capture everyone’s admiration.
Why the Edible Mason Jar Aquarium is So Popular
Edible Mason Jar Aquariums have gained quite the popularity in the crafting and culinary worlds due to their combination of aesthetics and tastiness. They’re perfect for any occasion, including birthday parties, summer barbecues, baby showers, or simply as a creative afternoon project with your kids. Each jar is a little world of flavor and imagination, allowing you to play with colors, texture, and flavors while creating a one-of-a-kind treat that can be enjoyed after you finish crafting it.
Materials Needed
Here’s a quick list of materials you will need for your Edible Mason Jar Aquarium:
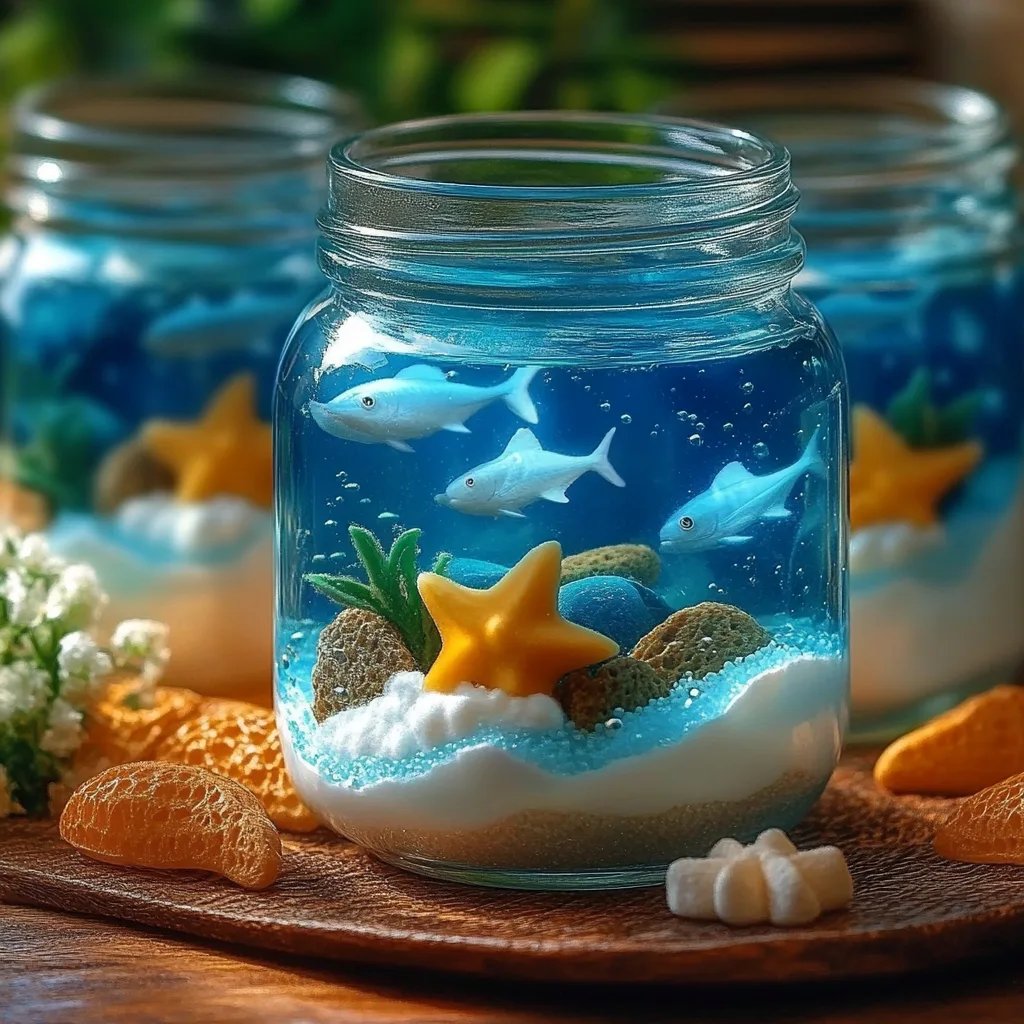
- Mason jars (small or large, depending on your vision)
- Gelatin (flavored, blue for water)
- Gummy candies (fish, sea creatures, or other shapes)
- Crushed graham crackers (to create the sandy base)
- Whipped cream or cool whip (to give a frothy ocean wave effect)
- Fruit (optional) (like edible seaweed using green gummy worms or kiwi slices)
- Food coloring (optional, to enhance the ocean color)
- Lemon or fruit-flavored soda (to mix with gelatin)
Step-by-Step Tutorial
Step 1: Prepare Your Gelatin
Start by boiling water as instructed on your gelatin package. Instead of normal water, consider substituting one part with lemon-lime soda for a sweeter twist. This adds fizz and flavor—a great tip I learned from experimentation!
Why this matters: The gelatin sets your aquarium's ‘water’ layer, and using soda allows for flavor enhancement.
To the boiling liquid, add the gelatin powder, stirring until it dissolves completely. If you wish, add blue food coloring for a vibrant look.
Tip: Make sure to taste the mixture. Adjust sweetness levels to your liking!
Step 2: Layer the Ingredients
Once your gelatin mixture cools slightly, it’s time to start layering. Pour about one-inch of the gelatin into the bottom of each Mason jar. Allow it to sit for about 10-15 minutes in the refrigerator to slightly set.
Why it matters: A solid base prevents your other ingredients from sinking.
While the first layer sets, prepare your “sand” by crushing graham crackers until they resemble fine sand. After the gelatin has started to set, carefully sprinkle a layer of crushed graham crackers on top, and gently press down.
What could go wrong: If you pour the crackers in too soon, they will sink.
Step 3: Add Your Sea Creatures
Now, it’s time to introduce some life to your ocean! Drop in your gummy sea creatures—goldfish, sharks, octopuses—whatever suits your ocean scene. You can even toss in some gummy worms to mimic seaweed.
Why it matters: This is the fun part! Personalize your aquarium to mirror your creative vision.
After you’ve arranged the candies, prepare another batch of gelatin and pour over the top of the jars until you reach the desired level (about halfway full).
Step 4: Chill and Decorate
Place your jars back into the fridge for about 2-4 hours until the gelatin is fully set.
Once they are ready, the real fun begins—decorating! Use whipped cream or cool whip on top for a frothy “wave” effect.
Alternative method: If you’re interested in creating a sugary look using crushed blue candy or blue coconut flakes, that could add a whimsical twist.
Step 5: Serve and Enjoy
After everything is set and layered beautifully, you can add a little “seaweed” by decorating with green gummy worms or thin pieces of kiwi on top to elevate your underwater world’s aesthetic.
Once served, I love watching the smiles spread across faces as people dive in!
Troubleshooting Common Issues
- Gelatin Isn’t Setting: This can happen if the mixture hasn’t cooled enough before pouring or if the gelatin-to-water ratio is off. To fix this, gently reheat and mix more gelatin as needed.
- Layers are Mixing: If the layers blend together, check if the bottom layers have appropriately set before layering on the next. Make sure there's a good enough cooling period.
- Too Sweet or Not Sweet Enough: If you find the taste off, always adjust your liquid sweeteners and flavors in moderation. Keep records on what ratios worked best for future endeavors!
Tips and Safety Warnings
- If kids are involved, make sure to supervise the activity closely, particularly when dealing with sharp utensils and boiling liquids.
- Allergies can also affect your ingredient choices. Always read labels to ensure inclusivity.
- Mix it up! Don’t hesitate to try different flavors or even add fresh fruits for health-conscious guests.
Creative Variations
- Halloween Edition: Use orange gelatin, gummy worms, and spooky-shaped candies to create a Halloween aquarium.
- Seasonal Themes: Alter colors and flavors for different holidays; think red and green for Christmas, or pastel shades for Easter.
- Edible Decorations: Use edible glitter to give your aquarium an ethereal sparkle.
Final Thoughts
Crafting an Edible Mason Jar Aquarium is more than just a delectable treat; it’s an experience filled with creativity and camaraderie. Remember, the beauty of crafting lies in its imperfections—each jar tells its own unique story. Come back here with your variations or to share your own tips; I want to hear about your journey! Until next time, embrace your creativity and happy crafting!