How to Make a Stunning CD Suncatcher: A Step-By-Step Guide
Hello, fellow crafting enthusiasts! Today I’m excited to share with you one of the most delightful and eco-friendly crafts I have ever come across: CD suncatchers. If you've ever marveled at the enchanting way light dances through colored glass in a window or the perfect glitter of sunlight twinkling on water, you’ll understand why suncatchers hold such appeal. They can transform mundane spaces into magical ones, all while being easy and fun to create.
What Are CD Suncatchers?
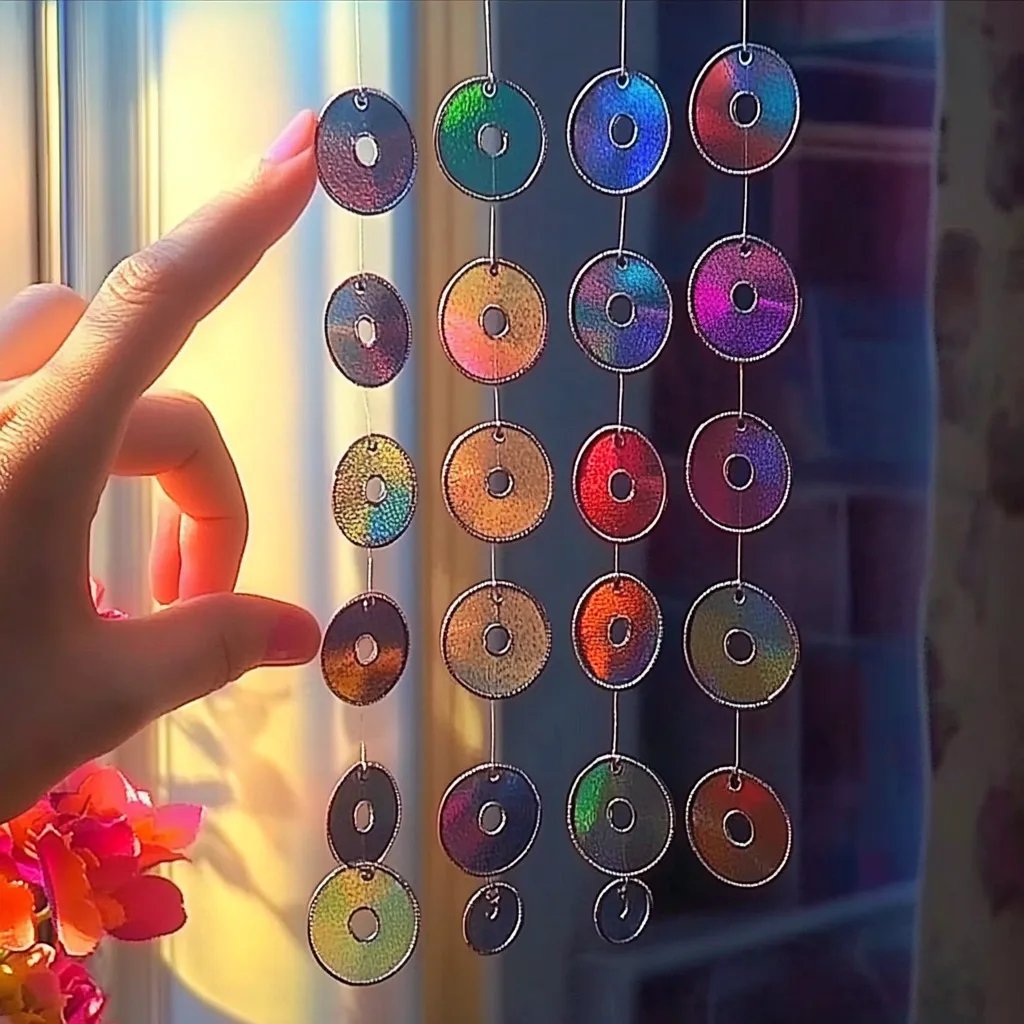
A CD suncatcher is a decorative piece that utilizes old, discarded CDs (or DVDs) and transforms them into beautiful art that catches sunlight, creating colorful reflections around your home. These whimsical creations are not just perfect for adding color to a room; they also serve as an environmentally friendly way to repurpose outdated technology. They're perfect for brightening up a window, hanging in your garden, or even as a playful addition to a child’s room.
Why are CD Suncatchers Popular?
CD suncatchers are popular for several reasons:
- Eco-Friendly: Recycling old CDs keeps them out of the landfill.
- Cost-Effective: Most of the materials are easily affordable, if not free.
- Child-Friendly: A great project for families or classrooms, encouraging creativity.
- Personalized Creations: Each suncatcher can reflect your unique style with colors and designs.
When Can You Use Them?
You can display CD suncatchers year-round. They’re particularly wonderful during the spring and summer when the sunlight is plenty, and you can make them for special occasions like birthdays, weddings, or seasonal decorations!
Gathering Your Materials
Before diving into the crafting process, let’s gather some easily accessible materials. Here’s what you will need:
Supplies:
- Old CDs or DVDs: Collect some that you no longer use.
- Acrylic Paint or Permanent Markers: The more vibrant, the better!
- Hot Glue Gun: For assembling the suncatcher.
- Fishing Line or Strong String: For hanging your creation.
- Scissors: For cutting string and potentially the CDs if you want smaller pieces.
- Paintbrushes: If you’re using acrylic paint.
- Mod Podge (Optional): For sealing your artwork and adding a glossy finish.
- Protective workspace: Old newspapers or a crafting mat to keep the area tidy.
Step-by-Step Tutorial
Step 1: Prepare Your Workspace
Set up your crafting area with newspapers or a craft mat. This step is crucial because the paint can get a little messy, and it's easier to clean up later. Organizing your materials within reach will allow the process to flow smoothly.
Step 2: Clean Your CDs
Take a moment to thoroughly clean the CDs. Wash them with soap and water, then dry them completely. This step is important because any dirt or oil can prevent the paint from adhering properly. If you forget this step, you might end up with an uneven paint job. If the old reflective surface is troubling, a gentle rub with a soft cloth may help to restore shine.
Step 3: Create Your Design
Now comes the fun part! Using acrylic paint or permanent markers, start decorating your CDs. You can swirl colors together, create geometric patterns, or even go for themed designs based on seasons or holidays. Here’s a tip: acrylic paints dry quickly and allow for layering, so don’t hesitate to build up colors for depth.
If you’re using markers, keep in mind that you may need to work quickly to ensure even color application. Once you're satisfied with your design, let it dry completely. If you want to seal it, apply a thin layer of Mod Podge once the paint is dry.
Step 4: Assemble Your Suncatcher
Once your designs are dry and set, it’s time to assemble your piece. You can choose to keep the CDs whole or cut them into smaller shapes for a more dynamic look. If you decide to cut, you may want to use a utility knife, but exercise caution, as this requires a steady hand.
Position your CDs to your liking, and then use a hot glue gun to attach them together (if you’re using multiple). Make sure to give the glue a moment to cool and set properly; this ensures your suncatcher remains intact when hanging.
Step 5: Add the Hanging Mechanism
Use scissors to cut a length of fishing line or string—approximately 12 inches long, depending on how high you want to hang your suncatcher. Attach one end through the center of your CD, applying a small dab of hot glue for extra security.
Make a loop with the other end and tie a knot for hanging. This step matters because a secure knot will ensure that your suncatcher doesn't come crashing down unexpectedly!
Step 6: Hang and Enjoy!
Select a sunny window or a bright nice spot outdoors and hang up your beautiful suncatcher. Watch as beams of light reflect off your creation, filling your space with color. Enjoy the fruits of your labor and perhaps share with friends how they, too, can create their own suncatchers!
Troubleshooting Common Issues
- Uneven Paint: If you notice that your paint hasn’t applied evenly, you can always paint over it once the first layer dries.
- Glue Not Holding: If the glue isn't securing pieces properly, allow more time for it to cool and harden. Alternatively, you can reinforce connections with extra glue or switch to a more robust adhesive.
Personal Tips and Anecdotes
I remember the first time I made a suncatcher—I was overwhelmed with joy as I watched the sunlight create colors on my wall. It’s therapeutic to paint and express creativity, and these suncatchers always bring back fond memories of those sunny days.
Creative Variations
Feel free to personalize your suncatcher further! You might add beads, natural materials like dried flowers, or even glitter for that extra sparkle.
If you're feeling adventurous, explore geometrical designs with additional shapes cut from the CDs, or theme your suncatchers around holidays—think pastel colors for Easter or bright reds and greens for Christmas!
Safety Notes
While using a hot glue gun, be cautious as the glue will be extremely hot. Make sure you have a safe workspace and possibly some gloves for protection if you're concerned about burns.
Conclusion
I hope this guide inspires you to turn your old CDs into beautiful suncatcher crafts! The joy of creating something delightful while making good use of what you already have is a satisfying experience that shines through your work. Crafting is a wonderful journey, and every project adds a touch of magic to your day. Happy crafting, and may your new suncatchers bring you endless sunshine!