How to Make a Salt Volcano: A Fun and Engaging DIY Project
Hey there, fellow craft enthusiasts! Today, I'm excited to bring you one of my favorite DIY projects: making a Salt Volcano! This hands-on activity is not only a delight to see but also an excellent way to learn about chemical reactions, geology, and the joy of crafting. Whether you’re a teacher looking for a captivating project for your classroom, a parent seeking a fun afternoon activity, or simply a curious crafter wanting to explore something new, this guide is for you.
What is a Salt Volcano?
A Salt Volcano is a visually striking DIY project that mimics the eruption of a volcano using simple materials like salt, water, and vinegar. The project is popular for its ease and accessibility, making it a favored choice in educational settings, birthday parties, or rainy day activities at home. As the salt dissolves and interacts with the acidic vinegar, it creates an exciting fizzing reaction that bubbles over like lava.
Why Make a Salt Volcano?
- Educational Value: It's a fantastic way to introduce children (and even adults) to basic chemistry concepts.
- Engagement: The eruption effect is sure to wow anyone who witnesses it.
- Affordable and Accessible: You can easily find the materials in your pantry or local grocery store.
- Creativity: You can customize the volcano's appearance and experiment with colors.
Ready to get your hands a little messy and create something magical? Let’s dive into the step-by-step tutorial on how to make your very own Salt Volcano!
Materials Needed
Here’s what you will need for this project:
- Salt (about 1 cup). This will represent the “lava.” Sea salt or table salt works just fine.
- Baking soda (1 tablespoon). This will help create the fizzing reaction.
- Vinegar (1 cup). The acid that will trigger the eruption.
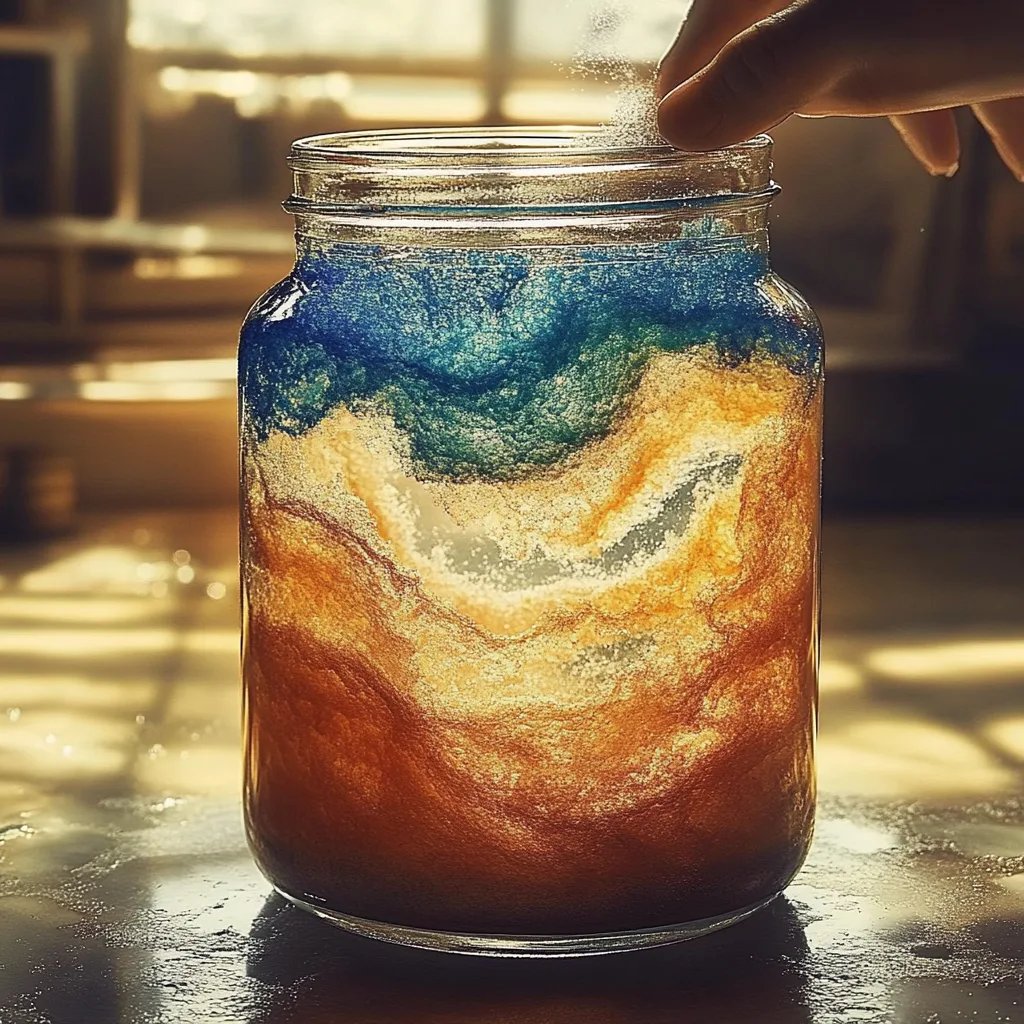
- Food coloring (optional). Use this to make your “lava” more visually exciting.
- A dish or tray to catch the overflow. This can be a shallow baking dish or an old dinner plate.
- A small container (like a plastic cup or small bottle). This will be the “volcano” structure.
- Water (optional). To create a paste if you're making a volcano shape.
Steps to Create Your Salt Volcano
Step 1: Build Your Volcano Structure
If you want your Salt Volcano to have that classic cone shape, you can use your salt! Begin by taking your small container and placing it in the center of your tray or plate. Next, start pouring the salt around the container to form a cone shape. If you want it to hold together better, mix a little water in with the salt to create a paste.
Tips:
- Make sure the container is securely in place, as you don't want it tipping over during the eruption!
- Creating a stable base with an even height helps the eruption look more dramatic.
Step 2: Fill Your Volcano
Once your volcano structure is ready, it’s time to prepare the inside. Pour one tablespoon of baking soda into the container at the center of your salt volcano. This will be the base for your eruption.
Why This Step Matters:
Baking soda is a base, and when it combines with vinegar, it will lead to the fizzing reaction that represents the lava. If you skip this step, you won't get that exciting eruption!
Step 3: Add the Food Coloring
Now for the fun part—color! Add a few drops of food coloring into the baking soda. This part is great for creativity! Choosing red, orange, or even glow-in-the-dark colors can make your volcano look more thrilling.
What Could Go Wrong:
- Too much food coloring can lead to a messy overflow, so start with just a couple of drops and add more if needed.
Step 4: Prepare for Eruption!
Before we set the volcano off, let’s prepare our vinegar. Measure out one cup of vinegar and, for an added twist, mix in a few extra drops of food coloring. This will make the “lava” even more vibrant!
Step 5: The Eruption!
Now comes the exciting part! Pour the colored vinegar slowly into the container with baking soda. Stand back and watch the magic happen as the reaction causes a bubbly eruption that flows over your salt volcano!
Safety Warnings:
- While the ingredients are safe, remember to keep pets and very young children at a distance while the volcano is erupting.
What Could Go Wrong:
- If the eruption is underwhelming, it might be due to not enough baking soda or vinegar. Adjust as needed—it’s all about experimentation!
Alternative Methods and Ingredient Substitutions
If you want to switch things up, consider these variations:
- Use Liquid Dish Soap: Mixing a tablespoon of liquid dish soap in with the baking soda can create even more froth for a more dramatic effect.
- Different Salts: Explore using different types of salt, such as Epsom salt, which can change how the “lava” looks and flows.
Personal Anecdotes: Why I Love This Project
I first stumbled upon the Salt Volcano during a summer science camp I led for kids. Their faces lit up with excitement when the colors erupted, and I knew I had to share it with more people. Over the years, I’ve tried all sorts of variations and came to appreciate how versatile and engaging this project can be. I’ve even had themed volcano parties, where kids come dressed as scientists, ready to explore the wonderful world of geology!
Creative Variations
Want to take your Salt Volcano to the next level? Here are some ideas:
- Make a Multi-Color Eruption: Layer different colors of baking soda and vinegar to create a rainbow effect.
- Add Glitter: Sprinkle some glitter on top of the volcano before the eruption for a sparkle effect.
- Create a Volcano Diorama: Assemble the volcano on a cardboard base, complete with trees, animals, and a painted backdrop for a scenic view.
Conclusion
There you have it! A detailed guide on how to make your own Salt Volcano. This project is not only a blast to create but also serves as a fantastic way to learn about scientific principles while having fun.
I hope my tips and experiences inspire you to give this a try and perhaps even unleash your creativity to modify the classic Salt Volcano. Happy crafting, and may your eruptions be exciting and colorful!
Remember, crafting is all about having fun, so don’t stress over perfect outcomes—experiment, play, and enjoy the process! Feel free to share your results and modifications in the comments below. I can’t wait to hear about your adventures in crafting!