How to Make a Magical Rainbow Rain Cloud Science Experiment: A Step-by-Step Guide
Hello, dear crafters and curious minds! Today, I am absolutely thrilled to share one of my all-time favorite science experiments with you—a project that’s not just fun but also brings delight and wonder right into your home. It’s called the Magical Rainbow Rain Cloud, and it combines creativity and science in the most delightful way! This experiment is especially popular among children and educators, making it a fantastic choice for classrooms, birthday parties, or a cozy afternoon at home with family.
Why This Experiment is Popular
The Magical Rainbow Rain Cloud experiment creates an awe-inspiring visual effect that captures children's imaginations. Watching colorful, "rain" droplets form and fall from a cloud made of shaving cream is mesmerizing! It’s an educational tool that teaches children about precipitation in a fun and approachable way. Let’s face it: Who doesn’t love creating colorful, fluffy clouds and rainbow rain, all while learning something new? Plus, it sparks conversations about weather phenomena, making it perfect for budding scientists.
What You’ll Need
Before we dive into the step-by-step process, let’s gather our materials. Most of these should be easily found in your home or a local store, making this project accessible for everyone.
Materials:
- Clear Plastic Cup or Glass: This will be the base for our cloud.
- Shaving Cream: The base of our cloud (make sure it’s non-toxic).
- Food Coloring: Several colors of your choice—red, blue, yellow, green, etc.
- Syringe or Dropper: To help you add the food coloring precisely.
- Water: To fill up the cup or glass.
- White Plate or Tray: This is for catching any overflow and makes cleanup easier.
- Optional: Glitter: For an extra sparkle in your rainbow!
Step-by-Step Tutorial
Let’s get started! This is going to be a delightful journey.
Step 1: Prepare the Base
Begin by filling your clear plastic cup or glass with water about three-quarters of the way full. The water represents the atmosphere, setting the stage for our cloud.
Tip: If your cup is taller, try to use different amounts of water in different cups for a fun visual comparison later!
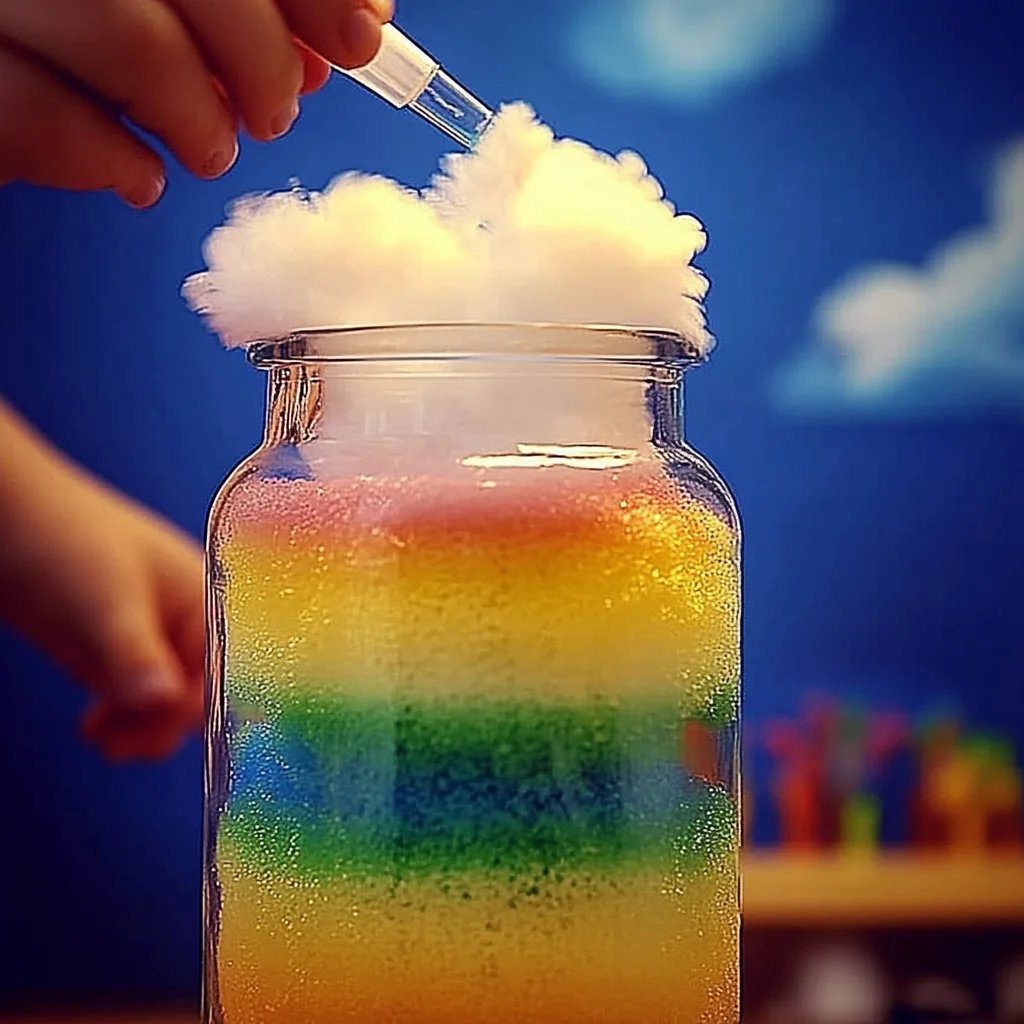
Step 2: Craft the Cloud
Next, take your shaving cream and gently squirt it into the cup on top of the water. You want the shaving cream to form a fluffy “cloud” layer over the water. This is the fun part—let your kids (and your inner child) be creative with how they shape the cloud.
Why this Matters: The cloud layer needs to be thick enough to hold the food coloring, acting like a real cloud until it gets too heavy.
What Could Go Wrong: If your cloud doesn't form well, try using a bit more shaving cream. You want it to adhere to the water surface but not mix with it.
Step 3: Add Color to Your Experiment
Now for the fun! Using your syringe or dropper, add drops of food coloring to the top of your cloud. You can make patterns or clusters of colors—whatever your heart desires!
Tip: Go for a rainbow effect by using red, orange, yellow, green, blue, and purple. This will not only teach children about weather but also color mixing!
Step 4: Wait for the Magic
Give it a few moments and watch as the colors begin to seep through the cloud, eventually dripping down into the water below. This is where the “rain” begins to fall!
What to Observe: This step demonstrates how clouds are formed and how rain occurs—when too much moisture builds up in the cloud, it falls back to the earth!
Fixing Issues: If the colors aren’t flowing through, ensure your cloud is sufficiently thick. You can add a bit more weight or allow the coloring to rest before it drips.
Step 5: Optional Glitter
For an extra touch of magic, you can sprinkle a little glitter on top of your cloud. It adds sparkle and enhances the visual appeal of your experiment.
Safety Warnings
While this experiment uses safe, non-toxic ingredients, always supervise children during the experiment, especially when handling food coloring, as it can stain clothing and surfaces. If you have younger kids, using a plastic table cover can also save you from any accidental spills on wood or fabric.
Alternative Methods and Substitutions
You might want to experiment with different materials:
- Alternative to Shaving Cream: If you want a more eco-friendly option, you can use whipped cream, though it won't hold its shape as well.
- Color Options: Natural food dyes from fruits and vegetables can be used if you're looking to avoid synthetic food coloring.
- Different Bases: Try using a colored water base instead of clear water to see how that changes the final effect.
Personal Anecdotes
I remember doing this experiment with my niece during a particularly rainy summer when outdoor play was challenging. She was mesmerized by the colors and went on to create a whole "weather report" afterward, talking about how rain forms! This simple science experiment led not only to creative play but also to a great conversation about weather systems.
Creative Variations
As you get comfortable with this project, consider these creative variations:
- Cloud Jars: Use different sizes of jars, layering shaving cream and water to create cloud jigsaws.
- Miniature Weather Station: Create several rainbow rain clouds with different food colorings and compare how they look after different time intervals.
Conclusion
The Magical Rainbow Rain Cloud experiment is more than just a charming visual delight; it’s an engaging way to explore science through hands-on learning. I hope you find the same joy and excitement in this craft that I've experienced! So gather your materials, invite your little helpers, and embark on this magical journey through weather and creativity. Remember, every drop is an opportunity for learning, laughter, and memories. Happy crafting, everyone!