How to Make a Glow-in-the-Dark Ocean Jar: A Step-by-Step Guide to Crafting Your Own Illuminated Coastal Art
As an avid crafter, I’m passionate about creating unique pieces that not only brighten up a room but also add a touch of whimsy and wonder. One of my favorite projects is the Glow-in-the-Dark Ocean Jar. This delightful craft captures the magical beauty of the ocean and transforms it into a glowing masterpiece that glimmers in the dark. It’s perfect for home decor and makes an excellent gift. Picture this: as night falls, your jar lights up like a treasure chest of marine wonders, exuding soft, ethereal light that beckons you to imagine serene ocean waves.
In this article, I'll guide you through the entire process, sharing my personal insights, tips, and things to watch out for to ensure your crafting experience is enjoyable and successful. By the end, you’ll have your very own Glow-in-the-Dark Ocean Jar that can illuminate your space or serve as a thoughtful gift. Let’s dive in!
Why Are Glow-in-the-Dark Ocean Jars So Popular?
Glow-in-the-Dark Ocean Jars have been trending in the crafting community for several reasons:
- Versatile Aesthetic: These jars can complement a variety of decor styles, from beachy vibes to bohemian chic.
- Engaging Activity: Making these jars is a fantastic way to relax while embracing your creativity.
- Gift Potential: Whether it’s for birthdays, housewarmings, or simply a thoughtful gesture, these jars make meaningful gifts.
- Educational Aspect: This craft is an excellent way to discuss themes like marine life, light absorption, and chemical reactions, making it a great activity to do with curious kids.
Materials You'll Need
Before embarking on this enchanting journey, let’s gather our materials. Here's what you'll need:
- A clear glass jar (Mason jars work great!)
- Glow-in-the-dark paint (available at craft stores or online)
- Small shells, sand, and pebbles (to create the ocean base)
- Water
- Food coloring (optional, but adds depth)
- A paintbrush or sponge applicator
- Hot glue gun (for embellishments)
- Spoon or small shovel
- Sealant (like Mod Podge, to ensure longevity)
Optional Add-ins:
- Plastic sea creatures (for a little whimsy)
- LED fairy lights (if you want an extra glow)
Step-by-Step Guide to Creating Your Glow-in-the-Dark Ocean Jar
Step 1: Prepare Your Jar
The first step in our craft is preparing the jar. Clean it thoroughly to remove any labels or residue. I usually soak my jars in warm soapy water for a few minutes to make peeling off labels easier. Once they’re clean, dry them well. This is important because any moisture can hinder the shine of your paint.
Step 2: Paint the Interior
Next, it’s time to apply the glow-in-the-dark paint. With your paintbrush or sponge, apply an even coat to the inside of the jar. Focus on the bottom, as we'll be layering materials on top. You don’t want to overdo it on the first layer; a thin coat will help the paint glow brighter later, as thick coats can become heavy and dull.
Pro Tip: Use a small brush for the intricate areas, especially if your jar has any patterns or textures.
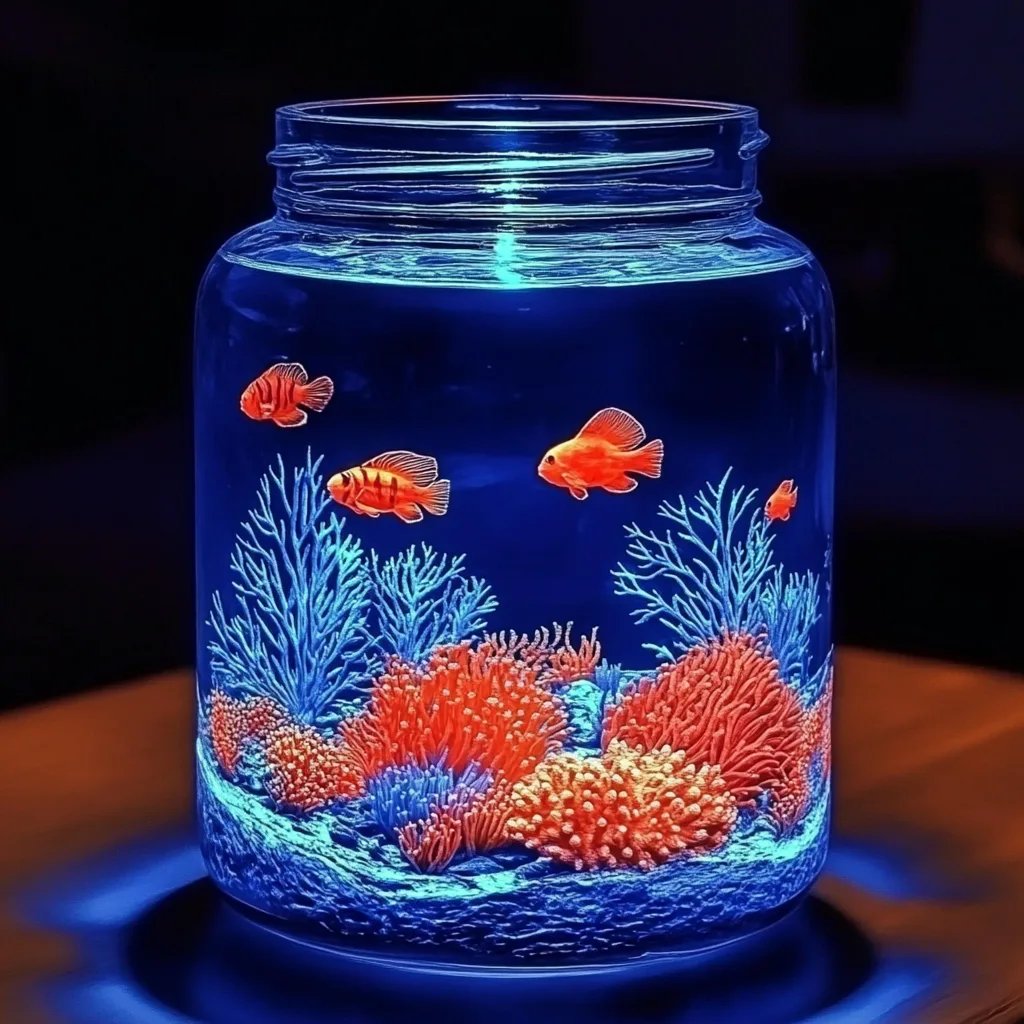
Step 3: Layer Your Ocean Elements
Now comes the fun part! To create the ocean effect, begin layering your materials. Start with a layer of sand to give the illusion of a sandy ocean floor. Then, arrange your pebbles and shells in a way that resembles a miniature beach. You can either create a gradient of colors with your shells or stick to a singular shade for a more cohesive look.
What Could Go Wrong: If the paint is still wet when you add the sand, it might stick to the paint and mess up the glow effect. Wait at least 30 minutes for the paint to become touch-dry.
Step 4: Add Water and Color
Once your base is ready, gently fill the jar with water. This is where you can get creative—if you want a touch of color to your ocean water, add a few drops of food coloring. A soft blue or teal can evoke the feel of a tranquil sea.
Important Note: Don’t fill the jar all the way to the top. Leave a little space to accommodate the next layers without overflow.
Step 5: Seal and Personalize
Once the jar is filled and you’re happy with its look, it’s time to seal it. Apply Mod Podge around the rim to prevent leaks and to add a glossy finish. If you're adding plastic sea creatures or LED lights, hot glue them to the inside of the jar at this stage. They can float or stick to the bottom as you prefer.
Step 6: Charge the Glow
To see the magic happen, place your jar under direct sunlight or artificial light for several hours. After charging, turn off the lights and see your ocean jar come to life!
Final Pro Tip: Remember that the brightness of the glow will diminish over time. To revive it, just give it another "charge."
Creative Variations
As you gain more confidence in your crafting skills, consider experimenting with different designs:
- Seasonal Themes: In winter, you could add artificial snow for a different effect.
- Glow Colors: Try using different colored glow paints for a unique experience.
- Layered Ocean: Place the shells and sand in layers inside the jar for a more textured look.
Personal Reflection
Creating my first Glow-in-the-Dark Ocean Jar was a magical experience. I vividly remember being mesmerized as I watched it illuminate my room, turning it into a peaceful seaside retreat. Each jar I’ve crafted since has become a unique reflection of my current inspirations, collecting memories of different seasons and celebrations.
Safety Warnings
- Ensure proper ventilation while using paint and sealant, especially if you're crafting indoors.
- Handle glass jars carefully to prevent cuts.
- If making this project with kids, supervise closely during the use of hot glue guns and sharp objects.
Conclusion
Crafting your own Glow-in-the-Dark Ocean Jar is a joyful adventure that provides a perfect blend of creativity, science, and decorative flair. With simple materials and a little imagination, you’ll create a stunning piece that lights up your life, one glowing wave at a time. Whether for your own home or as a heartfelt gift, your finished jar will surely evoke oceanic inspiration every time the lights go down.
Ready to dive into your crafting adventure? Gather your supplies, roll up your sleeves, and let the magic of the ocean inspire you. Happy crafting!