How to Make a Fake Aquarium: A Step-by-Step Crafting Guide
Hello, fellow crafters! Today, I'm excited to share with you one of my favorite crafting projects: creating a stunning fake aquarium. Whether you want to add a serene touch to your living space, are seeking an entertaining project for your kids, or simply love the vibrant colors and textures of a marine landscape, making a fake aquarium can be both rewarding and therapeutic.
What is a Fake Aquarium?
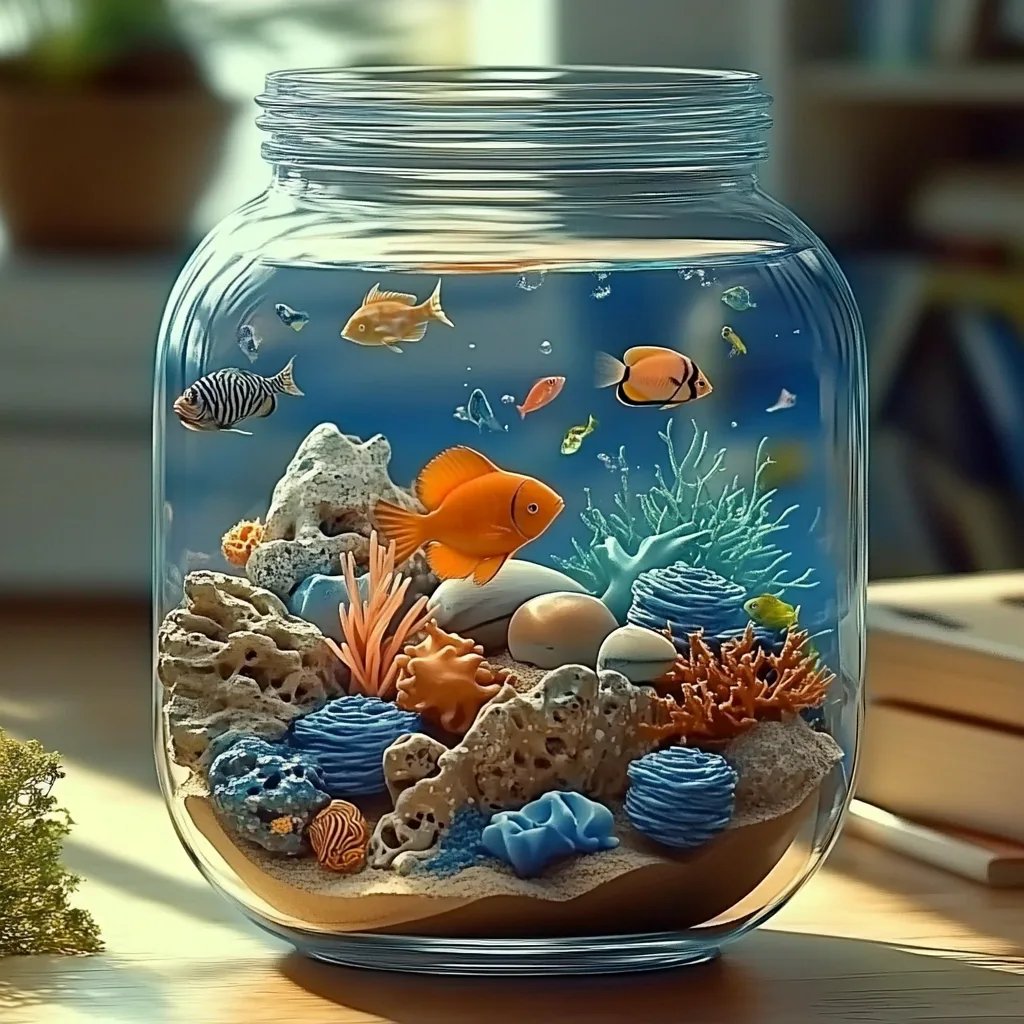
A fake aquarium is a decorative craft that mimics a real aquarium, but without the need to care for living fish or plants. It’s an artful way to bring the beauty of the underwater world into your home, minus the maintenance hassles of a real aquarium. These creations are incredibly popular not only for home decor but also as educational tools for children to learn about marine life and ecosystems. They make fantastic gifts as well!
When Can You Use a Fake Aquarium?
Fake aquariums can be used in various settings. They are perfect for:
- Home Decor: Create a focal point in your living room or office.
- Educational Purposes: Use them to teach children about aquatic environments.
- Gifts: A thoughtful and unique present for nature lovers or friends starting a new life.
- Event Decor: They can be incorporated into themed parties or events.
Materials Needed
Before we dive into the crafting process, let’s gather the materials you’ll need:
- A clear glass or plastic container (like a fish bowl, vase, or even a terrarium)
- Artificial plants and corals (available at craft stores, aquarium shops, or online)
- Decorative gravel or sand
- Water beads or blue gel (for water effect)
- Small decorative rocks or pebbles
- Marine-themed figurines (such as fish, turtles, or sea horses)
- Craft glue (or a hot glue gun)
- Optional: LED lights (for added ambiance)
Step-by-Step Tutorial: Creating Your Fake Aquarium
Step 1: Prepare Your Container
First things first, choose a clear glass or plastic container. The size will depend on the space you want to fill and how grand a design you envision. Make sure the container is clean and dry. I often wipe it down with vinegar to ensure clarity and shininess.
Why It Matters: A clean container helps showcase your beautiful decor, allowing colors to pop and providing a clear view.
Step 2: Add Base Materials
Next, pour a layer of decorative gravel or sand at the bottom of the container. I usually aim for about an inch or two of base material, but you can customize this depending on the look you want.
What Could Go Wrong: Overloading the base can make it too heavy or not visually appealing. If it's uneven, gently shake the container to settle.
Step 3: Arrange Artificial Plants
Now comes the fun part—arranging your artificial plants! I suggest layering different heights and colors for a natural look. Stick the plants into the gravel strategically, making sure to spread them out for a balanced feel.
Tip: For realism, think about how plants grow underwater, tipping some slightly and varying their positioning.
Step 4: Add Decorative Rocks
Next, incorporate decorative rocks or pebbles. This adds texture to your aquarium and contributes to the natural habitat feel. Place these rocks around the plants, taking care to distribute them evenly.
Step 5: Introduce the Water Effect
For an eye-catching effect, use water beads or blue gel instead of real water. These materials create the illusion of a water-filled aquarium but without the mess. Spread them gently across the gravel or mix them with other elements to create layers.
Personal Anecdote: The first time I tried this, my water beads rolled all over the place, and I regretted not securing the plants first! Just remember, patience is key!
Step 6: Add Marine-Themed Figurines
Let your creativity shine by introducing marine-themed figurines. Position these little treasures around the plants and rocks, ensuring that they are partially submerged or peeking out, just like real fish do in a natural setting.
Tip: If you want to secure them in place, use a touch of craft glue. Just place them carefully where you envision them without overcrowding!
Step 7: Illuminate Your Aquarium
For a finishing touch, consider adding LED lights. These can be placed around the base of the aquarium or carefully hidden beneath the gravel to create a mystical underwater glow.
Safety Warnings
- Hot Glue Gun Caution: If using a hot glue gun, be cautious of burns. Always use it in a well-ventilated area.
- Awareness of Materials: Ensure that any materials used are non-toxic, especially if children will be involved in the crafting.
Alternative Methods and Ingredient Substitutions
If you're looking for different textures or aesthetics, consider using:
- Colored aquarium gravel for a more vibrant look.
- Natural elements like small shells or even driftwood for a beach-themed aquarium.
- Aquatic-themed stickers on the exterior of your container for added flair!
Creative Variations
As you get comfortable with the basics of your fake aquarium, feel free to experiment! You might want to create themed aquariums, like a tropical paradise, a rocky sea floor, or coral reef scenes with vibrant colors.
Conclusion: Your Beautiful Fake Aquarium Awaits
And there you have it! Your very own beautiful fake aquarium, ready to be admired. I hope this guide provides you not just with the steps, but a sense of creativity and fun as you embark on your crafting journey. Memories are made through our hands, and this project is an excellent opportunity to share and create experiences with others.
When you’re finished, don’t forget to share pictures of your creation or leave comments for tips or variations! Happy crafting, and may your fake aquarium bring joy and peace to all who view it!