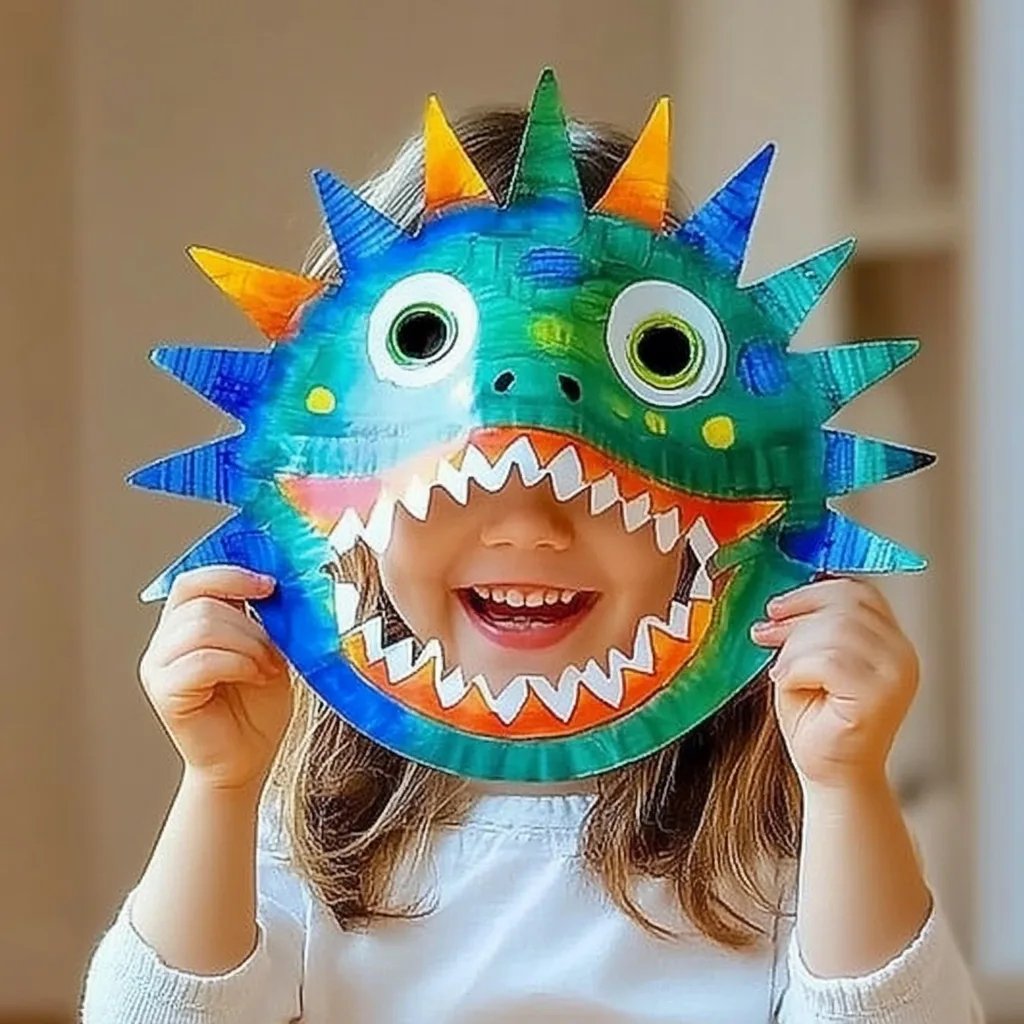
How to Make a DIY Paper Plate Dinosaur Mask: A Step-by-Step Guide
Hello fellow crafters! Today, I'm excited to share one of my favorite DIY projects: making a whimsical Paper Plate Dinosaur Mask. This project is not just fun and creative; it’s also incredibly versatile and perfect for various occasions—whether for a classroom activity, a birthday party, or a playful afternoon at home. There’s something magical about transforming an everyday item like a paper plate into a delightful dinosaur mask that sparks imagination and creativity in both children and adults alike.
Why Paper Plate Dinosaur Masks are Popular
Paper plate crafts are a staple in schools and homes because they are easy to make, affordable, and require minimal supplies. Dinosaur masks, in particular, inspire curiosity and exploration about these fascinating creatures that once roamed the Earth. Whether used for a theatrical performance, a party costume, or just a fun playdate activity, these masks can transport children to a prehistoric world of adventure. I’ve loved making them with my kids as part of a “Dinosaur Day” celebration, and they are always a hit!
Let’s dive into this fun and crafty adventure together!
What You Need
Before we start crafting, gather these materials. Most of them are likely already in your home, which is one more reason I adore this project!
Supplies:
- Paper Plates (2 for each mask)
- Acrylic or Tempura Paint (green, yellow, red, or any colors you fancy)
- Paintbrushes
- Scissors
- Glue (school glue or hot glue for adults)
- Craft Foam or colored paper (for additional decorations like spikes, eyes, or nostrils)
- Markers or crayons
- Thin elastic string or ribbon (for securing the mask)
- Pencil
- Optional: Googly eyes or stickers for extra flair
Step-by-Step Tutorial
Step 1: Prepare Your Plates
Why it matters: Starting with a clean workspace and plates helps to ensure your mask turns out well.
- First, you’ll want to choose a paper plate that will serve as your mask base. I typically pick sturdy plates, as they hold paint and designs better.
- Flip one plate upside down. This will be the front of your mask.
Step 2: Design Your Dinosaur
Using your pencil, sketch out the features of your dinosaur on the paper plate. Will it be a ferocious T-Rex or a quirky Triceratops?
Common mistakes: Don’t press too hard; it’s just a guideline for when you start painting.
Tip: If you're unsure about your dinosaur, look up images online for inspiration, or even better, ask your little ones to draw their designs first!
Step 3: Paint the Base Color
Why it matters: The base color sets the tone of your dinosaur mask.
- Use your acrylic or tempura paint to cover the entire front side of the plate with your chosen color. Green is classic, but feel free to experiment! Everyone loves a purple dinosaur as well.
- Let the paint dry completely. Patience is key here—rushing this step might lead to smudged designs or errors.
Step 4: Create Additional Features
While your base coat is drying, it’s time to prepare the dinosaur features. Here’s what I recommend:
- Spikes: Cut triangles from craft foam or colored paper to create spikes along the back of the dinosaur’s head. These will add dimension and make your mask truly roar-worthy! Attach them with glue when ready.
- Eyes and Nostrils: Use googly eyes or cut out shapes from foam or paper to create big, expressive eyes and nostrils. They can make your dinosaur look more playful or intimidating, depending on how you design them.
Step 5: Assemble Your Mask
Common mistakes: Be careful of using too much glue, as this can make your decorations slide around.
- Once everything is dry, carefully glue your spikes, eyes, and nostrils onto the painted plate.
- Consider layering different colors of spikes or alternating the sizes for a more dynamic look.
Step 6: Cut Out Eye Holes
Using scissors, carefully cut out eye holes in the painted paper plate. This is a crucial step! Make sure they’re large enough for visibility but not too big that they take away from the mask’s design.
Tip: Try the mask on periodically to ensure you can see comfortably.
Step 7: Create the Strap
- Cut a piece of thin elastic string or ribbon about 12 inches long.
- Poke holes on either side of the mask (where your eyes are), and thread the string or ribbon through the holes. Tie knots on the ends to secure it in place.
Step 8: Final Touch-ups
At this stage, take a moment to admire your work! Go back and add any additional paint or decorative elements to ensure your dinosaur mask is just how you want it.
Alternative Methods: If some kids are too young for scissors, have adult supervision to help with this part.
Safety Warnings
- Always supervise younger children during the craft, especially when using scissors and hot glue.
- Make sure paints and glues are child-safe.
Creative Variations
- Color Variations: Use non-traditional colors for dinosaurs, like pinks or blues, and even sprinkle glitter for a magical effect.
- Themed Masks: Depending on the type of dinosaur, variations can include adding features like feathers for a more modern take.
- Group Projects: This mask can easily become a fun group activity where everyone creates their dino-themed character.
Conclusion: Celebrate Your Creativity!
And there you have it—a step-by-step guide to crafting your own DIY Paper Plate Dinosaur Mask! I hope you find joy in this project as much as I do. Remember, the main goal is creativity and fun, so feel free to experiment and make this craft your own.
Don't forget to share your dino creations with friends or on social media; I love seeing everyone's unique twists on this project! Happy crafting, and may your imaginative adventures be as exciting as a trip back to the Jurassic!