How to Make a DIY Cardboard Robot – Your Creative Companion
Hello, fellow crafters! I’m thrilled to share my passion for creating a DIY cardboard robot, a delightful project that embodies creativity and innovation while transforming everyday materials into something extraordinary. Cardboard robots have become a popular undertaking among makers of all ages. Not only are they a fantastic introduction to crafting and building, but they also serve as playful companions for kids or quirky decorative pieces for your home. Whether you’re gearing up for a fun afternoon with your kids, eager to display your craftsmanship, or simply want to explore your artistic side, this is the perfect project for you!
Why Build a Cardboard Robot?
Building a cardboard robot allows you to unleash your imagination. I’ve seen kids (and adults, too!) light up with joy when they see their creations come to life. This project can spark conversations about robotics and engineering, or serve as a fun activity during birthday parties or playdates. Plus, the best part? You’re reusing and recycling materials, minimizing waste!
Materials You’ll Need
Let’s gather our supplies! This project is wonderfully adaptable, and many of these materials can be found around your house:
- Cardboard boxes: Pizza boxes, shipping boxes, or any sturdy cardboard will do.
- Scissors: Sharp enough to cut through cardboard without difficulty.
- Glue or tape: Hot glue works best for strength, but regular craft glue or duct tape can also do the trick.
- Markers, paint, or colorful paper: To decorate your robot with personality.
- Googly eyes or buttons: These little accents bring your robot to life.
- Straws or bottle caps: For arms and legs, or any other crafting embellishments.
- Wire or pipe cleaners: Great for adding flexible movement to your robot.
Step-by-Step Tutorial: Building Your Own Cardboard Robot
Step 1: Design Your Robot
Start with a rough sketch of what you want your robot to look like. This blueprint is crucial as it will guide your construction. Will it have antennae? What about arms? Remember, there are no limits to creativity! Think of characters from your favorite shows or let your imagination run wild.
Tip: Keep it simple for your first robot. As you gain more confidence, you can add intricate details and larger structures.
Step 2: Cut Out the Cardboard Shapes
Using your scissors, cut out the shapes needed for your robot. Generally, I start with a large rectangular piece for the body and smaller rectangles for the arms and legs. A circular shape often makes a great head.
Safety Warning: Always be cautious with scissors; make sure to cut away from your body and work on a stable surface.
Step 3: Assemble the Body
Begin assembling by gluing or taping together your cardboard shapes. Attach the head to the body using tape or glue, making sure it's secure. This structural integrity is essential; if it wobbles, you might end up with a floppy robot!
Troubleshooting: If your pieces don’t stick well, give each joint extra time to dry before moving on to the next step.
Step 4: Add Limbs and Features
Take your arms and legs and attach them to the body. If you're using pipe cleaners or straws, glue one end to the body and let the other dangle, which can create a fun, articulated feel!
Alternative Method: Instead of cardboard for arms and legs, use paper towel rolls for a more dynamic look, giving your robot longer limbs that can be bent and posed.
Step 5: Decorate Your Robot
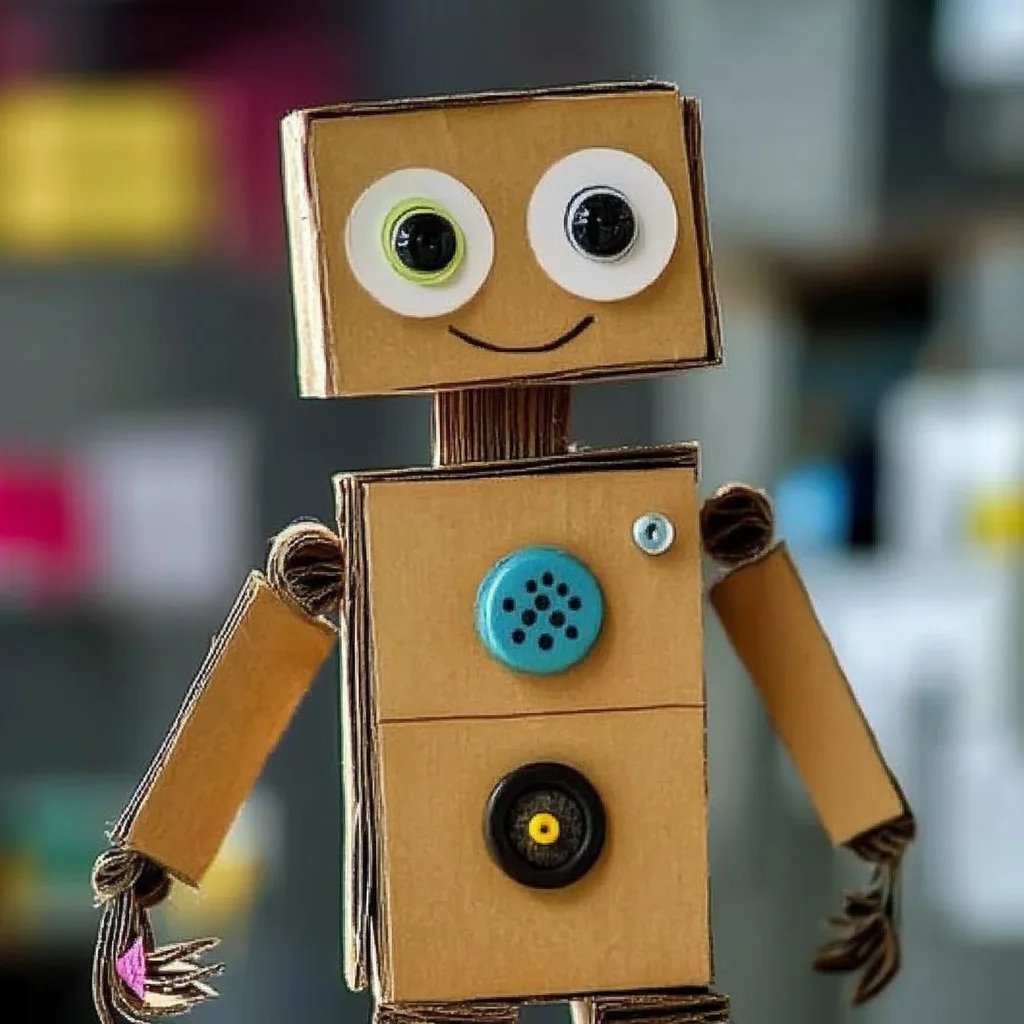
This is where you can let your creativity shine! Use markers, paint, or colorful paper to give your robot character. Incorporate googly eyes, decorate the body with stickers, or add some funky features like a mouth or designs.
Anecdote: My first cardboard robot had mismatched eyes that ended up being a talking point at every gathering! Imperfections can lead to the most charming narratives.
Step 6: Make it Move!
If you’d like your robot to have some personality, consider adding a little mobility. You can attach small wheels to the bottom of the feet or use paper clips as movable joints. Test the balance to ensure it can stand without toppling over.
Tips: Test different materials for movement and see what works best for your design. If it’s wobbling too much, add extra weight at the bottom to stabilize it.
Step 7: Final Touches
Look over your creation. Could it use more flair? Maybe some elbow and knee joints made of pom-poms or bottle caps? Tweak it until you’re completely satisfied.
Creative Variations and Personal Touches
Feel free to explore different themes! Your cardboard robot could be a superhero, an alien, or even a creature from your favorite movie. The possibilities are endless.
- Color Scheme: Stick to a classic metallic look with silver or gray paints, or be colorful and wild with bright neon colors!
- Personalization: Add your names or initials on the robot to make it uniquely yours or create a team of cardboard robots for a delightful family project!
Final Thoughts
Crafting a DIY cardboard robot can be a delightful way to express yourself and experiment with your artistic abilities. Whether you’re making them with friends, family, or a solo session, I hope you find joy in every slice of cardboard and dab of paint. Remember, patience is key. Each step is a chance to learn and improve. Let your creativity flow and, most importantly, have fun!
Embrace your inner craftsman, and I can’t wait to see what incredible cardboard robots you come up with! Feel free to share your creations or ask questions in the comments below. Happy crafting!