How to Make a Dinosaur Sensory Bin: A Complete Guide from My Crafting Journey
Hello, fellow crafters and parents! Today, I’m excited to share one of our favorite sensory play activities that’s not only entertaining but also educational: the Dinosaur Sensory Bin. If you haven’t heard of sensory bins, they’re simply containers filled with various materials that encourage hands-on exploration and imaginative play. And trust me, once your little ones start digging in, they'll be hooked!
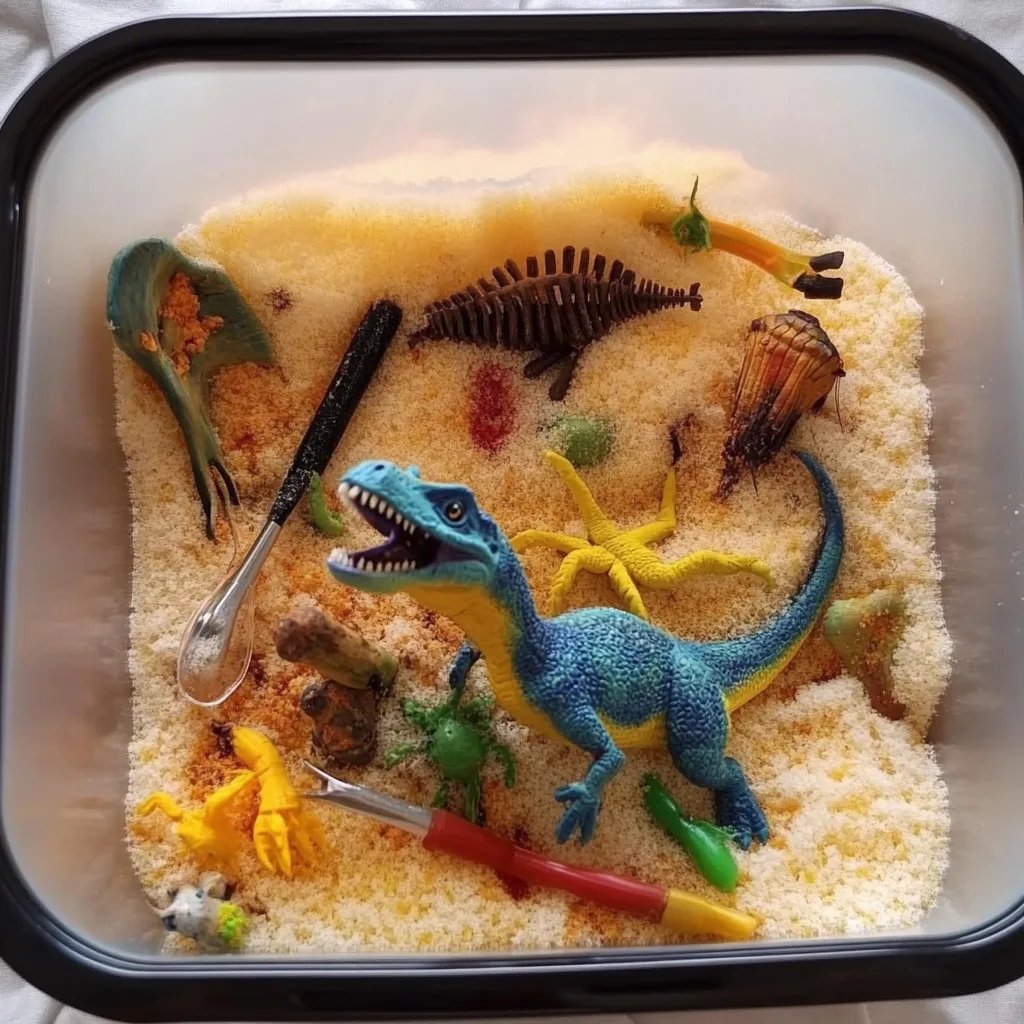
So, what is a Dinosaur Sensory Bin, and why is it so popular? Essentially, it’s a themed sensory experience that incorporates small dinosaur figures and a variety of tactile materials, creating an immersive environment perfect for imaginative exploration. These bins are particularly beneficial for young children, helping to develop fine motor skills, cognitive abilities, and even sensory regulation. Plus, they’re a fantastic way to keep kids entertained—whether during a rainy day indoors, as part of a themed educational lesson, or simply as a creative outlet.
What You’ll Need
Before we dive into the step-by-step tutorial, let’s gather our materials. The beauty of a sensory bin is that it can be adaptable based on what you have on hand. Here’s a comprehensive list of what I typically use:
- Base Material: You can choose from:
- Dry rice (white or colored)
- Kinetic sand
- Cornmeal
- Shredded paper
- Uncooked pasta
- Dinosaur Figures: These can be small plastic dinosaurs or even larger toy figures if you want to enhance the visual impact!
- Tools and Extras:
- Small shovels or scoops
- Buckets or cups
- Natural elements like rocks, leaves, or branches
- Water (optional for a muddy dinosaur theme)
Step-by-Step Tutorial
Step 1: Choose Your Container
The first thing you need is a container. I typically opt for a large, shallow plastic bin with high sides, which allows for easier scoop-and-pour action without the mess escaping. Make sure it’s big enough for your child to comfortably access all sides of the bin.
Tip: If you don’t have a sensory bin, a large baking dish or even a cardboard box can work nicely too!
Step 2: Select Your Base Material
The choice of base material can set the stage for your sensory bin theme. I often use dry rice due to its ease of use and clean-up. To add an extra layer of excitement, try coloring your rice with a simple DIY dye method using vinegar and food coloring. Just mix the ingredients, add the rice into a ziplock bag, shake, and let it dry.
What Could Go Wrong: If the dye doesn't stick, it can result in a messy bin. To fix this, add a little more vinegar to your mixture and try again. If you prefer a more natural option, consider using natural dyes from fruits or vegetables.
Step 3: Create the Setup
Once your base material is ready, pour it into the container. I typically fill the bin about halfway, allowing enough space for digging and exploration without spilling. This is where your little ones will be digging for their dinosaurs!
Step 4: Add Your Dinosaurs
Next, it’s time to place your dinosaur figures inside. You can either bury them partially within the rice or leave them visible; both methods encourage different types of play. I love to talk to my kids about each dinosaur as they “discover” them, sharing facts and stories that ignite their imaginations.
Safety Warning: If you have very young children or pets, ensure the dinosaur figures are large enough not to be a choking hazard.
Step 5: Enhance with Natural Elements
Adding natural elements can elevate the sensory experience and introduce different textures. Stones, leaves, or even small logs can represent a dinosaur’s habitat. Rocks provide a solid texture, while leaves can introduce a bit of crinkle for sensory exploration.
Tip: If you have a backyard, involve your child in gathering these elements. It’s a fantastic way to teach them about nature!
Step 6: Introduce Tools
I always include small shovels or scoops to allow the children to dig, scoop, and transport materials. This is a fantastic way to reinforce fine motor skills and encourage cooperative play.
Step 7: Optional – Add Water for a Muddy Dinosaurs Theme
For an extra layer of fun, you can add a small amount of water to create a ‘muddy’ dinosaur environment. Just a few tablespoons can transform the experience, but be cautious! If too much water is added, it can create a wet mess. I recommend starting slow and letting the children choose how much mud they want!
Personal Anecdote
I remember the first time I set up a Dinosaur Sensory Bin for my kids. They were fascinated for hours, discovering different dinosaur figures and even creating their own little stories about them. The squeals of joy as they uncovered each dinosaur made the effort completely worth it. This sensory bin became more than just a craft; it became a memorable family bonding experience.
Creative Variations
- Dinosaur Dig: Hide the dinosaur figures deeper in the base material, and provide tools specifically designed for excavation! A small paintbrush can be used to gently uncover the dinosaurs.
- Themed Educational Lessons: Incorporate books about dinosaurs alongside the bin to foster discussions and learning.
- Seasonal Themes: You could adjust your sensory bin for different seasons—try incorporating artificial snow for a winter theme or leaves and acorns for fall!
Final Tips for Success
- Clean-Up: Have a vacuum or a broom handy for easier cleanup.
- Supervision: Always supervise young children while they play to ensure they’re safe and engaged.
- Experiment: Don’t be afraid to play around with different base materials. Each will provide a unique texture and sensory experience.
There you have it! My complete guide on how to create a Dinosaur Sensory Bin! I hope you found this article helpful and inspiring. This play activity not only keeps kids entertained but also engages their senses, encouraging creativity and learning through play. Happy crafting, and may your sensory adventures be dino-mite!