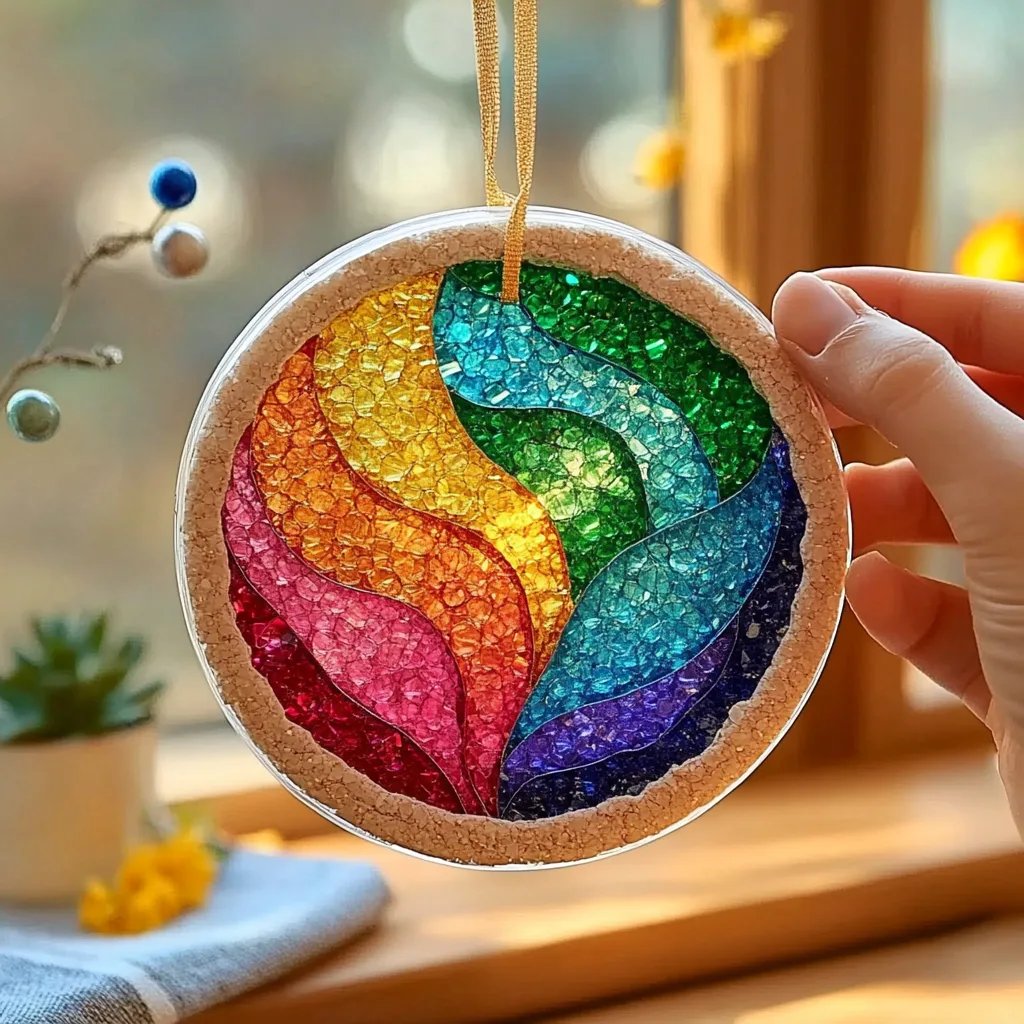
How to Make a Clear Glue Mosaic Suncatcher Craft
As an experienced crafter who has spent countless hours exploring the colorful world of arts and crafts, I’m excited to share one of the most delightful projects that you can undertake: a Clear Glue Mosaic Suncatcher. This vibrant creation will not only brighten up your living space but also bring a touch of nature indoors when sunlight dances through it. Whether you want to brighten up a window, create a thoughtful handmade gift, or enjoy a crafty day with friends or family, this project is perfect for a variety of occasions.
What is a Clear Glue Mosaic Suncatcher?
Simply put, a Clear Glue Mosaic Suncatcher is a colorful piece of art made from glass, beads, or other materials embedded in clear glue. When the sun shines through it, the colors come alive, creating a mesmerizing display. This kind of project has surged in popularity due to its simplicity and the ability to customize it to fit your style. Plus, there’s something incredibly soothing about layering colors and shapes, letting your creativity flow as you design your masterpiece.
When and How Can This Craft be Used?
These beautiful suncatchers are a wonderful addition to any window at home, especially in spring and summer when the sun is at its brightest. They also make excellent gifts for all occasions—birthdays, holidays, or just as a heartfelt gesture. Another fun scenario is hosting a crafting party where friends can come together, enjoy snacks, and make their own suncatchers, adding a touch of artistry to their day.
Gather Your Materials
Before we dive into the crafting process, it’s essential to gather all the materials you’ll need. Here’s a list:
- Clear School Glue (white or clear) – This will be the base for your suncatcher.
- Acrylic Paint (for a tinted effect) – Optional but adds vibrancy.
- Glass or Plastic Gems – Various shapes and colors for your mosaic.
- Cardstock or Heavy Clear Plastic – The base on which you’ll create your design.
- Paintbrush – To spread the glue.
- Craft Knife or Scissors – For any cutting needed.
- Pencil – For tracing designs.
- Small Bowl – To mix paint and glue.
- Newspaper or Plastic Tablecloth – To protect your work surface.
- Clear Varnish Spray – For a glossy finish (optional).
- Foam Brush or Sponge Applicator – Effective for applying the glue mix.
Step-by-Step Tutorial
Step 1: Set Up Your Work Area
I always emphasize the importance of establishing a clean and organized work area. Lay down newspapers or a plastic tablecloth to avoid making a mess. Make sure you have all your materials within reach and that you are comfortable.
Step 2: Prepare the Base
Using cardstock or heavy clear plastic, cut out your desired shape for the suncatcher. Popular designs include hearts, stars, or flower shapes. The size and shape will determine how light filters through the final product. A larger suncatcher will allow for more color and a more dramatic display, while smaller shapes can be used as part of a larger window display.
Step 3: Mix Your Glue and Paint (Optional)
In a small bowl, mix a few tablespoons of clear school glue with a few drops of acrylic paint if you want to add some color to your glue. This step is completely optional but recommended if you’re looking for a tinted effect. Stir thoroughly with a paintbrush until well combined. A consistency similar to pancake batter is ideal.
What Could Go Wrong? If your mixture seems too thin, add more glue. If it’s too thick, add a few more drops of paint and stir.
Step 4: Create Your Mosaic Design
With your brush, apply a thin layer of the glue mixture onto the base. While the glue is still wet, start placing your gems, beads, or other decorative materials onto the glue. Don’t hesitate to overlap them slightly for a more dynamic look. Be creative! You’re essentially creating a mini-work of art.
Tip: I like to start in the center and work my way out. This helps ensure a balanced design and allows you to visualize where to place the next piece.
Step 5: Secure the Gems
After you finish placing your gems, apply another layer of the glue mixture over the top of the entire piece to help secure everything in place. This layer should be thin but ensures that all your pieces are securely fastened.
Warning: Avoid using too much glue, as it may take longer to dry and could become opaque rather than clear.
Step 6: Leave to Dry
Set your suncatcher aside to dry for 24 hours in a well-ventilated area. It’s crucial that it dries completely to avoid any sticky surfaces and to maintain clear visibility. A good tip is to place it out of reach of pets and children during the drying process.
Step 7: Finishing Touches
Once dry, consider applying a coat of clear varnish spray for added shine and durability. This will protect your artwork from dust and provide a lovely glossy finish. Make sure to apply it in a well-ventilated outdoor area and follow the manufacturer’s instructions.
Creative Variations
- Theme-Based Suncatchers: Choose a specific theme (like ocean waves or colorful gardens) and collect decorative pieces that reflect that theme for a cohesive look.
- Holiday Suncatchers: For seasonal crafts, use colors that reflect holidays—reds and greens for Christmas or pastels for Easter.
- Textured Suncatcher: Instead of smooth gems, incorporate textured items like small shells, pieces of fabric, or dried flowers for different aesthetics.
Troubleshooting Common Issues
- Cloudy Appearance: If your suncatcher appears cloudy after drying, it could be due to excessive glue. In that case, you can try gently wiping it clean with a damp cloth and allowing it to dry thoroughly again.
- Pieces Coming Loose: If a gem or bead hasn't adhered properly, have no worries! Use a craft knife to carefully lift it, add some extra glue underneath, and press it back down.
Safety Warnings
- Always work in a well-ventilated area when using adhesives and varnishes.
- Supervise children closely while crafting, especially with small items that could pose a choking hazard.
- If you’ve got little ones crafting with you, consider using washable or non-toxic materials to ensure safety.
Final Thoughts
Making a Clear Glue Mosaic Suncatcher is a fulfilling and creative endeavor that results in a stunning piece of art. I’ve enjoyed sharing my process and hope that it inspires you to dive into your crafting adventure. Remember, there’s no right or wrong way to create; the joy lies in the process! So gather your materials, put on your favorite playlist, and let your imagination guide you. Happy crafting!