**How to Make a Car Wash Foam Bin: Soapy, Fun for Little Mechanics!**
Hey there, fellow crafters! If there's one thing I cherish from my childhood, it's the joy of hands-on play. As a parent—and let me tell you, a self-proclaimed “little mechanic” myself—I’ve discovered that creating a DIY Car Wash Foam Bin is not only a fantastic sensory activity for kids but also an engaging way to teach them about washing and caring for their toys. This project is easy to set up, incredibly fun, and perfect for any occasion, from a sunny afternoon in the backyard to a rainy day indoors.
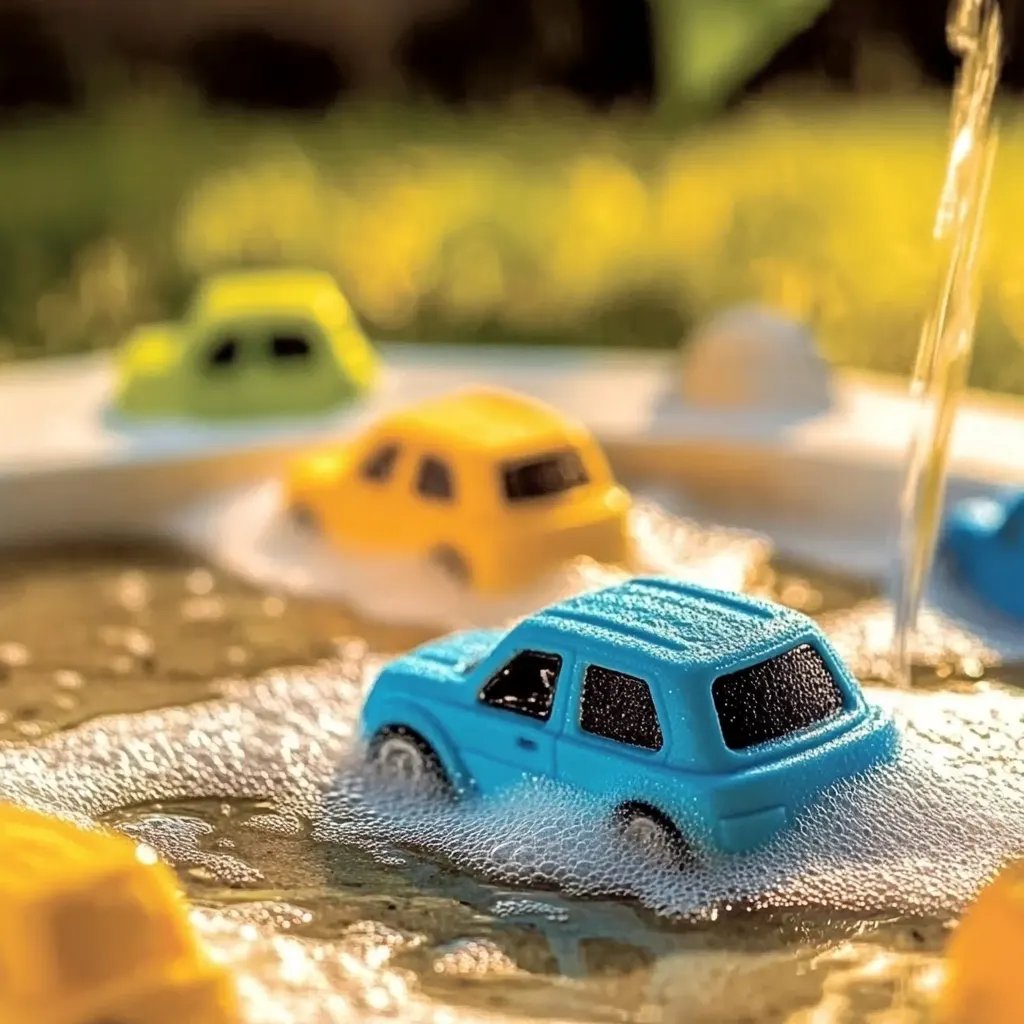
What is a Car Wash Foam Bin?
For those of you who might be scratching your heads at the idea, let me paint you a picture. Imagine a large bin filled with bubbles, soapy water, and an assortment of toy cars just waiting to be cleaned and pampered. This not only excites the little ones but also allows them to explore their creativity while developing fine motor skills. The Car Wash Foam Bin has become incredibly popular at playdates, birthday parties, and even as a part of our summer activities. If you’re ready to dive into this bubbly adventure, let’s get started!
—
Materials You'll Need:
Before we jump into the steps, gather the following materials. I promise you’ll find most of these items around your home, and they’re all very accessible!
- Plastic Bin: Approximately 2-3 gallons in size, ideally with a lid (helps keep supplies contained).
- Water: Warm, but not scalding—think bath temperature.
- Dish Soap: Unscented is best if your child has sensitive skin—look for eco-friendly options if you can.
- Foam Soap Pump: This enhances the bubbly texture if you want to take it up a notch.
- Toy Cars: A selection of your child’s favorite miniature vehicles.
- Sponges & Washcloths: Great for scrubbing and cleaning.
- Plastic Cups or Bowls: For the kids to dump, pour, and play with.
- Towel: For drying off the cars after they’ve been pampered.
- Safety Gear (Optional): Apron and goggles if your kids like to get totally immersed.
—
Step 1: Set Up Your Workspace
First and foremost, choose a spot that’s easily cleanable. I usually set up our Car Wash Foam Bin outside, whether on the grass or on a patio. I put down an old towel beneath the bin to catch any spills. If you’re inside, make sure to select an easily wipeable surface. Remember, the goal is to keep it fun and encourage a bit of mess, without overwhelming yourself with cleanup later!
Tip: Have a designated space so your kiddos know where to find their supplies and provide a fun atmosphere as they get into character!
Step 2: Prepare the Soapy Water
Now, let’s turn our attention to the bubbly goodness. Fill the plastic bin with about half a gallon of warm water. Then, add about 1-2 tablespoons of dish soap. Using a whisk or even your hands, stir the mixture gently to avoid creating bubbles too early. You can always add more soap later if you find it’s not bubbly enough.
Expert Tip: If you’re looking for an extra foam boost, consider adding a pump of liquid hand soap or bubble bath. This can create a more luxurious foam that delights the little ones!
Step 3: Create That Foam!
If you’re using a foam soap pump, now’s the time to add some additional ingredients. Once the soapy water is prepped, squirt in some liquid soap and mix it well. Making foam is key here; fluffy bubbles not only look great but they feel amazing to play with!
What Could Go Wrong: If you notice the foam isn’t as plentiful as you'd like, just add a touch more soap—experiment to see how the texture changes.
Step 4: Gather Your Cars
It’s time for the stars of the show! Gather up those toy cars. Encourage your little mechanics to pick their favorites and explain that these cars deserve a nice wash after all the adventures they've been on. I often share anecdotes of how I’d clean my own toy collection as a child—it makes the experience all the more relatable!
Creative Variation: If your children are really energetic, consider using other vehicles like toy trucks or even train cars to mix things up a bit!
Step 5: Wash and Scrub
Here comes the fun part: washing! Allow your kids to submerge the cars into the foam and instruct them to scrub each piece using sponges or washcloths. If they want to experiment with different scrubbing techniques, let them try washing cars in circular motions or a back-and-forth method.
Safety Warning: Keep an eye on the amount of water they’re splashing around. It can get slippery, and maintaining a safe play environment is key.
Troubleshooting: If the foam starts to dwindle, don’t hesitate to the add a bit more dish soap and gently mix. It can reinvigorate the excitement!
Step 6: Rinse & Dry
After scrubbing and bubble fun, it's time to rinse off the soap. I typically keep a bucket of clean water handy for this step. Let them tip their cars into the rinse bucket, then provide them with towels or even let them air dry on a cloth.
Step 7: Tidy Up!
When the play session winds down, have your little ones help with cleanup. Encourage them to pour leftover water on the garden or drain it into a sink. This not only teaches them responsibility but keeps them involved in the entire process.
Keeping It Fun: If you have additional time, why not let them paint their cars with non-toxic paint to give them a custom look before the washing?
—
Final Thoughts
Creating your very own Car Wash Foam Bin is more than just a fun activity—it’s a way to foster creativity, introduce science concepts like chemical reactions, and instill good habits of cleanliness in our little ones. Plus, it’s a delightful way to spend time together, creating memories that both you and the kids will cherish.
Remember to adapt this project based on your child’s interests and age; you can incorporate more elaborate ideas, such as numbers and letters on the cars for educational play! As always, don’t fret if everything doesn’t go according to plan; the goal is to have fun and enjoy the process.
So roll up your sleeves, grab those toy cars, and let’s get washing! I can’t wait to hear how your own car wash adventures go—happy crafting!