How to Make a Beaded Plant Hanger: A Personal Guide to Crafting Your Own Beautiful Creation
Hello fellow crafters! I’m so excited to share my passion for crafting with you today. As someone who has spent countless hours creating home decor that effortlessly combines beauty and functionality, I can't help but feel a thrill every time I make a beaded plant hanger. They are not just stylish; they’re a great way to showcase your favorite greenery, add a splash of color to your walls, and bring an inviting atmosphere to your home. Whether you’re looking to add some charm to your living space or you’d like to create a handmade gift for a loved one, a beaded plant hanger is the perfect project.
Why Beaded Plant Hangers Are Popular
The trend of beaded plant hangers has surged in recent years, largely due to the rise in popularity of indoor plants and the evergreen love for bohemian-inspired decor. Not only do these hangers add a striking visual element, but they also enable plants to flourish by allowing optimal sunlight exposure. Plus, they’re incredibly versatile and can complement a rustic farmhouse, a chic urban apartment, or a cozy cottage.
Today, I’ll be walking you through the steps of making your very own beaded plant hanger, along with my personal tips and insights gathered from years of crafting. I encourage you to roll up your sleeves and let your creativity shine!
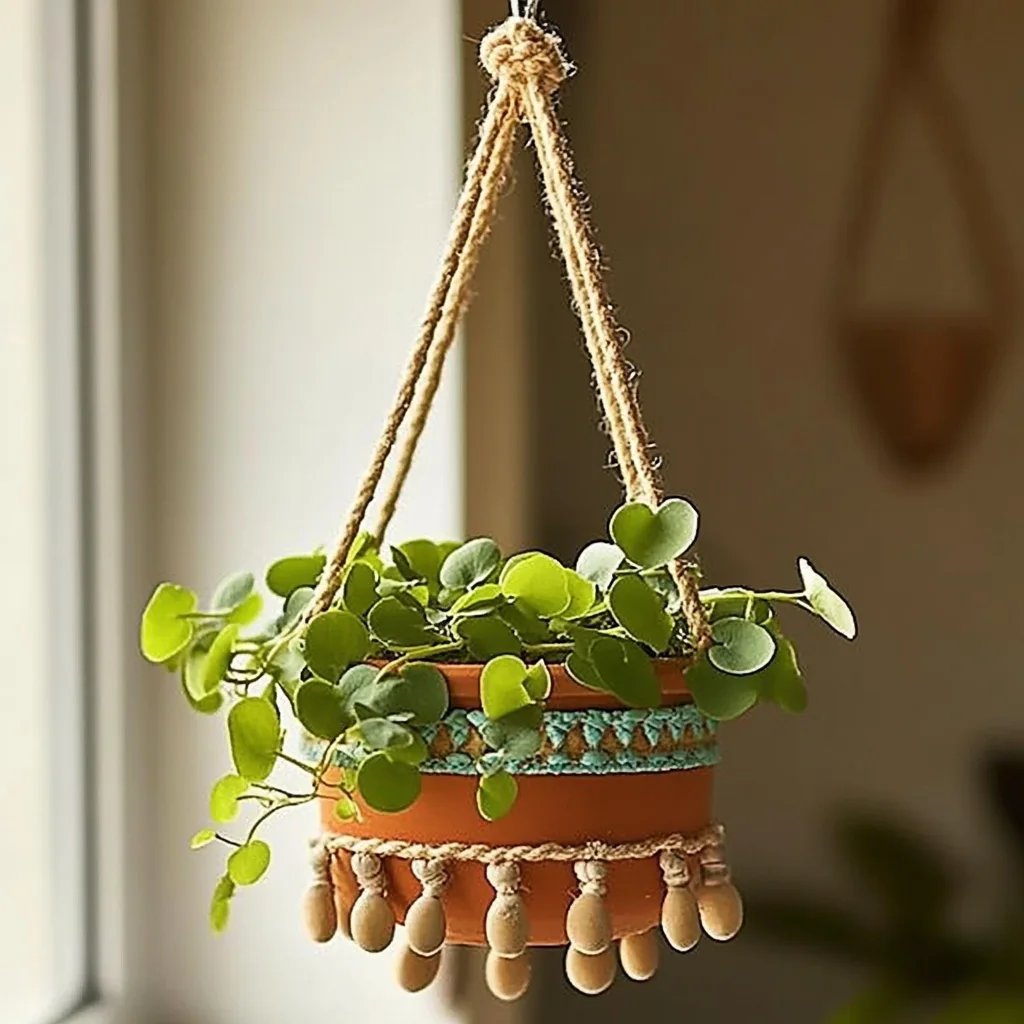
Materials You’ll Need
Before we dive into the step-by-step process, let’s ensure we have all the necessary materials. Here’s what you’ll need:
- Cotton macrame cord or jute twine (about 50 feet)
- Wooden beads (the number depends on your style and design—approximately 15-20 beads)
- Scissors
- Tape or a clipboard (to secure your work while you knot)
- A small pot with a plant (to ensure you get the sizing right)
- Measuring tape (to cut the cord to appropriate lengths)
- Optional: Paint or stain (to customize the beads)
Step-by-Step Tutorial: Making Your Beaded Plant Hanger
Step 1: Measure and Cut the Cord
Start by measuring the desired length for your plant hanger. A typical length is around 36 to 48 inches, but feel free to adjust based on where you want to hang it. Remember, the cords will hang down from the length you choose, so aim for a height that keeps your plant in a nice spot—don’t forget the plant pot’s height!
Tip: Cut 8 lengths of cord at your selected length. This gives enough support to heftier pots while maintaining a delicate look.
Step 2: Prepare your Cords
Once you have your cords cut, it’s time to gather them together. You’ll want to tie a secure knot at the top. Gather all the cords, fold them in half, and create a loop knot about 4 inches from the top.
What could go wrong: If the knot is too loose, the entire structure will wobble when you hang it. Make sure to pull tight on the knot and secure it well—this is the foundation of your hanger.
Step 3: Adding the Beads
Now comes the fun part: adding your beads! Thread about two to three beads onto each of the groups of four strings. The purposes of the beads are twofold: they add visual interest, and they also help spread the tension among the cords when the hanger is holding the pot.
Alternative Method: If you want a more minimalist look, you can use fewer beads or even skip them altogether.
Step 4: Create the Knotting Pattern
Once your beads are strung, it’s time to secure your plant pot. I recommend using a simple knotting method, such as a square knot or the spiral knot. The square knot is my go-to because it’s one of the easiest to work with and remains secure.
- Divide the strings into pairs (four pairs).
- Take the first two cords (the outer ones) and cross the right one over the left cord.
- Then, tuck the left cord behind and pull it through the loop created by crossing the first cords. Pull tight.
- Repeat with the other two pairs of cords and continue the pattern, leaving some space at the bottom to create a basket for the pot.
Personal Anecdote: When I first started making these, I didn't pay attention to how tight I was pulling the knots. The second time I followed through with precision, and the difference was night and day—they were solid and beautifully secure!
Step 5: Make the Basket
Once you’ve reached your desired level down, it’s time to form the basket that will cradle the pot. Divide the cords again and tie several knots together (about 2-3 inches apart) to create a strong support system. Adjust the size of the basket based on your plant pot’s width.
Step 6: Final Touches
At this stage, the structural part of your beaded plant hanger is complete! To finish, simply trim any excess cord for a tidy look. You can also use paint or stain to customize your beads if you wish—perhaps matching them to the decor of the room where your plant will reside.
Safety Warning: When using scissors, be careful to avoid injuries. Keep your fingers behind the cutting line, and always cut away from yourself.
Step 7: Hanging Your Creation
Hang your plant hanger in a bright spot, ensuring it’s secure. I often check mine after a week to make sure the knots remain tight. If you're hanging it outdoors, choose a sheltered location to protect your plants from harsh weather.
Creative Variations
- Different Knot Styles: Explore the world of macrame! Once you’re comfortable, try more complex knotting techniques like the lark's head or hitch knots.
- Mix Beads: Combine wooden beads with glass or ceramic beads for added visual appeal.
- Change Colors: Opt for dyed cords or beads to match your current home decor—let your creativity run wild!
Final Thoughts
I hope this guide inspires you to create your own beautiful beaded plant hanger. Remember, crafting should be a joyful and exploratory experience! Don't be disheartened if things don’t turn out perfectly at first; each project is a learning opportunity. If you have any questions or need advice, feel free to reach out. Happy crafting, and enjoy the journey of creating something meaningful for your space! Your plants will love their new home! 🌿