How to Create Your Own Vibrant DIY Dyed Salt Tray: A Step-by-Step Guide
Hello, fellow crafters! Today, I'm thrilled to share one of my favorite projects with you: creating a DIY Dyed Salt Tray. This charming little tray is a colorful, sensory-rich addition for any home or classroom, making it perfect for both artistic endeavors and educational activities. Whether you're using it for your child's playtime, as part of a calming mindfulness practice, or simply to bring a splash of color into your décor, this project is sure to inspire creativity and engagement.
Why Dyed Salt Trays are So Popular
The dyed salt tray has gained significant popularity among educators, parents, and artists alike. It's a versatile tool that serves multiple purposes—creating art, practicing letters and numbers, or even acting as a decorative piece in your home.
The tactile nature of salt engages both children and adults, making it a fantastic medium for exploration. Plus, the vibrant colors we can create make this project visually appealing. The best part? This is an incredibly budget-friendly craft, allowing you to customize it with colors and themes that resonate with you or your little ones.
Materials You'll Need:
Gathering your supplies will start your creative juices flowing! Here’s what you will need:
- Coarse salt or Epsom salt (2 cups): Coarse salt provides a great texture for writing or drawing.
- Food coloring or liquid watercolors: These are key for achieving vibrant colors in the salt.
- Baking tray or cookie sheets: To dry out the dyed salt.
- Plastic bags or containers: For mixing and storing the colored salt.
- Parchment paper or wax paper: To line your trays for easy cleanup.
- Spoon or spatula: For mixing.
- Airtight container: For storage once your salt has dried.
Optional:
- Essential oils: For added aroma that can enhance the sensory aspect (think lavender for calm).
- Stencils or letter guides: If you're using the tray for educational play.
Now that we have our materials, let’s dive into the creative process!
Step-by-Step Tutorial: Crafting Your Dyed Salt Tray
Step 1: Color Your Salt
Why This Step Matters: Coloring the salt is the heart of your project—it transforms ordinary salt into an artistic medium.
- Pour Salt: In a plastic bag or container, combine about 2 cups of coarse salt. Feel free to use more if you want to create multiple colors!
- Add Color: Add about 10-20 drops of food coloring or a couple of teaspoons of liquid watercolor to the salt.
- Seal the Bag: If using a plastic bag, seal it tightly, ensuring there’s no excess air.
- Shake and Mix: Shake gently, knead, or stir until the salt is evenly colored. If you find that some areas are darker than others, don’t worry. Just add more color to your bag, seal it again, and mix until uniform.
Tip: If the color isn’t as vibrant as you’d like, add more dye gradually. Be cautious, however; too much can lead to overly saturated salt, which takes longer to dry.
Step 2: Spread and Dry the Salt
Why This Step Matters: Proper drying is crucial in preventing clumping and ensuring your colors shine brightly.
- Preheat Your Oven: Set your oven to a low temperature (around 200°F/93°C).
- Line Your Baking Tray: Place parchment paper or wax paper on your baking tray to avoid sticking.
- Spread Salt: Evenly distribute your colored salt on the tray; about half an inch deep is ideal.
- Bake the Salt: Place the tray in the oven for about 10-15 minutes. Keep an eye on it; you want it to dry, not cook! Stir halfway to ensure even drying.
Potential Pitfall: If you accidentally forget the salt in the oven and it begins to brown, you may lose some vibrancy. Don’t worry to much – this can be turned into a creative opportunity! Consider using it ‘as is’ for unique, rustic decor.
Step 3: Cool and Store
Why This Step Matters: Cooling is essential to keep the texture perfect for your applications.
- Remove from Oven: After the salt is dry, take it out of the oven and let it cool to room temperature.
- Store Away: Once completely cool, transfer the dyed salt into an airtight container. If you’re not using it right away, keep it sealed to prevent moisture from sneaking in.
Personal Anecdote: I always make a batch of several colors at once. It’s a great way to have options for seasonal themes—think pastels for spring or deeper tones for fall!
Step 4: Assemble Your Tray
Why This Step Matters: Arranging your tray can elevate its appearance and usability.
- Choose a Tray: Select a shallow container or a tray that fits your aesthetic. Wooden trays can add a rustic vibe, while clear plastic may give a more modern look.
- Add Salt: Pour the colored salt into the tray, arranging it as you like. An even layer works best for writing or drawing.
- Create Dividers (Optional): If you want to keep your colors separate, consider using small dividers (like pieces of cardboard) within the tray.
Step 5: Enjoy and Create!
Now that your tray is set up, it’s time to enjoy your creation! Use it for:
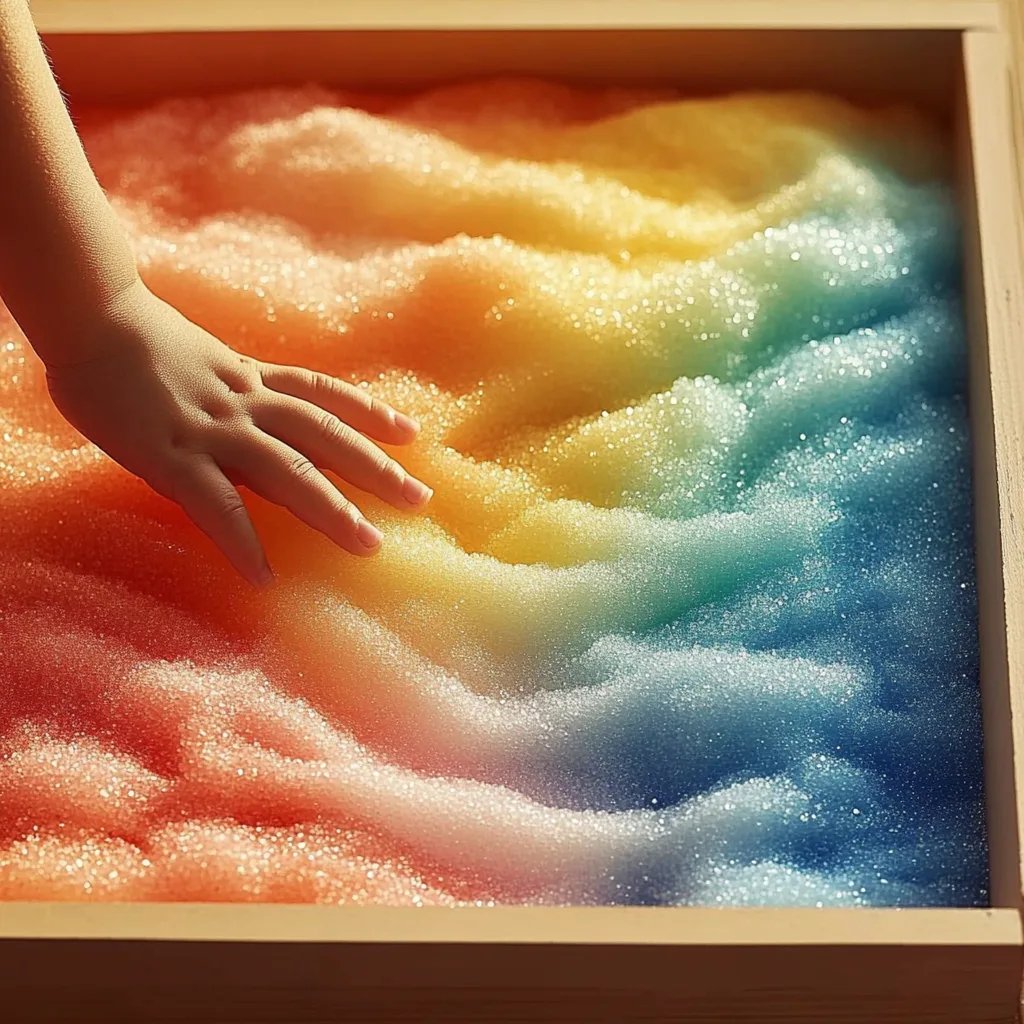
- Sensory Play: Children love running their fingers through the salt, which is calming and fun.
- Writing and Drawing: Practice letters or doodle designs—just use your fingers or a stick.
- Decorative Display: Add small figurines, shells, or seasonal decorations atop the salt for a whimsical touch.
Tips and Creative Variations
- Experiment with Textures: Consider adding glitter or sand to the salt for extra interest.
- Color Mixing: After drying, you can mix different colors of salt for beautiful gradients.
- Temporal Changes: Create themed trays for different seasons or holidays—red and green for Christmas, oranges, and browns for autumn, etc.
- Use Essential Oils: As mentioned, a few drops mixed in with the salt can create a lovely scent experience that enhances the sensory aspect.
Safety Warnings
While this project is quite safe, I want to remind you to be cautious:
- Supervise Children: Especially when they are using small tools or baking ingredients.
- Food Safety: If you plan to use the salt in any food-related contexts later, make sure to keep your trays separate!
Final Thoughts
Creating a DIY Dyed Salt Tray is not just a fun project; it's a delightful way to bring color, creativity, and sensory experiences into daily life. After many crafty afternoons spent with my kids, I can tell you, it has become a beloved staple in our home. So gather your materials, roll up your sleeves, and let your creativity soar. I can’t wait to hear about your projects; leave a comment about your creations or any questions you may have below! Happy crafting!