How to Create Stunning CD Suncatcher Crafts: A Step-by-Step Guide
Hello fellow crafters! Today, I’m thrilled to share one of my favorite DIY projects: crafting beautiful CD suncatchers. If you’re looking to brighten up your home or garden with an easy and delightful craft that captures sunlight in a stunning range of colors, you’ve come to the right place. Not only is this project fun, but it’s also an eco-friendly way to repurpose those old CDs that might otherwise end up in the trash.
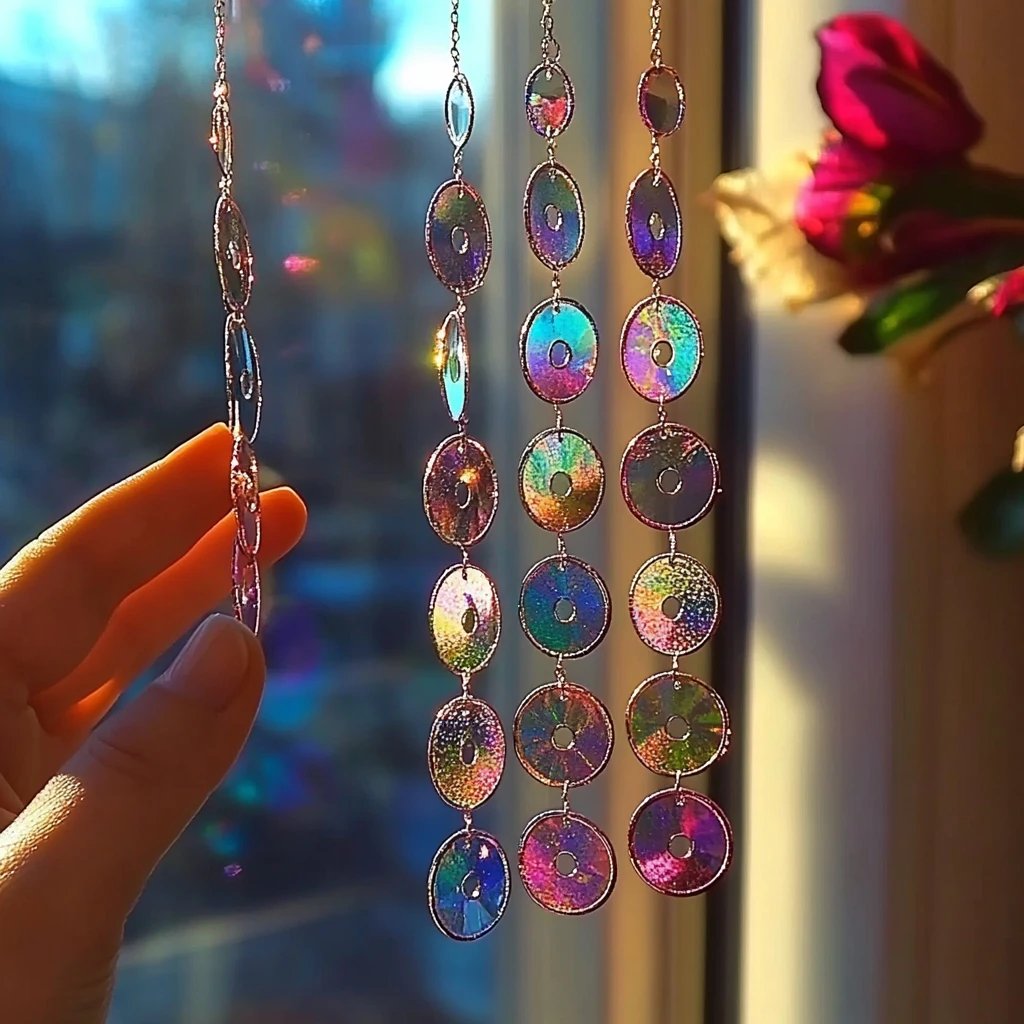
What is a CD Suncatcher?
A CD suncatcher is a decorative item made from old CDs that are transformed into eye-catching, colorful pieces of art. When sunlight hits the surface of the polished, reflective side of the CD, it creates a dazzling display of colors that dance and shimmer across your walls and floors. These suncatchers are perfect for hanging in windows, on porches, or among garden flowers, and they make charming gifts for family and friends.
Why CD Suncatchers are Popular
CD suncatchers combine creativity, sustainability, and a little bit of science—what's not to love? They are particularly popular during the spring and summer months when sunlight is abundant, but I find they add a cheerful touch to my home year-round. Plus, this craft is perfect for adults and kids alike, making it a fantastic activity for family bonding or crafting parties.
Gathering Your Materials
Before diving into the crafting process, let’s gather the necessary materials. Most of these items can be easily found at home or at your local craft store:
Materials Needed:
- Old CDs or DVDs: The shiny surface and compact size make them perfect for this project.
- Acrylic Paints: Choose vibrant colors to create a beautiful spectrum. Metallics can add extra shimmer!
- Paintbrushes: A selection of sizes will help you with details.
- Black marker or permanent sharpie: For outlines or personalization.
- String or wire: To hang your suncatcher.
- Scissors: For cutting string or any other materials.
- Hot glue gun: This will be essential when securing embellishments.
- Embellishments (optional): Think beads, glitter, or sequins for added charm.
- Sealant spray (optional): To protect your artwork.
Step-by-Step Tutorial to Create Your CD Suncatcher
Step 1: Prepare Your CD
Start with a clean surface. Remove any labels or stickers from the CDs, and wipe them down with a soft cloth to make sure they’re free of dust and dirt. This is crucial because a clean surface ensures better adhesion of the paint and clearer colors.
Step 2: Painting the CD
Why This Matters:
Painting the non-reflective side of the CD allows for vibrant colors to come through while creating a masterpiece that reflects your personality.
- Choose your colors! Start with a base layer of the dominant color you want to showcase on your CD.
- Using your paintbrush, apply acrylic paint to the surface in whatever design inspires you. Swirling patterns or dots can offer a playful effect.
- Allow the first coat to dry completely before adding additional colors or layers. A good drying time ensures the designs won’t smudge and will adhere better.
Common Pitfalls:
If the paint starts to bubble or peel, it means it wasn’t applied evenly or the surface wasn’t cleaned properly. Don’t fret! Simply sand the area lightly and repaint.
Step 3: Adding Details
Once your base layer is dry, use smaller brushes or markers to add details. Think of leaves, flowers, or abstract designs! This is where you can add personal flair.
Fixing Potential Mistakes:
If you accidentally make a mark you don’t like, you can paint over it with your base color once it dries. This is part of the creative process—embrace it!
Step 4: Sealing the Design
To protect your artwork and keep it vibrant, you may want to apply a sealant. This step is optional but recommended if your suncatcher will be exposed to outdoor conditions.
- Hold the sealant can about 6-12 inches away and spray lightly over the entire surface.
- Allow it to dry completely, as per the product instructions.
Step 5: Attaching the Hanging Loop
Once your CD is sealed and dry, it’s time to create a way to hang your suncatcher!
- Cut a length of string or wire and tie it securely to the top center of the CD.
- If using wire, you can create a loop or spiral it around itself to secure it.
- Hot glue embellishments like beads or glitter around the string alignment for added decor.
Step 6: Displaying Your Masterpiece
Now for the moment of joy! Find the perfect spot to hang your suncatcher. Windows that receive direct sunlight work best, especially during midday when the sun is most vibrant.
Personal Tips and Alternatives
- Themes: Consider creating a seasonal theme. For example, use pastel colors for spring, bright hues for summer, and warm tones for fall.
- Alternatives to Paint: You can also use colored tissue paper or wash (thin) acrylic paint if you prefer a translucent look.
- Protective Coating: For outdoor suncatchers, a UV-resistant sealant can help maintain the colors against fading.
Safety Warnings
- Hot Glue: Ensure that children are supervised while using the hot glue gun. The glue can get very hot!
- Ventilation: When using spray sealants or acrylic paints, work in a well-ventilated area to avoid inhaling fumes.
- Materials Reuse: Repurposing CDs is great, but ensure you’re handling them carefully, as broken edges can be sharp.
Conclusion
And there you have it! Your very own CD suncatcher, radiating color and positivity while making use of materials you already have at home. This simple yet satisfying craft provides a wonderful outlet for creativity, and I hope it inspires you to explore more DIY projects in your home.
Feel free to share your own versions and adaptations of this craft! The joy of crafting is best when shared with others, and I can’t wait to see what you create. Happy crafting!