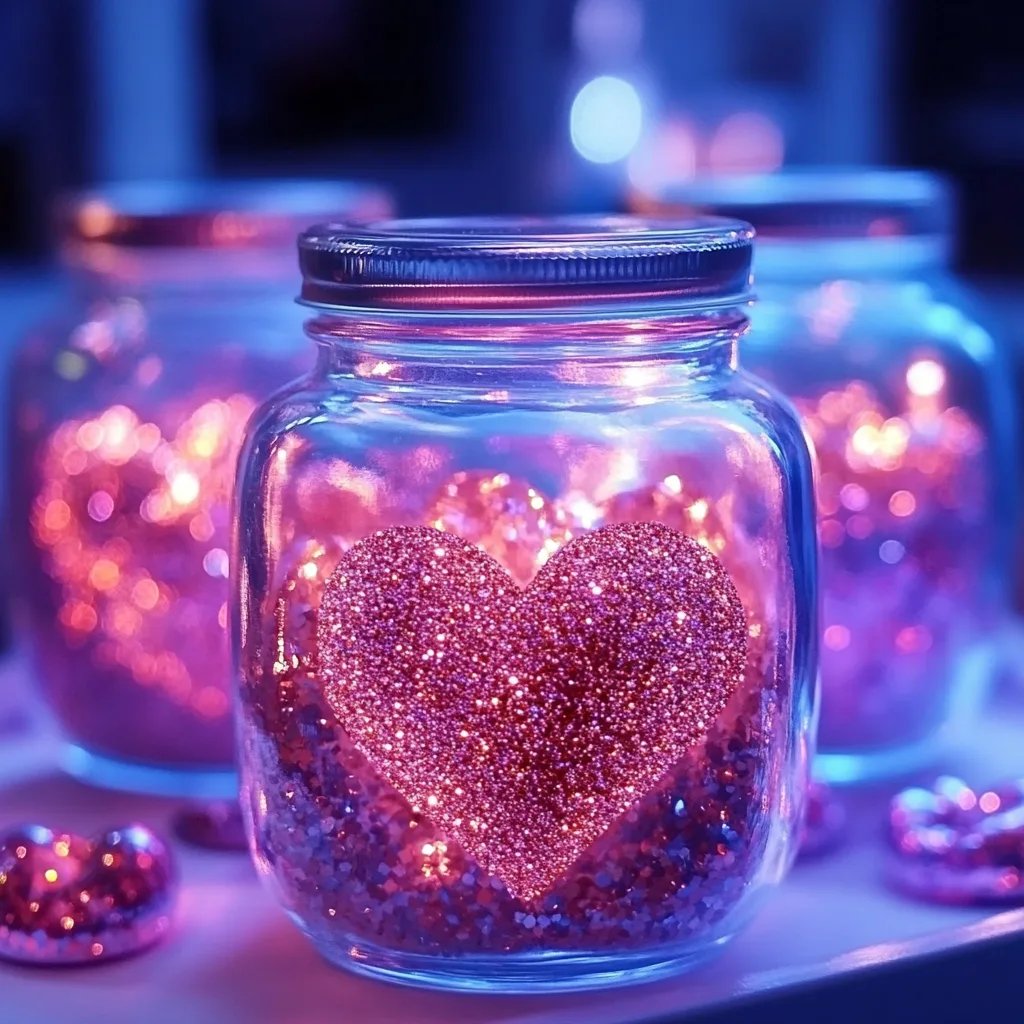
Heart Glitter Jars: An Amazing Ultimate Guide to Crafting 5 Delightful Jars
Heart Glitter Jars are a creative and fun project for individuals of all ages. These sparkling jars are not just visually stunning; they also serve a great purpose. Whether you're looking to create unique home decor, gifts for loved ones, or engaging activities for kids, Heart Glitter Jars are the answer. They combine simple materials with a sprinkle of imagination, allowing you to express your creativity in an incredible way.
Starting this crafting journey can quickly become an exciting adventure filled with color and joy. As you gather your materials and see the glimmer of glitter against the backdrop of heart shapes, anticipation builds. This project offers more than just eye-catching appeal; it also provides mindfulness and relaxation. As you engage in the crafting process, you're not just making a jar; you're crafting a moment of joy and tranquility for yourself or someone special.
In this ultimate guide, we’ll explore why Heart Glitter Jars have captured so many hearts, the preparation needed for this project, and the marvelous steps to create your own. Get ready to dive into a world where creativity glitters and love shines through!
Why You’ll Love This Recipe
Heart Glitter Jars are not just crafting projects; they’re a blend of art, emotion, and tranquility. Here are several reasons why this project will enchant you:
- Visual Appeal – The shimmering glitter and colorful hearts create breathtaking designs that are hard to resist.
- Therapeutic Process – Crafting is known to reduce stress and increase mindfulness, leading to a more peaceful state of mind.
- Versatile Uses – Whether for home decor, gifts, or as a sensory tool for children, Heart Glitter Jars are incredibly versatile.
- Complete Customization – You can express yourself by choosing colors, sizes, and materials that resonate with your personal style.
- Simple Materials – Most supplies can be found around the house or easily sourced, making this project budget-friendly.
- Perfect for All Ages – This is an inclusive project that you can enjoy with family members, friends, or even solo.
With these remarkable advantages, Heart Glitter Jars are an irresistible crafting choice that promises fun, relaxation, and beauty.
Preparation and Cooking Time
Though creating Heart Glitter Jars doesn’t involve cooking, it does take a bit of preparation to ensure the process goes smoothly. Here’s a breakdown of what to expect:
- Preparation Time: 15 minutes (for gathering materials)
- Crafting Time: 30-45 minutes (to create the jars)
- Drying Time: Varies based on glue used (approximately 24 hours for best results)
By planning ahead and setting aside some uninterrupted time, you can ensure a more enjoyable crafting experience.
Ingredients
- Glass jars or containers with lids (size of your choice)
- Glitter in assorted colors
- Heart-shaped confetti or foam hearts
- Mod Podge or white school glue
- Water
- Small decorations (optional, such as beads or sequins)
- A mixing bowl
- A stir stick or spoon
- A funnel (optional but helpful)
Step-by-Step Instructions
Creating your Heart Glitter Jars is a straightforward process. Follow these steps to craft your beautiful jars:
- Prepare Your Workspace: Lay down some newspaper or a protective cloth to catch any stray glitter or glue.
- Select Your Jars: Choose glass jars or containers you wish to decorate. Clean and dry them thoroughly before use.
- Mix Glue and Water: In a mixing bowl, combine equal parts Mod Podge or white school glue with water. Stir until well blended.
- Add Glitter and Hearts: Gradually add your chosen glitter into the glue mixture, stirring until it reaches the desired sparkle. Follow this by adding heart confetti or foam hearts to the mix.
- Fill the Jars: Carefully use a funnel if needed, and pour the glitter mixture into the jars. You can fill them halfway or all the way, depending on your design preference.
- Seal the Jars: If using lids, secure them tightly. If not, skip this step for open jars.
- Let it Dry: Place the jars upright in a safe space and allow them to dry. Ideally, let them sit for at least 24 hours for the best results.
- Decorate the Outside: Once dry, consider adding extra embellishments like ribbons, labels, or stickers to personalize your jars.
- Enjoy Your Creations: Your Heart Glitter Jars are now ready to shine! Use them as decor, gifts, or even to practice mindfulness by shaking them and watching the glitter swirl.
How to Serve
When it comes to showcasing your Heart Glitter Jars, consider these ideas:
- Display: Arrange the jars on a decorative shelf or table. Grouping multiple jars together enhances their visual impact.
- Gift Presentation: Place jars in gift bags or boxes with a heartfelt note. They make thoughtful presents for birthdays, anniversaries, or "just because" moments.
- Thematic Decor: Use jars as decorations for events such as weddings, baby showers, or holiday gatherings. The shimmering lights add charm to any occasion.
- Sensory Experience: For children, these jars can be used as calming sensory tools. Encourage them to shake the jars and watch the glitter settle as a mindfulness activity.
Incorporating Heart Glitter Jars into your life not only beautifies your space but also promotes creativity, relaxation, and thoughtful gift-giving. Enjoy every step of this delightful crafting journey!
Additional Tips
- Experiment with Glitter: Use different types of glitter, such as fine or chunky glitter, to achieve unique textures and visual effects in your Heart Glitter Jars.
- Color Coordination: Consider using color themes for different seasons or occasions, like red and pink for Valentine’s Day or pastel colors for spring.
- Use Alternative Fillings: In addition to glitter and hearts, try adding other small items like dried flowers or decorative pebbles for an interesting twist.
- Waterproofing: If you want to display your Heart Glitter Jars outdoors, ensure you use waterproof glue or sealant to protect your creations from the elements.
- Gift Giving: Personalize your jars with handwritten notes or inspirational quotes that resonate with the recipient.
Recipe Variation
Feel free to make your Heart Glitter Jars uniquely yours! Here are some creative variations to explore:
- Theme-based Jars: Create jars that embody themes such as ocean, galaxy, or holiday spirit using corresponding colors and shapes.
- Scented Options: Add a few drops of essential oils to your glue mixture for a delightful scent experience when you shake the jars.
- Layered Effect: Instead of mixing everything, create layers of glitter and hearts by pouring different colors of glitter one at a time. This will give a beautiful striped effect inside the jar.
- Textured Add-ins: Add sand, rice, or small beads to provide a fun sensory experience, especially for children.
Freezing and Storage
- Storage: Heart Glitter Jars are best stored in a cool, dry place. Keep them away from direct sunlight to prevent colors from fading.
- Freezing: While it’s not necessary, you can place your jars in a cool area if you want to keep them safe from dust or accidental spills. Ensure that the lids are tightly secured to avoid any leaks from the glue mixture.
Special Equipment
To create stunning Heart Glitter Jars, you won’t need much specialized equipment. However, here are a few helpful items:
- Mixing Bowl: For preparing your glue mixture.
- Stirring Utensil: A spoon or stick works perfectly for blending your ingredients.
- Funnel: This optional tool can simplify pouring your glitter mixture into the jars without making a mess.
- Protective Cloth: Cover your workspace with newspapers or old fabric to catch any spills.
Frequently Asked Questions
How long do the Heart Glitter Jars last?
If stored properly, your Heart Glitter Jars can last for several months. The contents are secured, and the colors remain vibrant if kept out of sunlight.
Can I use plastic containers instead of glass jars?
Yes, plastic containers work just as well. Just ensure they are clear to showcase the dazzling glitter effect.
Is this a safe activity for younger children?
Yes, this activity is safe for children. However, adult supervision is recommended due to the use of small items and glue.
What if I accidentally spill the mixture?
If you spill the mixture, clean it up immediately to avoid it drying on your surfaces. Use warm, soapy water for easy cleanup.
Can I re-use the jars after they dry?
Yes, if you wish to change the design or use the jars for something else, you can wash them out and start over.
Conclusion
Creating Heart Glitter Jars is not only a fun and creative activity but also a meaningful way to express emotions and enhance your living space. These jars can brighten any room or make thoughtful gifts for loved ones. By diving into the world of crafting, you engage in a rewarding experience that produces stunning visual art pieces, fantastic sensory tools, and cherished tokens. Enjoy every moment of crafting these delightful jars, and let your imagination shine as brightly as the glitter within!