Fire & Rain: Crafting the Rainbow in a Jar
Hello, fellow crafters! I'm excited to share with you one of my favorite and most visually stunning DIY projects: the Rainbow in a Jar, also affectionately known as Fire & Rain. This colorful craft is not only an eye-catching decorative piece but also a fun science experiment that demonstrates the principles of density and color mixing. Whether you're looking to channel your inner artist for a home décor piece, an educational project with children, or simply a way to relax and unleash your creativity, this project is for you!
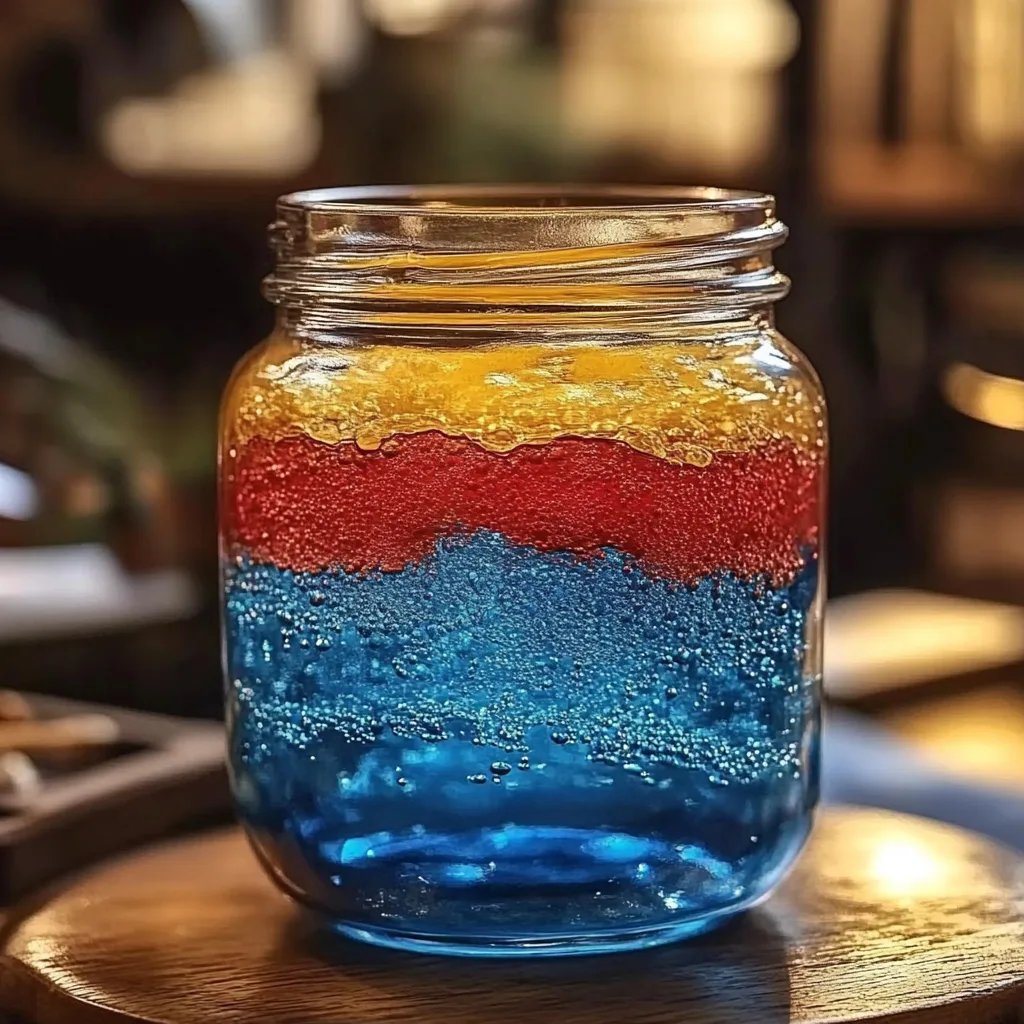
What Is Fire & Rain Rainbow In A Jar?
The Rainbow in a Jar is essentially a layered liquid display that resembles a rainbow trapped in a jar—complete with vibrant colors and a mesmerizing aesthetic. It's popular among crafters of all ages because it’s simple, requires easily accessible materials, and can be customized in countless ways. I often create these jars for birthday gifts, party favors, or just to brighten up my home. The process of assembling the colored layers can be meditative, and the end result is always a conversation starter.
When Can You Use It?
This craft is perfect for any occasion! I often use it for home décor, as a centerpiece for celebrations, or even as a calming visual for my workspace. Kids love it as a science project, too. It can easily sprinkle some color into birthdays, holidays, or even just as a weekend activity with friends or family. The best part? Once you make one, you’ll probably want to create more!
Materials You'll Need
Before we dive in, let's gather our supplies. Here's a comprehensive list of what you'll need to create your own Fire & Rain Rainbow in a Jar:
- Empty glass jar (clear mason jars work great!)
- Water
- Food coloring (red, orange, yellow, green, blue, indigo, violet—choose your favorites!)
- Sugar (granulated sugar works best)
- Small containers or cups (for mixing colors)
- Spoon (for stirring)
- Dropper or pipette (optional, but can help with layering)
- Patience and a dash of creativity!
Step-by-Step Tutorial
Now that you have your materials ready, let’s get started on making your own Rainbow in a Jar!
Step 1: Prepare Your Sugar Solutions
Why This Matters: Different concentrations of sugar solutions create varying densities, which is key to layering your colors without them blending.
- Create Your Solutions:
- In separate cups, mix equal parts of sugar and water. The idea is to create solutions with varying sugar concentrations. Here’s a simple breakdown you can follow:
- Layer 1: 1 tablespoon of sugar + ¼ cup of water (Red)
- Layer 2: 2 tablespoons of sugar + ¼ cup of water (Orange)
- Layer 3: 3 tablespoons of sugar + ¼ cup of water (Yellow)
- Layer 4: 4 tablespoons of sugar + ¼ cup of water (Green)
- Layer 5: 5 tablespoons of sugar + ¼ cup of water (Blue)
- Layer 6: 6 tablespoons of sugar + ¼ cup of water (Violet)
- Mix Thoroughly: Ensure all sugar is dissolved in each cup, as undissolved sugar can lead to uneven layers. Stir until the solution is clear.
Tip: If you find the solution cloudy, simply keep stirring! If left undissolved, the clarity and layering will be affected.
Step 2: Add Food Coloring
Why This Matters: The addition of food coloring to your sugar solutions gives the visual effect of a rainbow. Each layer should be a different color to create the striking effect of a rainbow.
- Color the Solutions:
- Add several drops of food coloring to each sugar solution:
- Red for the first
- Orange for the second
- Yellow for the third
- Green for the fourth
- Blue for the fifth
- Violet for the sixth
- The more drops you add, the more vibrant the color. Mix well!
Step 3: Assemble the Layers
Why This Matters: The key to a successful Rainbow in a Jar is layering without the colors mixing. This is achieved through careful pouring.
- Layering Technique:
- Start with the darkest color (red) and pour it carefully into the jar.
- To add the next layer, use the back of a spoon to slow the flow of the liquid. Place the spoon's bowl against the inside of the jar and pour the liquid down the spoon gently. This deflects the pour, minimizing turbulence that can mix layers.
- Add Each Layer: Follow this method with the other colors, working from darkest to lightest, until you reach the top of the jar.
What Could Go Wrong: If you accidentally mix layers, don’t despair! You can start over or try to carefully spoon out the mixed layer using a pipette.
Step 4: Admire Your Creation
Once you’ve layered all your colors, step back and enjoy the beauty of your Rainbow in a Jar! Place it in a sunny window or on your desk, and let its vibrant colors brighten your day.
Tips and Tricks for Success
- Use Room Temperature Water: Cold water can lead to a slightly unusual layering effect, as cold solutions are denser than warm solutions.
- Control the Pour: Safety first! If using a dropper, be careful not to squeeze too hard, or you’ll end up with a colorful splash.
- Experiment: Feel free to play around with different color combinations or sugar amounts for unique effects. You can also use various containers to create different designs.
Creative Variations
Once you’ve mastered the classic Rainbow in a Jar, consider trying these fun variations:
- Theme Colors: Create a jar based on sports teams, holidays, or personal favorites by using corresponding colors.
- Glittery Rainbow: Add a bit of glitter to each layer for some sparkle. Just be careful – glitter can get messy!
- Light-Up Version: If you're feeling especially creative, place fairy lights around the jar or underneath it to illuminate your colors for a nighttime glow.
Safety Warnings
Although this project is generally safe, there are still a few things to keep in mind:
- Avoid Ingestion: While food coloring and sugar aren’t harmful in small amounts, this craft shouldn’t be ingested.
- Glass Caution: Always handle glass jars with care to avoid breakage.
Conclusion
I hope you’re as excited about creating your Rainbow in a Jar as I was when I first started crafting this beautiful piece! Whether you’re making it for yourself or as a gift, the joy and satisfaction of creating something colorful and awe-inspiring is unmatched. Remember, crafting is about experimenting and embracing the creative process. Enjoy every step and happy crafting!