DIY Tin Can Lanterns: Illuminate Your Space with an Artistic Touch
As an avid crafter, I find immense joy in transforming everyday items into something beautiful and functional. One of my favorite projects to embark on is creating DIY tin can lanterns. Not only do these lanterns add a warm, inviting glow to any space, but they also tell a story of creativity, resourcefulness, and a touch of rustic charm. Whether for a cozy evening on the patio, an enchanting garden party, or simply to bring a little magic indoors, these lanterns are both a delightful and budget-friendly project that anyone can master.
In this detailed guide, I’m excited to share my expertise with you. From essential materials to troubleshooting common pitfalls, consider this your comprehensive resource to making stunning tin can lanterns that you’ll be proud to showcase.
Why Choose Tin Can Lanterns?
Tin cans are notoriously easy to come by and super inexpensive. They provide an almost blank canvas, ready for you to unleash your creativity. Plus, the soft, flickering light they emit creates a warm, inviting atmosphere—perfect for gatherings or just enjoying a quiet moment with a good book. Tin can lanterns are incredibly versatile as well. You can customize them for different occasions, such as:
- Outdoor summer nights
- Autumnal harvest festivals
- Winter holidays
- Personalized gifts for friends and family
Now, let’s dive into the crafting process!
Materials You’ll Need
Before you begin, ensure you have the following materials on hand:
- Empty tin cans (such as soup or coffee cans)
- A hammer
- A large nail or awl
- A bowl of water and ice (for safety)
- Pliers (optional)
- Paint (optional) for decorating
- Wire or twine for hanging (if desired)
- Tea lights or LED candles (for safety)
- A towel (for drying hands)
Step-by-Step Tutorial
Step 1: Prepare the Cans
Start by removing the labels from your cans and cleaning them thoroughly. I like to soak the cans in warm, soapy water for a bit, then scrub off the adhesive. The next step is crucial: fill each can with water and place it in the freezer overnight.
Why this step matters: Freezing the water inside the can creates a solid block of ice that keeps the can intact while you’re hammering out the design. This prevents bending or unwanted dents that could mar your project.
Step 2: Create Your Design
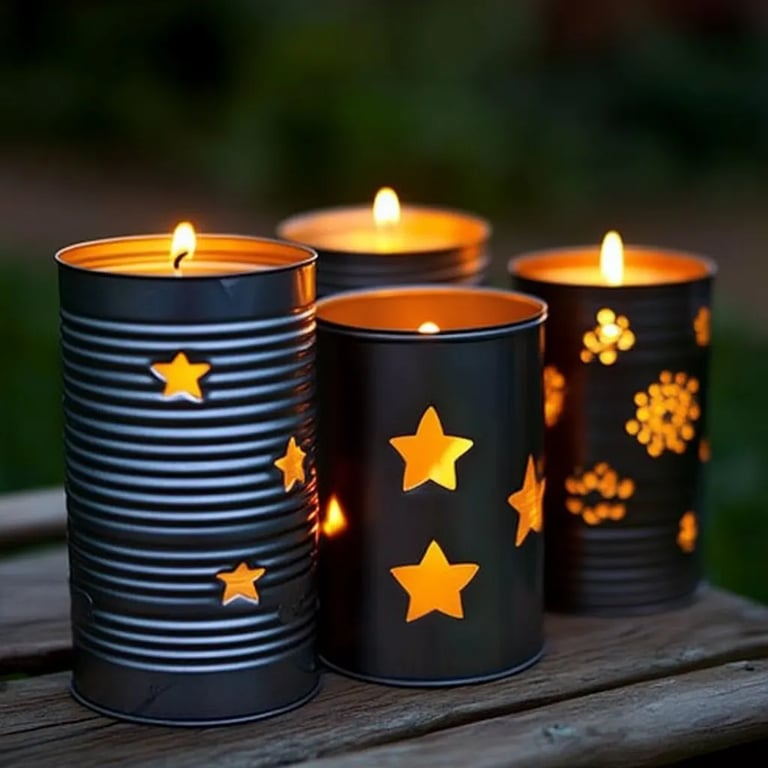
Once your cans are frozen solid, take them out of the freezer and place them on a towel (to absorb any melting water). Using a hammer and a large nail, you can start to punch through the can to create your design. This is where you can get creative!
I usually sketch out a simple pattern on paper beforehand—like stars, hearts, or geometric shapes—but don't hesitate to go freehand. The beauty of this project is in its imperfections.
Common issues and fixes: If the nail slips, it can cause unwanted holes. Aim for the center of the design and hold the nail steady. If you do make extra holes, embrace it! Each lantern will be uniquely its own.
Step 3: Clean Up
Once you've finished punching your design, carefully remove any ice from the can. You can simply run the can under warm water to speed up the process. Dry the inside and outside of the can thoroughly.
Step 4: Add Finishings
At this point, you have a basic lantern! However, to take it to the next level, consider painting the outside with non-toxic acrylic paint. This adds color and personality. You can also use a paintbrush to apply stencils or designs if you're feeling ambitious. Allow it to dry completely.
Helpful tip: If you decide to leave your lantern plain, I highly recommend using a clear sealant spray to protect metal surfaces from rust, especially if they will be used outdoors.
Step 5: Attach a Wire Handle
To hang your lanterns, cut a length of wire (around 18 inches) and punch two small holes on opposite sides near the top. Thread the wire through the holes, twisting it securely to form a handle.
Safety tip: Always search for specific wire types that are suitable for outdoor use to avoid rust over time.
Step 6: Add the Light Source
For the safest option, use LED tea lights rather than real candles. They provide a flickering light effect and will not cause a fire hazard, especially if your lanterns will be left unattended.
Personal Anecdote
I vividly recall the first time I showcased my tin can lanterns at a summer barbecue. As dusk fell and the soft glow illuminated the garden, I was overwhelmed by how beautiful and whimsical they looked! Friends and family marveled at my creation, and I felt proud to share something made from simple cans that now had me beaming with joy.
Creative Variations
Don’t feel limited to traditional designs. Here are some ideas to spark your imagination:
- Colorful gradients: Layer different colors and create a gradient look by mixing shades.
- Seasonal themes: Create Halloween characters or Christmas shapes for the holiday season.
- Personalized gifts: For a handmade gift, consider adding a meaningful quote or the recipient’s name.
Final Notes and Safety Warnings
Throughout your crafting journey, always prioritize safety. Work in a well-ventilated space, and keep your tools organized to avoid any accidents. Also, if crafting with younger children, try to make it a supervised activity, especially when using tools.
DIY tin can lanterns can unleash your creativity while showcasing your crafting skills. Choose your designs, let your personality shine, and enjoy the process. I'm excited for you to create your own lanterns that illuminate your gatherings with warmth and charm. Happy crafting!