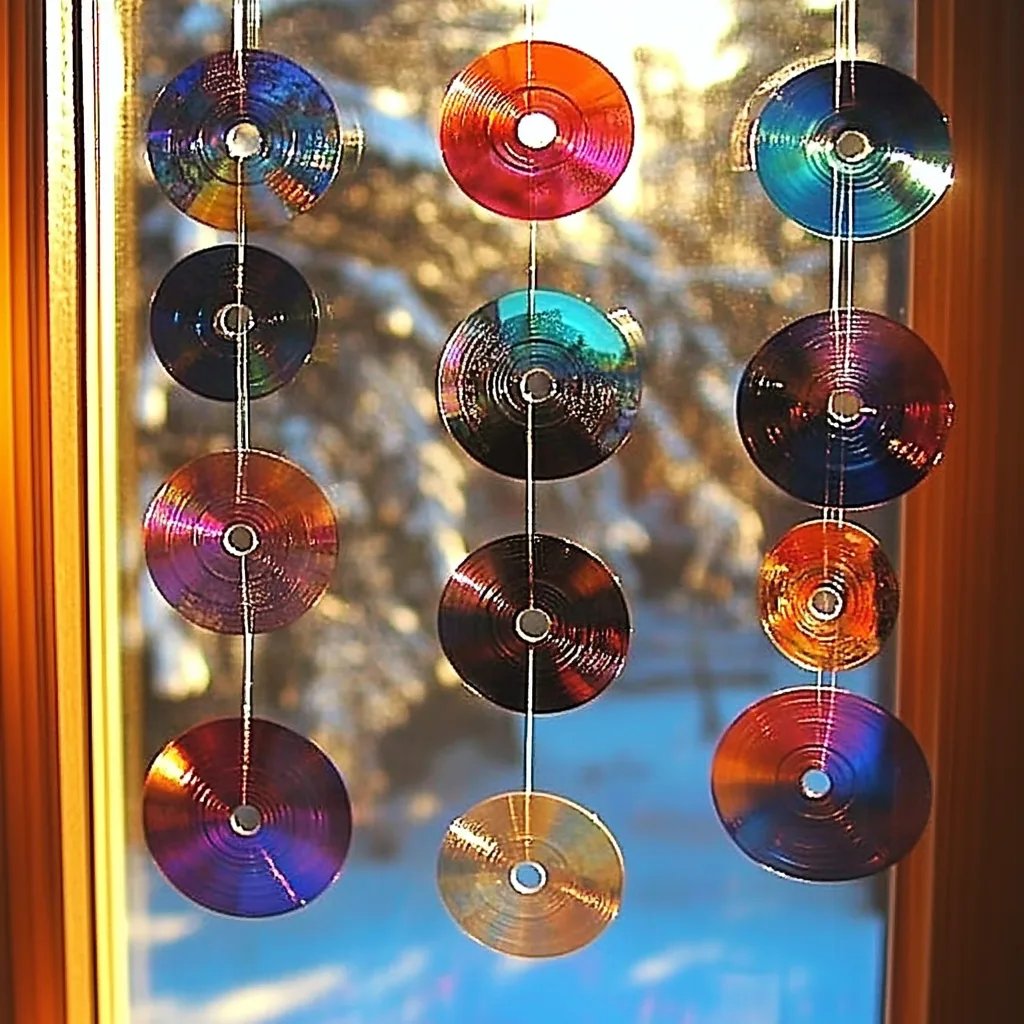
DIY Suncatchers from Old CDs: A Fun and Colorful Crafting Experience
Hello, fellow crafters! Today, I want to share with you one of my favorite DIY projects that’s perfect for brightening up any space—making stunning suncatchers from old CDs. If you're looking for a fun, eco-friendly craft that’s both engaging and visually appealing, you're in the right place.
What is a Suncatcher and Why are They Popular?
A suncatcher, as the name suggests, is a decorative piece designed to capture sunlight, which then illuminates the colorful patterns it creates. These beautiful creations can be hung in windows, gardens, or on porches, adding a touch of whimsical color anywhere you choose. Over the years, suncatchers have gained popularity because they are not only visually striking but also a wonderful way to upcycle materials that might otherwise end up in the trash.
They create a cozy ambiance in your home, especially during sunny days, and they serve as a fantastic art project for all ages. As someone who loves to create, I can tell you that there's nothing quite like the feeling of watching the sunlight refract through your handiwork, creating a dance of colors around the room.
Materials You’ll Need
Before we dive into the step-by-step tutorial, let’s gather our materials. Thankfully, this project doesn’t require a long shopping list:
- Old CDs or DVDs: Gather as many as you want to use. Remember, this is a repurposing project, so don't worry about their previous life!
- Acrylic Paints: Use vibrant colors that you love. Acrylics work great because they dry quickly and adhere well.
- Paintbrushes: Select different sizes depending on the details you want to add.
- Black Marker or Permanent Marker: This will help you create bold outlines if desired.
- Hole Punch: Essential for adding a hanging mechanism.
- Fishing Line or String: Anything strong enough to withstand the weight of your suncatcher.
- Scissors: For cutting threads or strings.
- Craft Glue or Mod Podge (optional): If you want to add extra elements like glitter or additional decorative pieces.
- Glitter, Tissue Paper, or Beads (optional): These can add a unique flair to your suncatcher.
Optional Safety Gear
- Protective eyewear: If you're working with a belt sander to smooth edges or small pieces that may fly off.
- Apron or Old Clothes: You may get paint on your clothes.
Step-by-Step Tutorial
Step 1: Prepare Your Materials
First, gather all your materials in one place. Clearing a workspace will help you stay organized and focused during the crafting process. I like to lay everything out before I start so that I have a clear idea of what I'm working with. Sometimes, when I get into a project, I misplace things and it can throw off my creative flow.
Step 2: Clean the CDs
Old CDs may have dirt or fingerprints on them. Give them a gentle clean with some soap and water. Let them dry completely.
Tip: A microfiber cloth works wonders for this task, as it reduces the risk of scratching the surface.
Step 3: Paint the CDs
Now comes the fun part! Using the acrylic paints, create designs on the shiny side of the CD. You can paint abstract shapes, flowers, or even write words that evoke positive feelings. Don’t be afraid to layer colors or experiment; the beauty of crafting is in the imperfections.
Why This Step Matters: The reflective surface of the CD will enhance the vibrancy of the colors, making the suncatcher catch the light beautifully.
Common Pitfall: If you find the paint is not sticking, ensure that the CD is completely dry, and consider using a primer spray before applying paint.
Step 4: Add Details
Once the base coat is dry, you can add finer details with a black marker or paintbrush. Delicate outlines can enhance the colors and make your designs pop.
Anecdote: I once created a suncatcher with intricate butterfly designs and realized that adding details significantly increased its beauty. So, don’t skimp on this step!
Step 5: Create a Hanging Mechanism
When your painting is complete and fully dry, it’s time to create a small hole at the top of the CD using a hole punch. This will be where you thread your fishing line or string.
Safety Note: Be cautious when using the hole punch. You might want to work on a thick board or mat to protect your table and fingers.
Step 6: Thread the Fishing Line
Cut a piece of fishing line or string to your desired length (a foot or so usually works well). Thread this through the hole you created and tie a knot to secure it.
Step 7: Optional Embellishments
If you're feeling adventurous, sprinkle some glitter or glue on small pieces of tissue paper to create texture. Just be sure they’re secured well with your craft glue or Mod Podge, as the wind can easily whisk away loose items.
Step 8: Display Your Creation!
Hang your suncatcher in a sunny spot, such as a window or tree branch. Sit back, relax, and watch as the sunlight dances through your artwork, filling your space with rainbow colors.
Troubleshooting Tips
- If the paint smudges: Make sure each layer is dry before applying new colors. Acrylic paint dries quickly, so just be patient.
- If it doesn’t hang straight: Adjust your string length or reinforc your knot at the top. Sometimes, a little trim can help it balance better.
Creative Variations
- Theme Suncatchers: Create seasonal or holiday-themed suncatchers. Think pumpkins for autumn, snowflakes for winter, etc.
- Suncatchers with Nature: Incorporate pressed leaves or flowers under a layer of Mod Podge for a more natural touch.
- Mixed Media: Use fabric scraps or buttons to add extra texture and dimension to your design.
Final Thoughts
Crafting a suncatcher from old CDs is not just an art project; it's a creative journey that reminds us of the beauty of repurposing. I cherish watching tiny rainbows dance on my walls, illuminating my space with joy.
As you dive into this DIY project, remember to enjoy the process, let your creativity flow, and don't hesitate to experiment. Each suncatcher will be a unique reflection of YOU.
Happy crafting, and may your home be filled with colorful rays of sunshine!