DIY Rope Coasters: An Amazing Ultimate Guide with 5 Steps
DIY Rope Coasters are an amazing way to add a touch of rustic charm to your home. These charming coasters not only protect your surfaces but also serve as a stylish addition to your décor. Whether you’re sipping coffee, serving drinks, or enjoying a cozy meal, these coasters are perfect for all occasions. The incredible part about making DIY Rope Coasters is that they are easy to create, affordable, and allow for endless customization possibilities.
If you’ve been searching for a fun craft project, then look no further! DIY Rope Coasters have quickly become a popular home craft that many enjoy. The unique textures and colors of the rope bring warmth to any room. You can tailor them to your taste, selecting different rope materials or dyes to match your existing décor. In this guide, we will explore why you’ll love creating these coasters, how to prepare for the project, the necessary materials, and step-by-step instructions to help you achieve stunning results.
Not only will you engage in a fun and rewarding craft, but you'll also end up with beautiful coasters that can be gifted or proudly displayed in your home. Let’s dive into the wonderful world of DIY Rope Coasters and discover why they are a perfect choice for any craft lover!
Why You’ll Love This Project
The DIY Rope Coasters project is special for several reasons:
- Affordable Materials – Rope coasters can be made with inexpensive supplies available at craft stores or online.
- Quick Craft – You can make several coasters in no time, allowing for quick home upgrades or gifts.
- Creative Expression – Customize your coasters with different colors, patterns, or designs to match your personal style.
- Functional and Decorative – Not only do these coasters serve a practical purpose, but they also enhance home aesthetics.
- Perfect for Any Occasion – Whether it's family gatherings or casual meals, these coasters fit seamlessly into all events.
By creating your own DIY Rope Coasters, you will find a sense of achievement and joy in crafting something unique that showcases your personal flair.
Preparation and Time
Before you embark on your DIY journey, it's important to gather your materials and understand the project timeline.
- Preparation Time: 10-15 minutes to gather supplies and prepare your workspace.
- Crafting Time: Approximately 30-60 minutes depending on your pace and experience level.
- Additional Drying Time: If you choose to use glue or decorative finishes, allow for additional drying time.
With this timeframe in mind, you’ll be able to estimate how to fit this enjoyable crafting session into your schedule.
Ingredients
- Natural rope (cotton or jute)
- Scissors
- Hot glue gun and glue sticks
- Crafting mat or surface protector
- Optional: Acrylic paint or dye for customization
Step-by-Step Instructions
Creating your own DIY Rope Coasters is an enjoyable process that can be accomplished by following these simple steps:
- Prepare Your Workspace: Set up a clean, flat surface where you can work without distractions. Lay down a crafting mat to protect the underlying surface.
- Cut Your Rope: Measure and cut several lengths of rope. Each length should be approximately 12-15 inches for a standard-sized coaster. Cut enough pieces for the desired number of coasters.
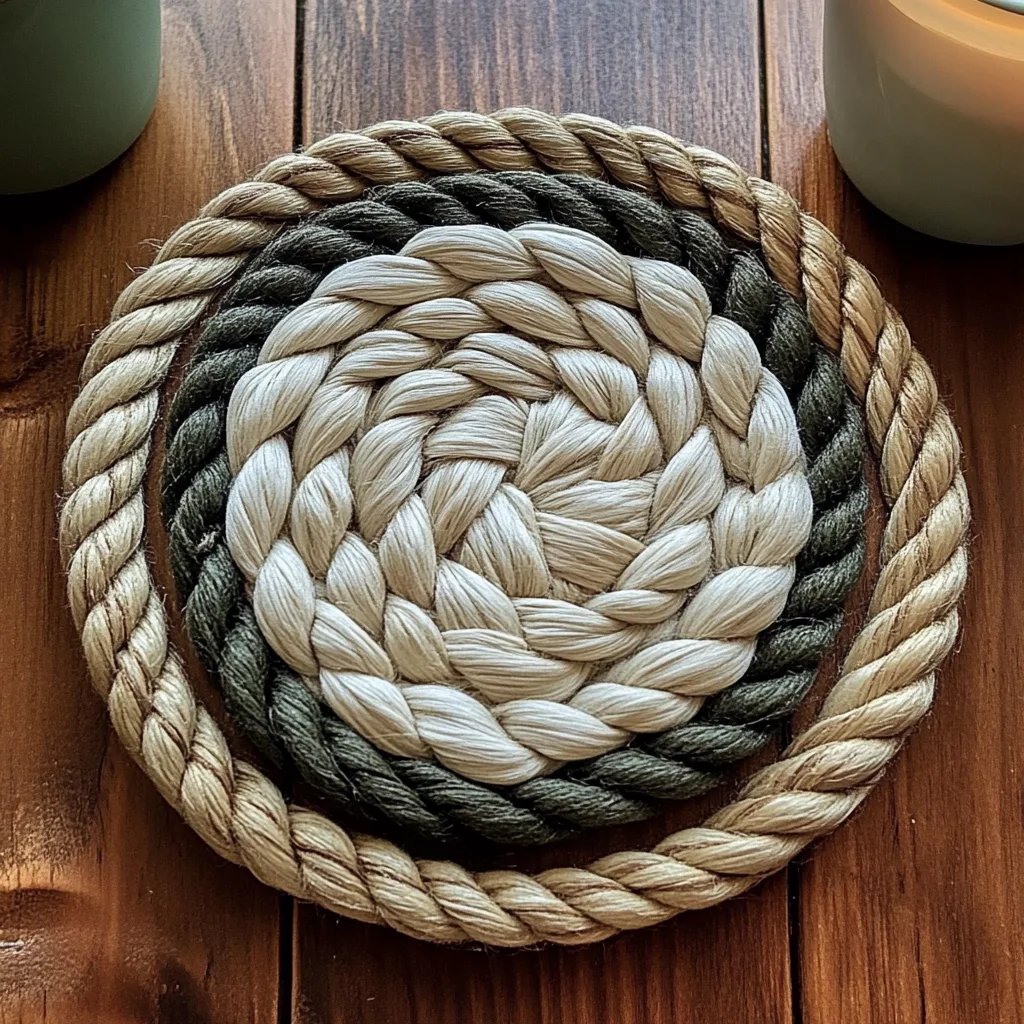
- Shape the Coaster: Take one piece of rope and form a spiral, starting at one end. Make sure to keep it tightly coiled as you progress to achieve a uniform look.
- Glue the Layers: As you coil the rope, use the hot glue gun to secure the layers together. Apply glue generously, ensuring that each part of the spiral is firmly attached.
- Finish and Customize: Continue adding layers of rope until you reach your desired coaster size. Once finished, let it cool and dry. You can then embellish it with paint, beads, or other decorative elements as desired.
By following these steps, you'll have beautiful DIY Rope Coasters ready in no time!
How to Serve
Once your coasters are crafted, it's time to showcase them! Here are some ideas for how to present and use your new DIY Rope Coasters:
- Use as Stylish Decor: Place these coasters on your coffee table or dining table to add a rustic touch to your decor.
- Gifts for Friends: Bundle a set of coasters together and tie them with twine for a personalized gift.
- Serve with Drinks: Use them during gatherings to protect your furniture while serving drinks.
- Thematic Displays: Create thematic sets based on events (e.g., summer BBQs or winter holidays) by varying designs and colors.
- Charity or Craft Fairs: Make a larger batch of coasters for selling at local fairs or donation events.
These methods will not only highlight your handiwork but also impress your guests with your creativity. Enjoy using and displaying your DIY Rope Coasters in your home!
Additional Tips
- Choose the Right Rope: Opt for cotton or jute rope for durability. Both materials provide a natural look and feel that enhances the coasters' rustic charm.
- Experiment with Shapes: While spirals are classic, don’t hesitate to try different designs like squares or hearts for a unique flair.
- Use Color Wisely: If coloring your coasters, consider using shades that evoke warmth and comfort to match your space.
- Practice Patience: Allow glue to fully dry between layers to ensure a sturdy and long-lasting result.
- Protect Your Coasters: Consider sealing your finished coasters with a protective coating to enhance durability and make them water-resistant.
Recipe Variation
There are many ways to customize your DIY Rope Coasters to make them truly unique:
- Colorful Twists: Try using dyed rope for bright, eye-catching coasters that pop.
- Textured Layers: Incorporate fabric strips or textured string into the coasters for added visual interest.
- Theme-Based Designs: Create coasters that reflect seasonal themes, such as earthy tones for autumn or bright colors for spring.
Freezing and Storage
- Storage: Store your completed coasters in a cool, dry place. A decorative box can keep them safe while adding to your home décor.
- Freezing: While not typical for coasters, if you do create water-resistant versions, ensure they are completely dry before sealing them in an airtight container.
Special Equipment
You won’t need much to get started, but having these tools will help:
- Hot glue gun and glue sticks
- Scissors for rope cutting
- Crafting mat or protective surface
- Ruler for measuring correct lengths
- Optional: Paintbrush for applying dye or paint
Frequently Asked Questions
Can I wash my DIY Rope Coasters?
It’s best to wipe them clean with a damp cloth instead of submerging them in water to maintain their integrity.
What types of rope work best for coasters?
Cotton and jute ropes are both durable and aesthetically pleasing, making them great options for coasters.
How can I personalize the coasters?
You can use paint, beading, or even stencils to add personal designs or monograms to your coasters.
How long do these coasters last?
With proper care, DIY Rope Coasters can last several years, especially if sealed or protected from moisture.
Can I create larger coasters for serving platters?
Absolutely! Simply increase the length of the rope and the diameter of your coil to create larger sizes.
Conclusion
DIY Rope Coasters are not just functional items; they are a reflection of personal creativity and style. Engaging in this project allows you to produce beautiful, custom coasters that enrich your living space. Plus, these coasters make excellent gifts for friends and family. Enjoy showcasing your crafting skills while adding a touch of charm to your home!